

What are the most effective ways to prevent roof leaks?
The most effective ways to prevent roof leaks combine proper installation, twice-yearly inspections, and targeted maintenance of the components that fail most often. Here is a quick-reference list of the core methods:
- Install ice and water shield underlayment at all edges, valleys, and penetrations
- Use pre-manufactured flashing at chimneys, vents, and skylights
- Inspect and maintain the roof deck for sagging or moisture damage
- Keep attic ventilation balanced with soffit and ridge vents
- Schedule professional inspections every spring and fall
- Clean gutters at least twice yearly to prevent water backup
- Trim tree branches to maintain 6–10 feet of clearance from the roofline
- Seal all roof penetrations (pipes, vents, skylights) and replace sealants on schedule
- Repair damaged or missing shingles promptly
- Choose roofing materials rated for your climate and slope
The sections below break each method down into what you actually need to do and why it works.
1. Install waterproof barriers and pre-manufactured flashing
Waterproof underlayment and correctly installed flashing are your roof’s first and second lines of defense. Ice and water shield must extend at least 2 feet beyond interior walls at roof edges and in every valley to create a redundant barrier against wind-driven rain and ice dams. Skip that extension and you have a gap exactly where water pressure is highest.
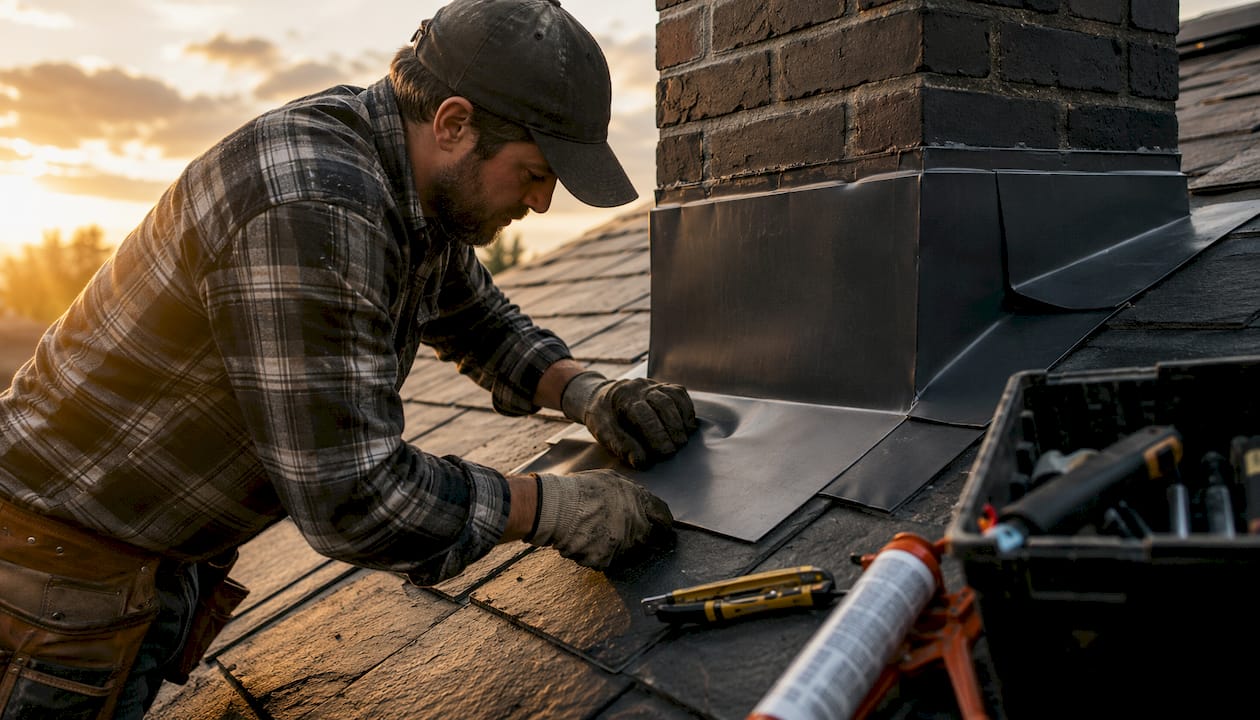
Flashing failure is the leading cause of residential roof leaks. Step flashing, counter flashing, and pipe boot flashing each protect a different transition point where the roof surface meets a vertical element. Pre-manufactured flashing pieces hold their shape and seal better than field-bent sheet metal, especially around chimneys and skylights where angles are irregular.
Sealants around flashings typically last 5–10 years under UV exposure before they crack and allow water in. That timeline means a 15-year-old roof may have had its flashing sealant fail twice already without any visible shingle damage.
- Use step flashing at every wall-to-roof junction, not just caulk
- Apply counter flashing over step flashing at chimneys
- Replace pipe boot collars when the rubber shows cracking or stiffness
- Inspect all sealant lines after any hailstorm or high-wind event
Pro Tip: Check flashing sealant before shingles during any inspection. Sealant degrades faster than shingles and often signals a leak months before the shingle surface shows any wear.
2. Protect the roof deck and choose durable materials
The roof deck is the structural layer everything else sits on. Inspect it from the attic for sagging sections, daylight penetration, moisture staining, or soft spots. Any of those signs means water has already been working its way in, and the surface repair alone will not fix it.
Material selection matters more than most homeowners realize. Asphalt shingles rated for your local wind zone and slope requirements outlast generic alternatives by years. Manufacturer guidelines specify minimum roof slopes for each product; installing a shingle rated for a 4:12 pitch on a 2:12 slope voids the warranty and invites pooling water. For low-slope sections, a dedicated flat roof system with a membrane designed for standing water is the right call.
- Look for shingles with a Class 4 impact rating in hail-prone areas
- Confirm the product’s minimum slope matches your actual roof geometry
- Replace any shingle that is cracked, curling, or missing granules in patches
- Document the installation date and warranty terms for every roofing product
Pro Tip: When replacing a few shingles, bring a sample to the supplier. Color and thickness mismatches between old and new shingles can create small ridges that catch debris and hold moisture.
3. Balance attic ventilation and insulation
Poor attic ventilation causes two separate problems: in summer, trapped heat cooks shingles from below, accelerating granule loss and brittleness; in winter, warm air escaping through an under-insulated deck melts snow unevenly, and that meltwater refreezes at the cold eave line. The result is an ice dam, a frozen ridge that forces water back under shingles. Once an ice dam forms, there is no stopping the leak until the ice melts.
The IRC Section R806 specifies a minimum net free ventilation area of 1:150 of attic floor space. Soffit vents bring cool air in at the bottom; ridge vents exhaust warm air at the top. Block either one and the system fails. Insulation levels in northern climate zones typically run R-49 to R-60 per the 2021 IECC to prevent the heat transfer that triggers ice damming.
- Confirm soffit vents are not blocked by insulation batts pushed too far toward the eaves
- Check that ridge vents run the full length of the peak, not just a short section
- Look for attic ventilation issues like condensation on rafters or mold on sheathing
- Add a vapor barrier if the attic shows chronic moisture in humid climates
Pro Tip: A simple way to check airflow: hold a stick of incense near a soffit vent on a calm day. Smoke drawn inward confirms the ventilation path is working.
4. Stick to a regular inspection, gutter, and tree-trimming schedule
Twice-yearly inspections, in spring and fall, catch the problems that turn into leaks. The fall inspection should happen before the first freeze and at temperatures above 40°F so roofing materials are safe to walk on. Spring inspections address whatever winter left behind: ice load damage, freeze-thaw cracking, and wind-lifted shingles.

Gutters are a bigger factor than most homeowners expect. When they clog, water backs up against the fascia and works under the shingle edge. In freezing climates, that backed-up water contributes directly to ice dam formation. Clean gutters at least twice yearly, and verify they pitch at a minimum ¼ inch per 10 linear feet of run so water drains toward downspouts rather than pooling.
Tree branches are a slower threat but a real one. Branches within 6–10 feet of the roofline scrape granules off shingles during wind, drop debris that clogs valleys and gutters, and give squirrels a bridge to chew through vents. Trim annually, not just when a branch looks obviously dangerous.
- After any major storm, do a ground-level visual check before the next scheduled inspection
- Check downspouts direct water at least 4 feet from the foundation
- Remove moss or algae with a diluted sodium hypochlorite solution, not a pressure washer
- Follow a full roof maintenance checklist to avoid missing steps between professional visits
5. Know the common leak sources and address them early
Improper installation is a major cause of roof leaks, making workmanship a critical risk factor. That figure puts the hiring decision in a different light: a low bid from an uncertified crew is not a savings, it is a deferred repair bill. Pipe boots and flashing together account for more than half of all leak locations, which is why those two components deserve the most attention during every inspection.
Common sources to check:
- Damaged shingles: cracking, curling, and granule loss expose the asphalt layer to UV and rain
- Flashing gaps: lifted or corroded step and counter flashing at chimneys and dormers
- Pipe boot failure: neoprene seals crack from UV exposure, typically after 10 years
- Chimney mortar: deteriorating mortar joints and crown caps let water channel straight down
- Clogged gutters: water backup saturates the fascia and infiltrates the roof edge
- Skylight seals: frame-to-roof transitions fail when sealant ages or the frame shifts
Ceiling stains rarely sit directly below the entry point. Water travels along rafters and sheathing before dripping, sometimes several feet from the actual breach. Start any leak investigation in the attic, not at the stain.
6. Stay safe and know when to call a professional
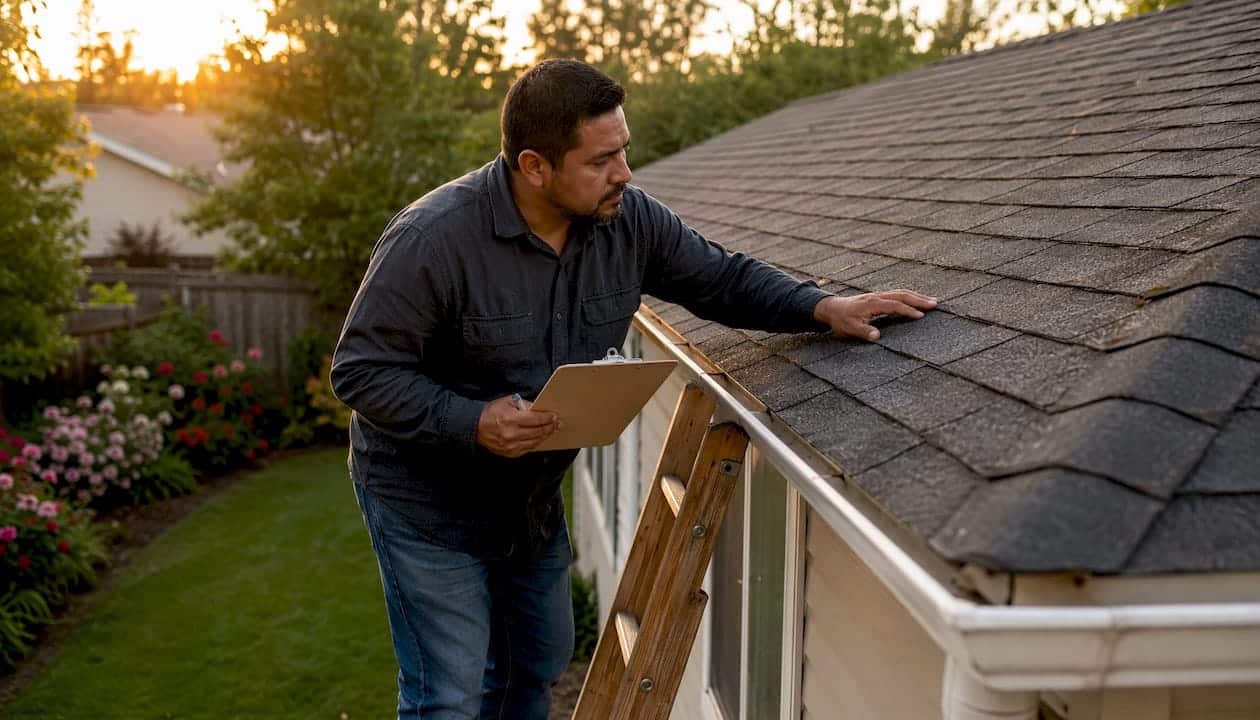
Climbing a roof without proper equipment causes injuries every year. The safer approach for most homeowners is a ground-level visual check with binoculars, which can reveal missing shingles, sagging gutters, and cracked flashing without any ladder risk. For anything beyond a visual pass, a certified inspector brings the right tools and the training to read what they find.
Infrared thermography and moisture meters detect hidden leaks that casual inspection misses entirely. Infrared cameras identify temperature differentials caused by wet insulation; moisture meters confirm whether a suspect area is actively wet. These tools work best while the material is still damp, so calling a professional promptly after a suspected leak gives the best diagnostic result.
- Never inspect a roof in wet, icy, or windy conditions
- Use a sturdy ladder on level ground, extended at least 3 feet above the roofline
- Document roof condition with dated photos after every inspection
- For storm damage in Texas, call a professional before filing an insurance claim to get an accurate scope of damage
Just as scheduling AC inspections on a fixed calendar prevents costly HVAC failures, putting roof inspections on the same annual schedule keeps small problems from becoming expensive emergencies.
Pro Tip: Take photos from the same four angles every inspection. Side-by-side comparison across seasons makes subtle changes like granule loss or flashing movement obvious in a way a single photo never will.
Get a professional roof assessment from Buffaloroofingandexteriors
Buffalo Roofing and Exteriors serves homeowners across Corpus Christi, San Antonio, and Victoria, Texas, with professional roofing inspections, repairs, and full installations. Whether you need a pre-storm checkup or a local roofing expert to diagnose an active leak, the team brings the tools and experience to get it right the first time. Contact Buffaloroofingandexteriors for a free estimate and protect your home before the next storm season.
Key Takeaways
Preventing roof leaks comes down to three things: correct installation of barriers and flashing, consistent twice-yearly maintenance, and prompt repairs before minor damage becomes structural.
| Point | Details |
|---|---|
| Flashing is the top failure point | Flashing failure is the leading cause of roof leaks; inspect sealants every 5–10 years. |
| Installation quality drives outcomes | Improper installation causes 42% of roof leaks, making contractor selection critical. |
| Ice and water shield placement | Underlayment must extend at least 2 feet beyond interior walls at edges and valleys. |
| Inspect twice yearly | Spring and fall inspections catch damage early; fall checks should occur above 40°F. |
| Tree clearance protects shingles | Keep branches 6–10 feet from the roofline to prevent abrasion and debris buildup. |