

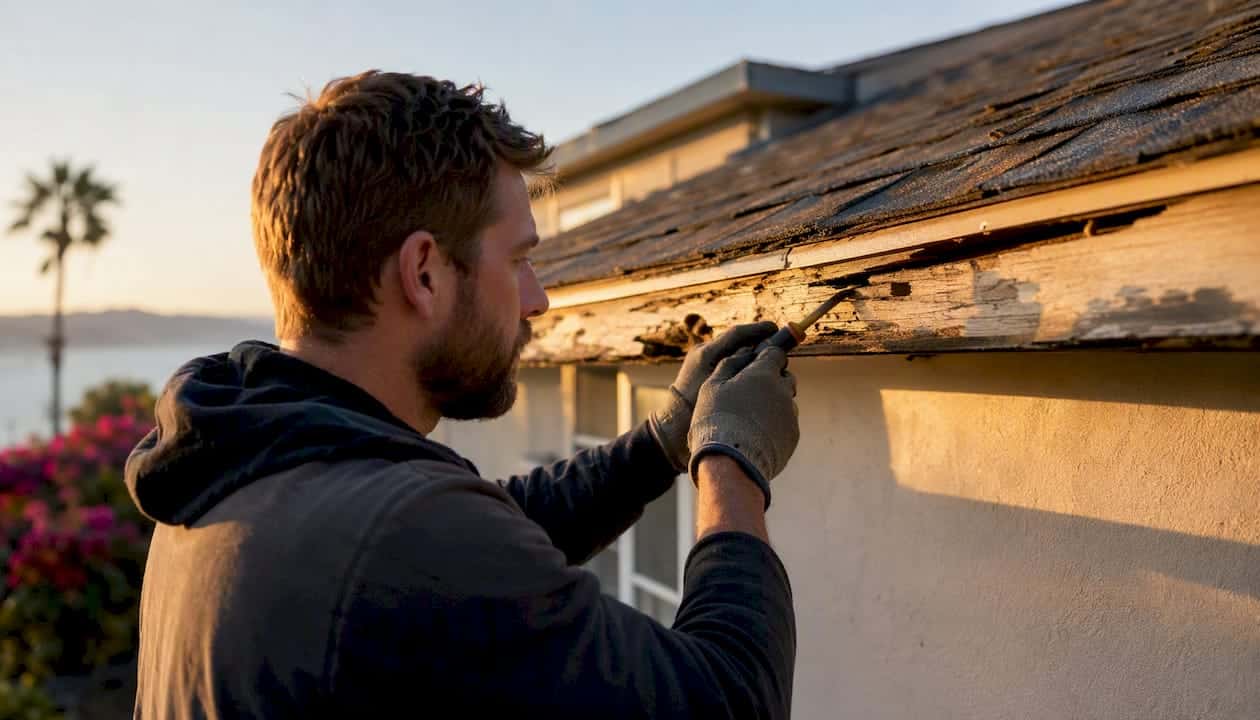
Most fascia problems fall into one of three buckets: a cosmetic patch you can handle in an afternoon, a section replacement that calls for a weekend and some confidence on a ladder, or a full-perimeter job that belongs with a licensed contractor. Soffit and fascia repairs range from a few hundred to several thousand dollars total, with most homeowners landing somewhere in the $600–$6,000 window depending on material, damage extent, and whether gutters and drip edge need to come out too.
Quick triage:
- Repair now if damage is limited to one or two boards, paint is peeling but wood is still firm, and no rot has reached the rafter tails or sheathing.
- Replace now if the screwdriver probe finds soft spots, gutters are pulling away, or you see staining behind the fascia from the attic eave.
- Monitor if paint is chalking but the board is solid and gutters are draining cleanly.
Per linear foot, installed fascia repair typically runs $6–$20 depending on material and access. A small single-elevation job (50 linear feet) often totals $400–$700; a full-perimeter replacement on a single-story home commonly runs $1,000–$3,300. Your immediate next step: photograph every suspect section from the ground, note where gutters sag or pull away, then call for a free on-site estimate before the next rain.
Key Takeaways
Damaged fascia almost always has an upstream cause: fix the root problem or the new board will rot on the same schedule as the old one.
| Point | Details |
|---|---|
| Triage rule | Probe every 4–6 feet; soft spots mean replace, not patch, regardless of how the surface looks. |
| Cost range | Installed fascia repair runs $6–$20 per linear foot; full-perimeter single-story replacement typically totals $1,000–$3,300. |
| Root cause first | Address gutters, drip edge, and any pest issues before or during fascia replacement or the new board will fail within 3–5 years. |
| DIY boundary | Spot repairs of 2–4 feet are manageable for experienced homeowners; full-perimeter replacement belongs with a licensed contractor. |
| Buffaloroofingandexteriors | Offers free estimates, written warranties, and financing for fascia repair and replacement across South Texas. |
Table of Contents
- What does fascia actually do for your roof?
- How do you know if your fascia needs work?
- What causes fascia to rot or fail?
- Which fascia material should you choose?
- How much does fascia repair or replacement cost?
- Should you DIY fascia repair or hire a professional?
- Step-by-step: how fascia replacement actually works
- How to maintain fascia and prevent repeat problems
- What to expect when a professional scopes your fascia work
- What we see in the field: common mistakes and how to avoid them
- Buffaloroofingandexteriors handles fascia repair across South Texas
- Sources
What does fascia actually do for your roof?
Fascia is the horizontal board that runs along the lower edge of your roof, capping the ends of the rafter tails and forming the mounting surface for your gutters. The soffit sits just below it, covering the underside of the eave overhang. Together they seal the attic from moisture, pests, and wind-driven rain. Without solid fascia, gutters have nothing firm to hang from, water can wick directly into the rafter ends, and attic ventilation suffers.
Two diagnostics are worth knowing. The screwdriver probe test is the industry standard for assessing fascia condition: press a flathead screwdriver firmly into the board every 4–6 feet, paying extra attention behind gutters and at corners where back-side rot hides. Firm resistance means the wood is sound; the screwdriver sinking in means active rot and almost always means replacement, not a patch. The second check is the attic eave: look for brown staining on the sheathing at the roofline. Ground inspections miss this early sign of water intrusion entirely.
From the ground, scan for gutters that tilt or gap away from the roofline. From a ladder (one step at a time, three-point contact always), look for paint that has bubbled or cracked in a pattern that follows the wood grain, dark streaks running down the board face, and any visible gaps between the fascia and the soffit.
Drip edge condition matters here too. Code updates have made drip edge standard at eaves in most jurisdictions, and missing or corroded flashing accelerates back-edge rot faster than almost any other single factor.
How do you know if your fascia needs work?
Start from the ground with binoculars if you have them. Most serious damage announces itself before you ever climb a ladder.
Severity checklist:
- Peeling or bubbling paint — monitor; probe the board before scheduling anything.
- Soft spots on probing — replace the affected section; do not patch over active rot.
- Gutters sagging, tilting, or pulling away from the roofline — replace fascia before reinstalling gutters; the fasteners have nothing solid to grip.
- Visible rot, holes, or dark staining on the board face — replace; rot spreads laterally faster than it looks.
- Pest entry holes or nests — call a pest professional first, then replace the board after treatment.
- Attic eave staining — replace fascia and inspect rafter tails and sheathing for secondary damage.
A short safety note: if the damage is above a single-story roofline, on a hip or complex roof, or requires leaning out over a gutter, stop and call a pro. Ladder falls are the leading cause of DIY roofing injuries, and no fascia board is worth a trip to the emergency room. Roof safety for storm-prone homes covers the specific ladder and positioning rules worth reviewing before any elevated inspection.
What causes fascia to rot or fail?
The board itself rarely fails on its own. Something upstream is almost always feeding the problem, and skipping that fix means the new fascia follows the old one into rot within 3–5 years.
- Clogged or overflowing gutters — the single most common culprit. Water backs up behind the gutter lip and sits against the fascia face and back edge continuously. Gutters that overflow regularly are the fastest path to fascia rot.
- Missing or damaged drip edge — without flashing, rainwater runs off the roof deck and directly onto the top edge of the fascia rather than into the gutter.
- Ice dams (northern climates) — meltwater pools at the eave and wicks under the shingles and behind the fascia.
- Pest infestation — carpenter ants and wood-boring beetles follow existing moisture damage; squirrels and birds create entry holes that let rain in.
- Age and failed paint/caulk — bare wood exposed to UV and moisture cycles degrades quickly; a missed caulk joint at a corner can start a rot pocket in one wet season.
- Coastal humidity and salt air — in South Texas and similar coastal markets, salt-laden air accelerates paint failure and corrosion on fasteners, which loosens boards and opens gaps.
Pro Tip: The single most cost-effective preventive action is cleaning gutters twice a year and confirming the drip edge is intact every time you do it. Thirty minutes on a ladder twice a year prevents the majority of fascia rot calls.
Which fascia material should you choose?
Material choice drives both your upfront cost and your long-term maintenance schedule. Paying more for a low-maintenance material often costs less over a 10–20 year window, especially on exposed or coastal homes where wood degrades faster.
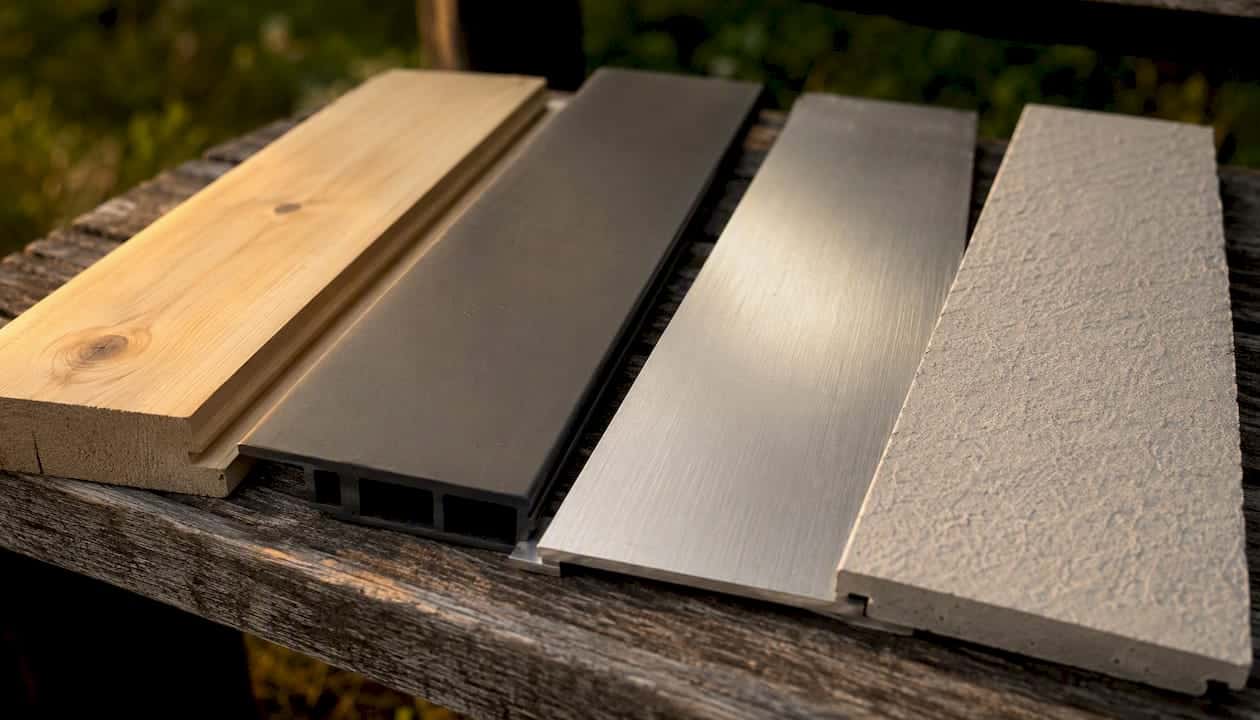
Wood is the cheapest board to buy and the easiest to cut and nail, which keeps labor costs down. The tradeoff is that it needs paint every few years and is the first material to fail when gutters overflow or drip edge is missing. Cedar holds up better than pine in humid climates, but neither competes with synthetic options on longevity.
PVC costs more upfront and expands noticeably in heat, which can cause visible gaps at joints if not installed with the right spacing. In South Texas, that thermal movement is real. The payoff is zero rot risk and no painting.
Aluminum is the go-to for coastal homes. It does not rot, resists salt air, and lasts decades. The downside: it dents, and once dented it looks dented. Fastener choice matters because dissimilar metals corrode.
Composite and fiber cement sit between wood and aluminum in both cost and performance. Fiber cement in particular handles coastal humidity well and holds paint longer than wood, making it a strong choice for homeowners who want a painted look without the wood maintenance cycle.
Quick climate recommendations: coastal or high-humidity climates (Gulf Coast, Florida, Pacific Northwest) — PVC or aluminum; freeze-thaw climates (Midwest, Northeast) — fiber cement or composite; budget-first with normal humidity — wood with cedar upgrade where possible.
How much does fascia repair or replacement cost?
Full-perimeter fascia replacement on a typical single-story home runs $1,000–$3,300, with a national average near $2,500 for common jobs. Smaller section repairs cost a fraction of that.
| Job size | What’s typically included | Estimated total |
|---|---|---|
| 50 LF (one elevation) | Board replacement, basic trim, seal/paint | $400–$700 |
| 50 LF (one elevation) | Boards, drip edge, gutter removal/reinstall | $400–$700 |
| 50 LF (one elevation) | Boards, drip edge, gutters, minor sheathing check | $1,000–$3,300 |
| full perimeter | Full replacement, drip edge, gutters, disposal | $1,000–$3,300 |
What pushes the cost up:
- Dry rot that has spread to rafter tails or sheathing (adds carpentry labor)
- Gutter removal and reinstallation (often $3–$6 per LF on top of fascia cost)
- Drip edge replacement (adds material and flashing labor)
- Pest removal: pest treatment costs vary widely depending on infestation size and should be budgeted separately
- Multi-story access or complex hip/valley rooflines (scaffolding adds cost)
- Permit requirements (varies by municipality; ask your contractor)
- Material upgrade from wood to aluminum or fiber cement
Project timeline callout: A small patch (2–4 feet) is a half-day job. A single-elevation replacement (50 LF) typically takes one full day. A full-perimeter replacement on a single-story home usually runs 2–3 days including gutter removal, board installation, and reinstallation. Eave reconstruction with sheathing repair can extend that to a week.
Bundling gutter and fascia work in the same visit often reduces per-project labor costs compared to scheduling them separately.
Should you DIY fascia repair or hire a professional?
A spot repair covering 2–4 feet is a realistic DIY job for an experienced homeowner; full-perimeter replacement is a different animal entirely. Here is how to decide:
DIY is reasonable when:
- Damage is limited to one or two boards on a single-story home
- You are comfortable on a ladder and have a helper to stabilize it
- The rafter tails and sheathing behind the board are solid
- No gutters need to be removed (or you are confident removing and reinstalling them)
- No permits are required in your municipality for cosmetic board replacement
Hire a pro when:
- The home is two stories or has a complex roofline
- Rot has reached the sheathing or rafter tails (structural carpentry required)
- Gutters need full removal and reinstallation
- You find pest nests (call a pest professional before any contractor)
- The job requires a permit (check with your local building department)
- You are unsure whether the drip edge needs replacement
Questions to ask any contractor before signing:
- Are you licensed and insured in Texas? (Ask for the certificate of insurance, not just a verbal yes.)
- What warranty do you offer on labor and materials?
- Who removes and reinstalls the gutters, and is that included in the quote?
- How do you diagnose the root cause before installing new boards?
- Will you check the rafter tails and sheathing while the board is off?
- Can you provide a line-itemized written estimate?
- Do you offer free estimates?
For guidance on choosing a roofing contractor in Texas, look for contractors who pull permits when required, carry general liability and workers’ comp, and give written warranties on both materials and workmanship.
Step-by-step: how fascia replacement actually works
Whether you are doing it yourself or watching a contractor work, this is the correct sequence. The standard procedure runs from inspection through gutter reinstallation, and skipping steps is where most callbacks originate.
Numbered sequence:
- Inspect from the attic and from the ladder. Check rafter tails, sheathing, and the back face of the existing board before touching anything.
- Remove gutters. Unscrew gutter hangers and lower the gutter section carefully. Label each section if reinstalling.
- Remove the drip edge. Pry it up gently; you will likely need a new piece.
- Remove the damaged fascia board. Use a pry bar; work from one end and pull nails rather than snapping the board.
- Inspect and repair rafter tails and sheathing. Any soft or rotted wood here must be sistered or replaced before the new board goes on.
- Cut and fit the new board. Span joints over rafter tails, never in mid-air. Stagger joints on adjacent boards.
- Fasten the new board. Use hot-dipped galvanized or stainless ring-shank nails (or screws) at every rafter tail. Standard spacing is two fasteners per rafter contact point.
- Seal all end cuts and joints with exterior-grade caulk before painting.
- Prime and paint with two coats of exterior paint, or install pre-finished material.
- Reinstall drip edge, lapping it over the new fascia and under the first course of shingles.
- Reinstall gutters and confirm slope (1/4 inch drop per 10 feet toward the downspout).
- Final inspection: run a hose to confirm drainage, check for gaps at joints, and probe the new board at every rafter point.
Tools and materials minimum list:
- Pry bar, hammer, circular saw or miter saw
- Drill/driver with exterior screws or ring-shank nails (hot-dipped galvanized or stainless)
- Exterior-grade caulk (paintable, 50-year rated)
- Primer and exterior paint, or pre-primed boards
- New drip edge (aluminum or galvanized steel, matching existing profile)
- Safety glasses, work gloves, and a stable extension ladder rated for your weight plus tools
Pro Tip: Pre-prime all four sides of a wood fascia board before installation, including the back face and both end cuts. Back-side rot almost always starts at an unprimed surface. This one step adds 20 minutes and can double the board’s service life.
A broader look at roof maintenance to prevent storm damage covers how fascia condition fits into the full annual inspection routine.
How to maintain fascia and prevent repeat problems
The best fascia repair is the one you never need. Most repeat failures trace back to two skipped maintenance tasks.
Spring checklist:
- Clean gutters completely and flush downspouts
- Inspect gutters for backflow signs (mud lines, staining on fascia face)
- Check drip edge for lifted sections or corrosion
- Probe any suspect spots with a screwdriver
- Check attic eave sheathing for new staining
Fall checklist:
- Clean gutters after leaves drop
- Caulk any open joints at fascia corners and trim intersections
- Touch up paint on any bare or cracked sections before winter
- Check vent screens at soffit for blockage or pest damage
Routine tasks and frequency:
- Gutter cleaning: twice yearly minimum; quarterly in heavy-tree areas
- Paint/caulk inspection: annually
- Full probe inspection: every 2–3 years, or after any major storm
Pro Tip: If your gutters overflow even after cleaning, the problem is usually undersized downspouts or a slope issue, not debris. Fixing the drainage path protects the fascia far more than any coating or sealant.
For a complete picture of how to prevent roof leaks, fascia and gutter maintenance sit at the top of the list.
What to expect when a professional scopes your fascia work
A thorough contractor does not just measure linear feet and quote boards. Here is what a proper on-site scope covers and what a line-itemized estimate should show.
What the contractor checks on-site:
- Fascia condition across all elevations (probe test at every rafter point)
- Soffit condition and ventilation screen integrity
- Attic eave sheathing for staining or soft spots
- Rafter tail condition behind the fascia
- Gutter condition, slope, and hanger spacing
- Drip edge presence, profile, and condition
- Any pest evidence (nests, frass, entry holes)
- Underlying roof edge condition (shingle overhang, flashing)
Sample estimate line items:
| Line item | Unit | Notes |
|---|---|---|
| Fascia board (material) | Per LF | Priced by material type |
| Labor (remove and install) | Per LF | Includes fasteners and caulk |
| Drip edge (material + install) | Per LF | Aluminum or galvanized |
| Gutter removal and reinstallation | Per LF | Or new gutter if needed |
| Sheathing/rafter tail repair | Per SF or per rafter | Only if damage found |
| Disposal | Flat or per load | Debris removal |
| Warranty | Included or separate | Ask for written terms |
What to have ready before the estimate visit:
- Photos of every damaged section (taken from the ground and from a ladder if safe)
- Approximate linear footage (measure along the roofline at ground level)
- Date of last gutter cleaning
- Any known pest activity or prior repairs
- Whether you have had any recent storm damage (relevant for insurance documentation)
Buffaloroofingandexteriors serves homeowners and property managers across Corpus Christi, San Antonio, Victoria, and surrounding South Texas communities. Free estimates are standard, and financing options are available for larger replacement jobs. If your fascia damage followed a storm, the storm damage restoration process may apply to your claim.

What we see in the field: common mistakes and how to avoid them
The most common fascia failure we see is not the rot itself. It is a homeowner or a cut-rate contractor who replaced the board without touching the gutters, drip edge, or the clogged downspout that caused the rot in the first place. Three years later, the new board looks exactly like the old one.
Two things to confirm during any estimate: first, ask the contractor to show you the drip edge condition before they close up the eave. A missing or lifted drip edge is the fastest path back to the same problem. Second, ask how they will fasten the new board. Ring-shank nails or screws driven into rafter tails are the standard; smooth-shank nails driven into the sheathing edge pull out within a few seasons and let the board work loose, which opens the joint to water.
DIY mistakes that cause repeat rot: skipping the back-face prime coat, using interior-grade caulk that cracks in the first summer, and nailing into the sheathing edge instead of the rafter tail. Any of these voids a material warranty and puts you back on the ladder in three years.
Buffaloroofingandexteriors handles fascia repair across South Texas
Fascia work rarely travels alone. By the time a board needs replacement, gutters usually need adjustment, drip edge needs inspection, and the rafter tails behind the board need a look. Buffalo Roofing and Exteriors scopes all of it in a single visit, which means one mobilization cost instead of three separate contractor calls.

Free estimates are available across Corpus Christi, San Antonio, Victoria, and the surrounding South Texas service area. Financing options cover larger replacement jobs, and written warranties cover both materials and labor. For storm-related fascia damage, the team handles local roofing and exterior repair from initial documentation through final inspection. To get started, have your photos, approximate linear footage, and last gutter service date ready, then request your free estimate at Buffaloroofingandexteriors.
Sources
- How Much Does Soffit and Fascia Repair Cost? 2026 Data | Angi
- Fascia Board: What It Is + 2026 Replacement Cost | The Roofing Brief
- How to Install and Replace Fascia Board | Lowe’s
- Roof Fascia Repair Cost 2026 | Official Site
- 2026 Fascia Board Replacement Cost: Prices & Factors | Thumbtack
For permit questions, consult your local building department directly. Permit requirements for fascia replacement vary by municipality and by whether structural repairs (rafter tails, sheathing) are included in the scope.