

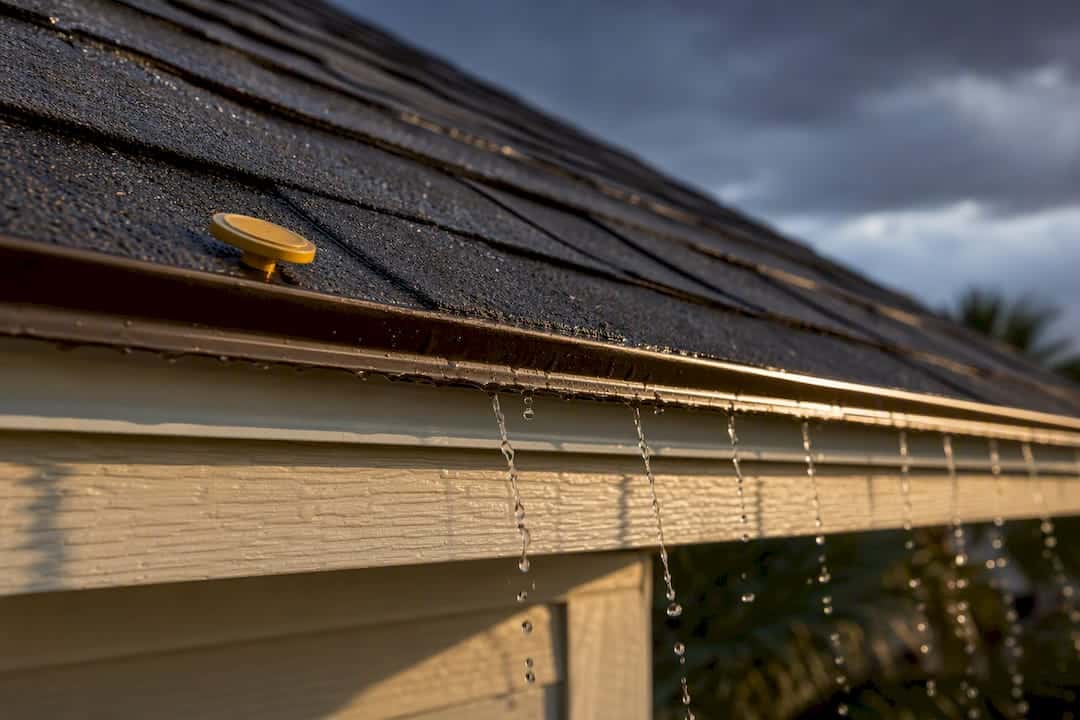
A properly installed drip edge is not optional for a shingled roof. This thin metal flashing runs along the eaves and rakes, directing water into gutters instead of letting it soak the fascia and decking underneath. ARMA recommends it on every roof, most codes now require it, and the material itself typically runs a few dollars per linear foot. Skipping it invites rot you won’t see until it’s expensive.
TL;DR:
- Proper installation of a drip edge involves placing it under the underlayment at the eave and over the underlayment at the rake to ensure effective water diversion.
- Missing or improperly installed drip edges can lead to fascia rot, mold, pest intrusion, and damage from ice dams or wind-driven rain, especially in colder or storm-prone regions.
- Common installation mistakes include nailing through the vertical flange or not following the correct “over and under” method, which compromises water shedding and increases long-term damage risk.
- Regular inspections every six months and after storms should focus on rust, gaps, shingle lift, and water stains, with repairs costing less if only small sections require replacement.
- Building codes generally require drip edges, and homeowners should verify proper installation by inspection rather than relying solely on contractor assurances to prevent hidden rot.
Table of Contents
- Roof Drip Edge Importance: What It Is and How It Protects Your Home
- Why a Missing or Failed Drip Edge Causes Real Damage
- Drip Edge Profiles and Materials: Matching the Right Type to Your Roof
- Installation Best Practices Every Homeowner Should Know
- How Often to Inspect Your Drip Edge and What Repairs Cost
- Does Your Local Code Require a Drip Edge?
- What a Coastal Contractor Sees on Storm-Damaged Roofs
- The Real Lesson Homeowners Miss About Drip Edge
- Get a Free Roof Inspection Before Small Damage Becomes a Big Repair
- Sources
Roof Drip Edge Importance: What It Is and How It Protects Your Home
A drip edge is a strip of formed metal, usually aluminum or galvanized steel, installed at the roof’s outer edges before the shingles go down. At the eave, it sits under the underlayment; at the rake, installers often flip that order and place it over the underlayment. That difference matters more than most homeowners realize, and it’s one of the first things a roofer checks during an inspection.
The physics behind it is simple but easy to underestimate. Water running off a shingle doesn’t always fall straight down. Surface tension can pull it sideways, back under the shingle edge, and onto the fascia board or roof deck. A drip edge breaks that surface tension and forces water to release cleanly into the gutter, which is exactly why IKO’s guide to drip edges treats it as a standard protective component rather than an upgrade.
If you want to find yours, here’s where to look:
- At the eave, just below the first row of shingles, tucked over the fascia board
- Along the rake edges, running up the slope on either side of the roof
- Wherever gutters attach, the drip edge should extend slightly past the fascia into the gutter trough
Why a Missing or Failed Drip Edge Causes Real Damage
Skip the drip edge, or install it wrong, and water finds the path of least resistance, which is usually straight into your fascia board. Once that happens, rot sets in quietly. Angi’s breakdown of drip edge function points out that surface tension alone can pull water back under shingles and onto exposed wood, and once wood stays damp long enough, mold follows, and pests aren’t far behind carpenter ants and termites both favor softened, water-logged trim.
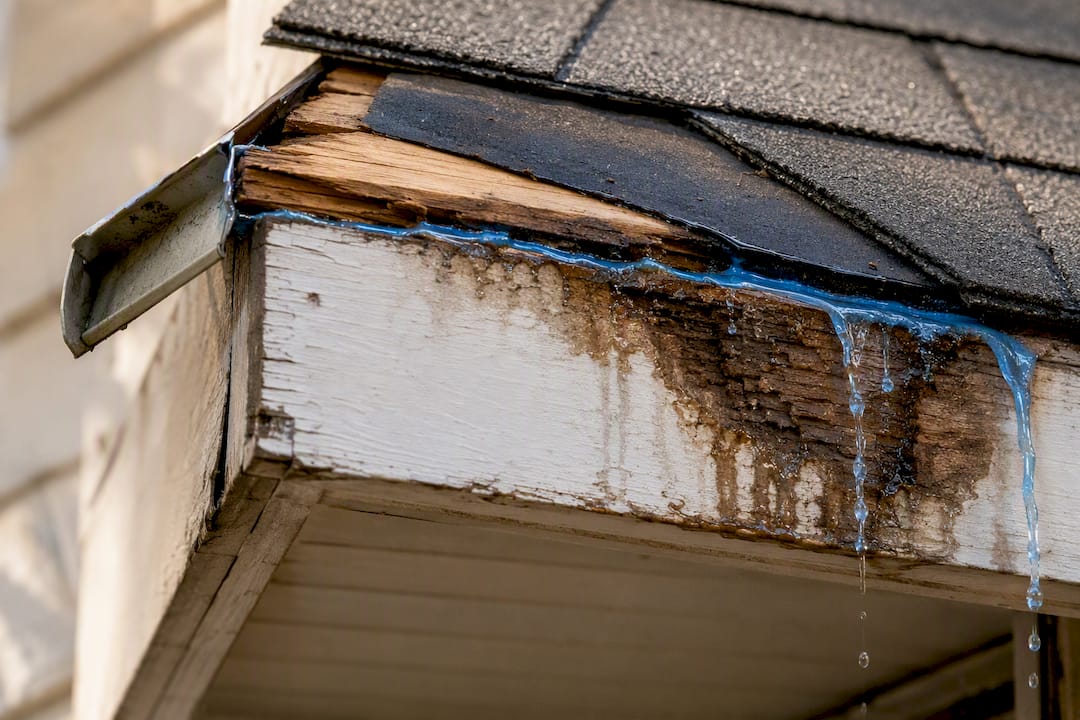
Ice dams make the problem worse in colder climates. Water that backs up under shingles at the eave has nowhere to go without a drip edge to direct it outward, so it refreezes and pries shingles loose from underneath. Wind-driven rain does something similar during storms, forcing moisture sideways and upward under shingle tabs.
There’s a downstream cost too. Uncontrolled runoff that misses the gutter system erodes landscaping beds and, over years, can undermine soil near the foundation. The EPA’s moisture control guidance identifies edge and flashing details as one of the primary places water intrusion starts in building assemblies, not just roofs.
Pro Tip: Check your fascia boards after a heavy rain. If you see dark streaking, peeling paint, or a soft, spongy feel when you press on the wood, that’s often the first visible sign a drip edge has failed or was never installed.
Watch for these warning signs during your next walk-around:
- Rust spots or streaking on the metal flashing itself
- Visible gaps between the drip edge and the fascia or shingle edge
- Shingles lifting or curling right at the roof’s edge
- Water stains on the underside of the roof deck, visible from the attic
Drip Edge Profiles and Materials: Matching the Right Type to Your Roof
Not every drip edge looks the same, and the profile you need depends on where it’s going. Type C, sometimes called Type L, is the most common shape and works well at both eaves and rakes on standard shingle roofs. Type D, or Type T, has a slightly different bend that some installers prefer for its stiffer profile. Type F, often called a gutter apron, has a wider flange that tucks further under the shingle and over the gutter’s back edge. This is why the terms “drip edge vs. gutter apron” and “gutter apron vs. drip edge” get tossed around interchangeably even though they serve slightly different roles at the eave.
Material choice matters just as much as profile:
- Aluminum has largely replaced galvanized steel for most residential jobs, according to Today’s Homeowner’s material guide, thanks to better corrosion resistance and a reasonable price
- Galvanized steel is sturdier but rusts faster in humid or coastal air
- Copper costs significantly more but resists corrosion for decades and develops a distinctive patina
- Vinyl shows up occasionally on budget installs but doesn’t hold up as well to UV exposure over time
If your home sits near salt air, lean toward aluminum with a protective coating, or copper if the budget allows. Galvanized steel in a coastal setting tends to show rust within a few years.
Installation Best Practices Every Homeowner Should Know
Getting a drip edge right isn’t complicated, but it’s easy for an inexperienced crew to get wrong in ways that quietly undermine the whole system. Here’s the sequence a careful installer follows:
- Install the drip edge at the eave first, placing it directly on the roof deck before the underlayment goes down, so the underlayment overlaps the top of the flange.
- At the rake edges, flip that order: underlayment goes down first, then the drip edge sits on top. This is often called the “over and under” method, and skipping it is one of the more common installation shortcuts.
- Nail into the roof deck, not through the vertical flange, at intervals of roughly 8 to 10 inches, per ARMA’s fastening guidance.
- Leave the correct shingle overhang, typically 3/8 to 3/4 inch past the drip edge, so water sheds cleanly instead of dripping straight down the fascia face.
The mistakes that show up most often during inspections aren’t dramatic. They’re small oversights that add up. This Old House’s testing on drip edge installations found that nailing through the vertical flange, or setting the drip edge flush against the fascia with no gap for water to escape, both defeat the purpose of the flashing even though the roof looks finished from the ground. Gaps at seams or corners are another red flag, since they give wind-driven rain and even small pests a direct entry point. If a contractor’s crew is skipping the underlayment sandwich at the eave or nailing wherever is convenient, that’s a reasonable moment to ask questions or bring in a second opinion.
How Often to Inspect Your Drip Edge and What Repairs Cost
Tie your drip edge inspection to your gutter cleaning schedule, since you’re already up there or hiring someone to be. Twice a year is a reasonable baseline, spring and fall, with an extra check after any major storm. Look for rust, loose or missing nails, gaps at the fascia line, and shingles lifting right at the edge.
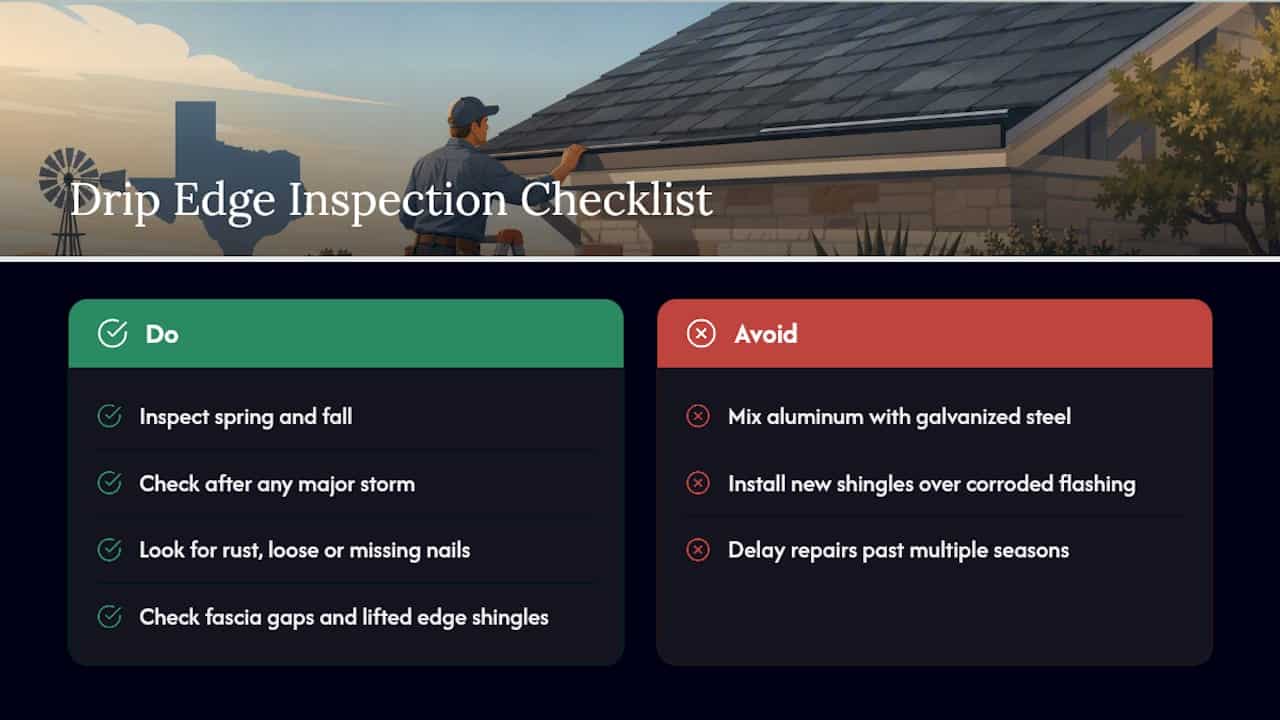
Minor sections can usually be repaired or replaced individually without touching the rest of the roof, especially if the damage is limited to a short run along one eave. But if you’re already scheduling a full roof replacement, the drip edge gets replaced as a matter of course, since installers won’t warranty new shingles over old, corroded flashing.
Costs vary by material and scope. A basic aluminum retrofit on a section of roof tends to run modestly compared to a full roof job, while copper carries a real premium, sometimes several times the cost of aluminum for the same linear footage. IKO’s guidance frames this plainly: the cost of the flashing itself is small next to what fascia and deck rot cost to fix once water gets past it for a few seasons.
Pro Tip: If you’re patching a small section, match the existing profile and material exactly. Mixing aluminum with galvanized steel at a seam speeds up corrosion on both pieces through a reaction called galvanic corrosion.
Does Your Local Code Require a Drip Edge?
Industry guidance and building codes have largely converged on the same answer: yes, drip edge belongs on essentially every shingled roof. ARMA’s installation standard spells out fastening intervals, flange extension, and the underlayment sandwich method at eaves in detail, and the International Residential Code’s roof assembly section addresses flashing requirements that many jurisdictions apply to new construction and full roof replacements.
A few things worth confirming before you assume you’re covered:
- Your local building department’s specific amendments, since IRC adoption varies by city and county
- Your shingle manufacturer’s warranty language, which often requires drip edge installation to keep coverage valid
- Whether your permit history shows the roof was inspected against current code, especially on older homes
If you’re not sure your roof meets current guidance, a quick inspection settles it faster than guessing.
What a Coastal Contractor Sees on Storm-Damaged Roofs
A local contractor working across Corpus Christi, San Antonio, and Victoria frequently encounters drip edge failure in storm damage calls along coastal areas. Salt air accelerates corrosion on galvanized flashing faster than most homeowners expect, and wind-driven rain during tropical storms finds gaps that would never leak in a calmer climate.
The decision between repair and replacement usually comes down to how far the damage has spread. If rot is limited to a short run of fascia, a section replacement solves it. If water has been getting past the flashing for a few seasons, the deck underneath often needs attention too, which is where a proper inspection of the roof’s flashing system matters more than patching the visible symptom. Some contractors in this region offer free estimates, financing options, warranty coverage on roofing work, and storm damage consultations.
The Real Lesson Homeowners Miss About Drip Edge
Most roofing advice treats drip edge as a checkbox item, something a contractor either includes or doesn’t, with little explanation of why it matters beyond “code requires it.” That framing undersells the problem. The actual risk isn’t the absence of drip edge, it’s the appearance of drip edge that’s installed wrong. A flush-mounted or improperly nailed drip edge looks identical to a correct one from the ground, and that’s precisely why so much rot damage goes undetected for years.
The conventional advice to “just make sure you have drip edge” isn’t wrong, but it’s incomplete. What actually protects a fascia board is the sandwich method at eaves, the correct nailing pattern into the deck, and a profile matched to the roof’s exposure. Homeowners should prioritize asking a contractor to show them the installation, not just confirm it exists. A five-minute look at how the flashing meets the fascia tells you more than any warranty document.
If there’s one habit worth building, it’s pairing a visual drip edge check with your regular gutter maintenance routine. The two systems work together, and neglecting one undermines the other.
— Results
Get a Free Roof Inspection Before Small Damage Becomes a Big Repair
Some roofing service providers offer homeowners in Corpus Christi, San Antonio, and Victoria a free, in-person inspection that checks drip edge condition alongside flashing, fascia, and gutter attachment points, all in one visit.

A typical visit covers a full roof assessment, a written estimate, and a plain-language explanation of whether you’re looking at a targeted repair or something bigger. Financing options and workmanship warranties are available for larger jobs, and storm damage consultations are handled with the same visit if recent weather is the reason you’re calling. For homes with visible fascia staining or rust along the roofline, a fascia repair evaluation often gets bundled into the same estimate. Homeowners who also want their gutters checked at the same time can look at complementary roof maintenance guidance from a trusted cleaning partner.
If your roof is due for a look, request a free estimate from Buffaloroofingandexteriors and get a clear answer on what your drip edge and roof edge actually need.
Sources
- Guide to Drip Edges for Shingle Roofs
- What is a Roof Drip Edge and Why Is It Important?
- Moisture Control Guidance – EPA