

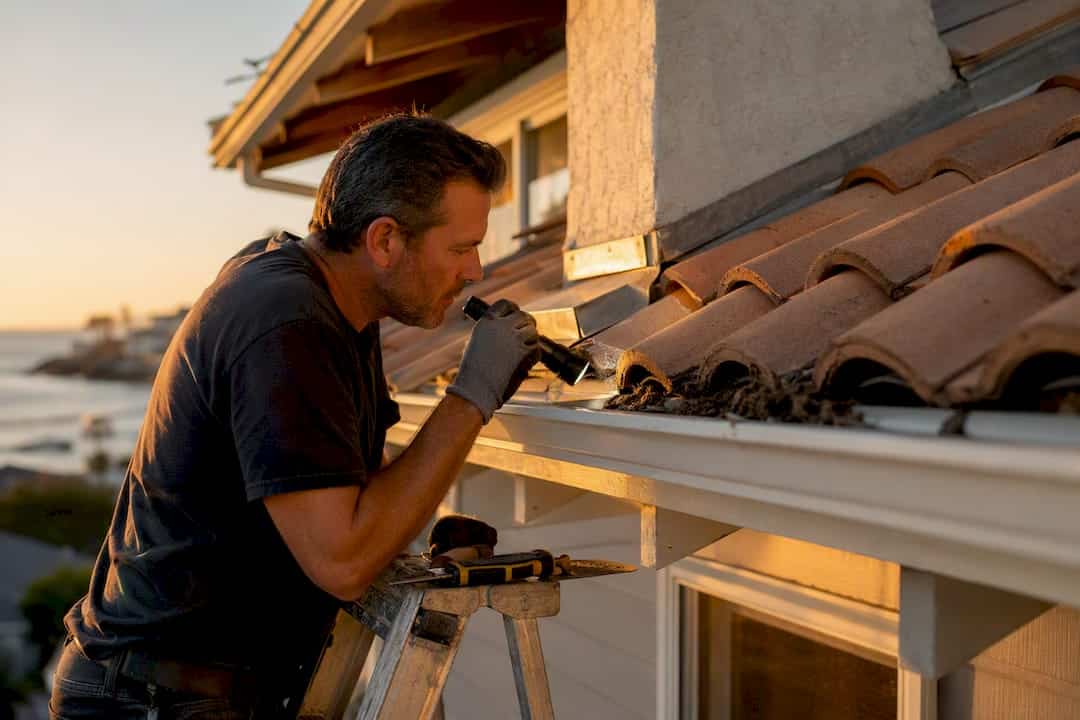
Manufacturer guidance from Owens Corning points to ventilation, flashing, and underlayment condition as the three things most likely to determine whether a roof lasts its full lifespan or fails early. Basic repairs like a missing shingle or a small leak often run in the low hundreds of dollars; a full slope replacement is a different budget conversation entirely.
If water is actively coming through your ceiling right now: contain it with a bucket or tarp, move furniture and electronics out of the drip zone, and call a roofer today rather than waiting for a scheduled inspection.
Pro Tip: Take a photo of any active leak with a coin or tape measure next to it before you clean up. That single habit saves arguments with insurance adjusters later.
Quick wins you can knock out this weekend:
- Clear gutters and downspouts of leaves and grit
- Trim tree branches hanging within 6 feet of the roofline
- Replace any cracked or missing shingles you can spot from the ground
- Re-secure loose flashing around chimneys and vents
- Check the attic for daylight, water stains, or a musty smell
- Confirm downspouts drain at least 3 feet away from the foundation
Key Takeaways
Regular inspection of the ridge, flashing, and ventilation, paired with fast action on active leaks, prevents most major roof failures before they start.
| Point | Details |
|---|---|
| Inspect quarterly, prioritize three zones | Check ridge caps, flashing seals, and attic ventilation every season; these predict long-term performance. |
| Document everything with photos | Take wide shots, close-ups, and scale references dated by slope for insurance and contractor estimates. |
| Know the 25% threshold | Repairs nearing 25% of one slope can trigger a full replacement requirement under many local codes. |
| Match repairs to skill level | Handle single shingles and gutter clearing yourself; leave steep pitches and flashing work to a licensed roofer. |
| Buffaloroofingandexteriors offers full-scope help | Free estimates, photo documentation, and warranty handling are available for South Texas homeowners who prefer a professional. |
Table of Contents
- Roof Tips for a Room-to-Roof Inspection Checklist
- Seasonal Roof Maintenance Tips That Actually Prevent Damage
- DIY Roof Repairs vs. When to Call a Professional
- Roofing Materials and Tools Every Homeowner Should Recognize
- Planning a Reroof: Cost Drivers and Timeline
- Why Ridge, Flashing, and Ventilation Decide How Long a Roof Lasts
- A Quick Roofing Glossary for Homeowners
- If You’d Rather Hand This Off to a Pro
- Sources
Roof Tips for a Room-to-Roof Inspection Checklist
A good inspection doesn’t start on the roof. It starts on the ground and works its way up, one zone at a time, so nothing gets missed.
1. Ground and perimeter. Walk the full perimeter and look up at the roofline from several angles. Granules collecting in flower beds or near downspouts signal shingle wear. Sagging gutters or plants growing out of them mean debris has been sitting too long.
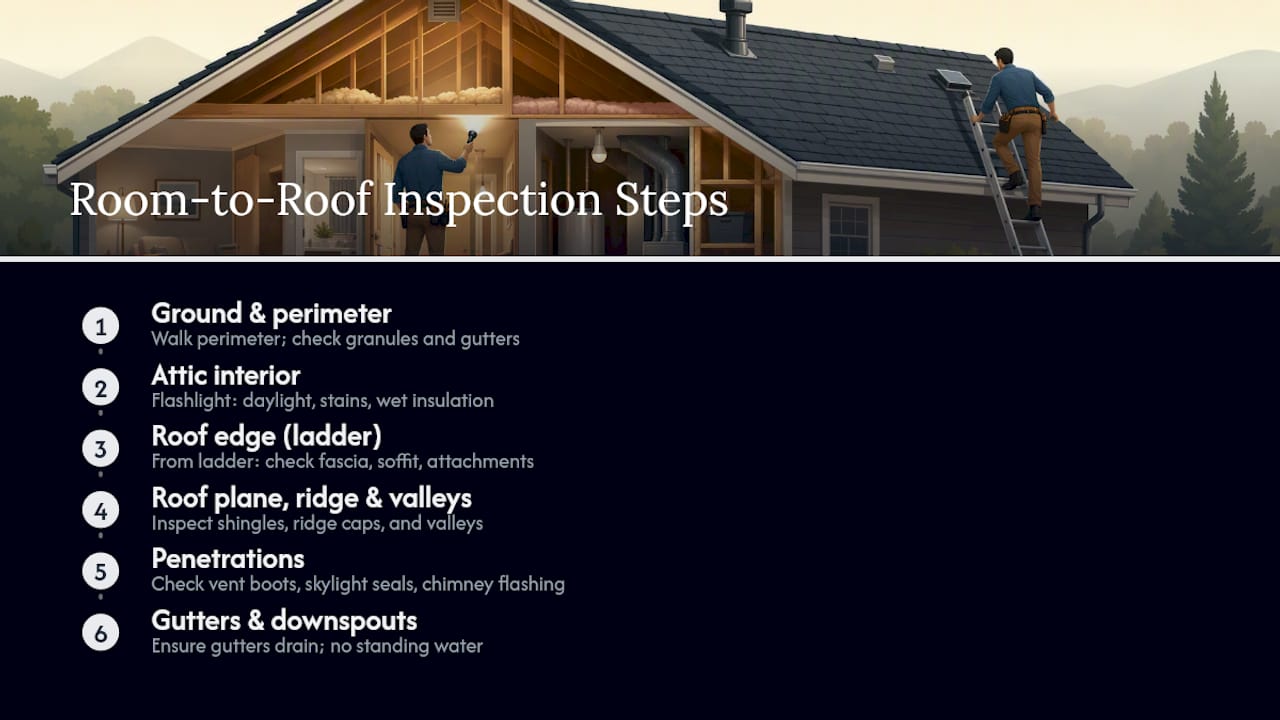
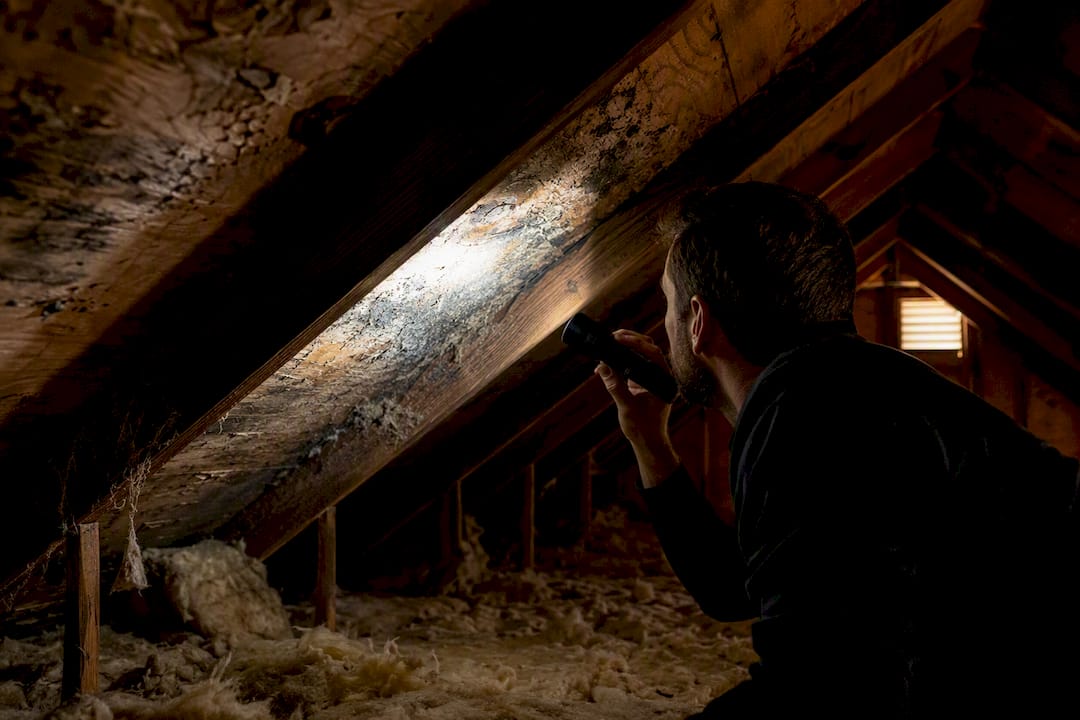
2. Attic interior. Head up with a flashlight on a dry day. Look for daylight coming through the decking, dark water stains on rafters, compressed or wet insulation, and any smell of mildew. These are early warning signs long before a ceiling stain shows up downstairs.
3. Roof edge from a ladder. Before you ever step onto the roof, check the fascia, soffit, and gutter attachment points from a stable ladder. Look for rot, pulling nails, or gaps where pests could get in.
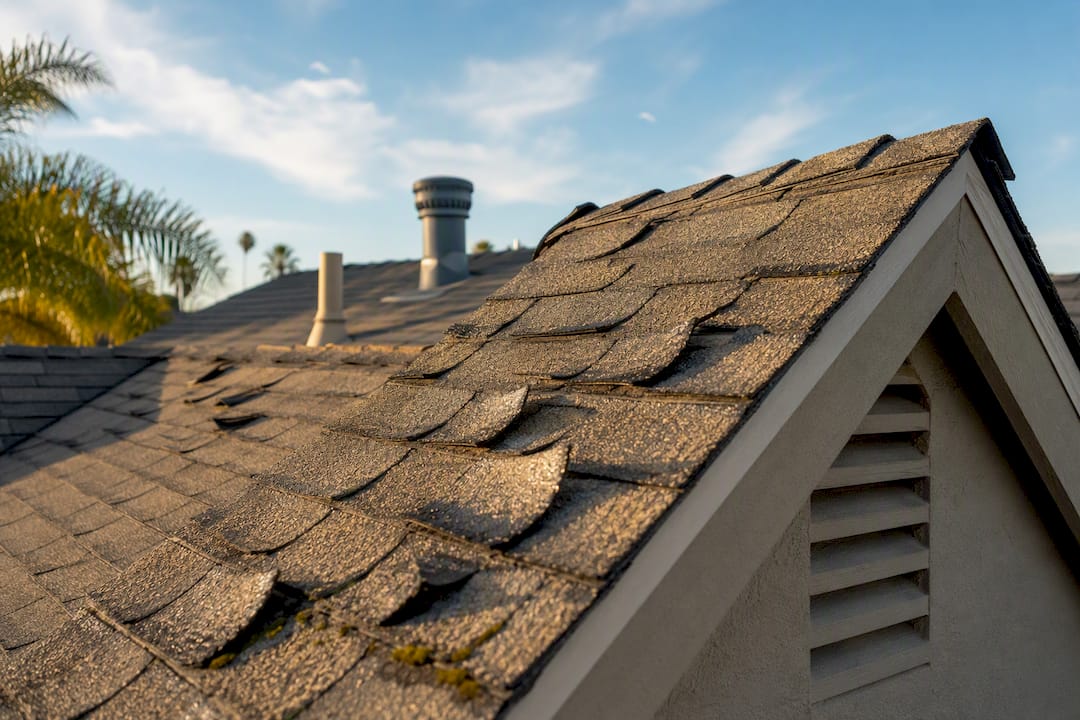
4. Roof plane, ridge, and valleys. Curled or cupped shingles, bald spots missing granules, and cracked ridge caps all point to aging material. Valleys collect the most water and debris, so they fail first when metal or shingle flashing corrodes or shifts.
5. Penetrations. Check the boots around plumbing vents, skylight seals, and chimney flashing. Cracked rubber boots are one of the most common, and cheapest, leak sources on any roof.
6. Gutters and downspouts. Confirm water is actually flowing, not just sitting. Standing water in gutters adds weight and invites rot at the fascia line.
When you photograph an issue, take one wide shot for context, one close-up, and include something for scale, like a tape measure or a shoe. Note the date and the roof slope where you found it. That level of documentation, used well, speeds up insurance supplements when an adjuster’s initial scope misses damage.
Not every finding needs the same urgency. Active leaks and large missing shingle sections need attention within 24 to 48 hours. Minor granule loss or a few curled shingles can be monitored over several weeks. Suspected decking rot or ventilation failure should go straight to a professional inspection rather than a DIY fix.
Pro Tip: Never lean a ladder against a gutter for support. Gutters bend and can dump you off in seconds. Use a stabilizer bar that rests against the roofline instead, and if the roof pitch looks steeper than comfortable to stand on, stay on the ladder and call a pro.
Seasonal Roof Maintenance Tips That Actually Prevent Damage
Roof problems rarely start big. They start as a season of neglect that compounds. A simple seasonal rhythm heads off most of them.
Spring: Clear winter debris, check for ice-dam damage along eaves, and inspect flashing that may have shifted from freeze-thaw cycles.
Summer: Look for heat-related shingle curling, check attic ventilation is moving air (a hot, stagnant attic accelerates shingle aging), and clear any moss or algae growth before it spreads.
Fall: Clean gutters before leaf drop finishes, trim overhanging branches, and do a full visual inspection before winter weather arrives.
Winter or post-storm: After any significant wind or hail event, do a ground-level visual check and a storm damage inspection as soon as it’s safe. Watch for ice dams forming at the eaves, which push water backward under shingles.
A few things not to do: don’t power-wash asphalt shingles. The pressure strips granules and shortens the shingle’s life faster than the algae it’s meant to remove. Don’t walk a steep roof (anything over roughly 6/12 pitch) without fall protection, no matter how careful you feel. And don’t ignore moss just because it looks cosmetic. It holds moisture against the shingle surface and speeds up decay underneath.
Pro Tip: For moss and algae, a zinc or copper control strip installed near the ridge works passively with rainwater and avoids repeated chemical treatments. On tile or metal roofs, a mild bleach and water solution applied with a soft brush is safer than pressure washing either material.
Coastal wind and salt air add another layer. Homes near the coast see faster corrosion on metal flashing and fasteners, so those inspections should happen more often than the standard quarterly check, closer to every two months during storm season.
DIY Roof Repairs vs. When to Call a Professional
Some repairs are genuinely within reach for a careful homeowner. Others are a fast way to void a warranty or fall off a roof.
Safe to handle yourself, with reasonable caution:
- Replacing a single damaged shingle. Lift the surrounding shingles gently, pull the old nails, slide the new shingle into place, and re-nail per the manufacturer’s pattern.
- Clearing gutters and downspouts. Use a stable ladder, gloves, and a garden trowel; flush with a hose afterward to confirm flow.
- Caulking small penetrations. A fresh bead of roofing sealant around a vent boot or exposed nail head is a five-minute fix that stops a lot of small leaks.
Call a licensed roofer when:
- Repairs would replace close to 25% or more of a single roof slope, since many municipal codes built on the IRC treat that threshold as a trigger for full-slope replacement rather than a patch
- The roof pitch exceeds roughly 7/12, where standing without professional fall protection is genuinely dangerous
- You suspect decking rot underneath the shingles, which needs to be assessed and often replaced before new material goes down
- The job involves complex flashing, like where a roof meets a wall or a chimney
- The project will take more than a single day, since multi-day roof work needs proper site protection and sequencing
Before you climb up with a toolbox, check your manufacturer’s warranty terms. A lot of shingle warranties are voided by unlicensed repair work, and unpermitted structural changes can create problems when you go to sell the house.
Safety non-negotiables for any DIY roof work: a harness and anchor point on anything steeper than a walkable pitch, rubber-soled shoes, a ladder set at the correct 4:1 angle, and a second person nearby who knows you’re up there. If any of that isn’t available, that’s the signal to stop and call a professional.
Roofing Materials and Tools Every Homeowner Should Recognize
Knowing the vocabulary and the basic wear patterns for each roofing material makes you a better judge of your own roof’s condition, and a sharper conversation partner with a contractor.
Asphalt shingles are the most common residential covering. Watch for curling edges, bald spots where granules have worn away, and cracking, especially on south-facing slopes that get the most sun.
Metal panels hold up well against wind and hail but show wear through fastener backing out, seam separation, and rust starting at cut edges or scratches.
Tile roofs rarely fail from the tile itself. Problems usually show up in the underlayment beneath cracked or slipped tiles, which is why a cracked tile should get fixed quickly even if it looks minor.
Underlayment and ice-and-water shield sit beneath the visible roofing and do the real waterproofing work. You won’t see these unless a roof is opened up, but a contractor upgrading them during a reroof is addressing the layer that actually stops leaks.
For tools, a few are worth renting rather than buying for a one-time job: a ladder stabilizer, a roofing nailer, and a safety harness with anchor points. Items worth owning if you plan to do ongoing maintenance include a pry bar, a chalk line, and a good utility knife.
Pro Tip: If a rental counter offers a pneumatic roofing nailer, ask for a quick demo before you leave. Overdriving nails is the single most common amateur mistake and it weakens shingle hold-down strength significantly.
Material choice also drives your maintenance calendar. Asphalt needs the most frequent visual checks. Metal needs the least routine attention but benefits from an annual fastener check. Tile needs careful walking protocols since cracked tiles are easy to create and expensive to ignore.
Planning a Reroof: Cost Drivers and Timeline
Once repairs start creeping toward a full slope or the roof is simply past its service life, the conversation shifts from patching to planning. A few factors drive most of the cost variation between one reroof quote and another: total roof area, pitch and complexity (multiple valleys and dormers cost more than a simple gable), whether decking needs replacing, ventilation or underlayment upgrades, material choice, and disposal and permitting fees.
Typical timelines: a single repair often wraps in a day. A standard residential reroof usually takes 1 to 3 days for a straightforward roof, longer for steep or architecturally complex homes, and weather can push that out further, especially in stormy seasons when contractors are booked solid.
Before work starts, a short prep checklist helps the day go smoothly:
- Move vehicles out of the driveway and away from the work zone
- Protect landscaping and outdoor furniture near the foundation
- Secure pets indoors, since roofing work is loud and crews come and go through gates
- Photograph the roof and surrounding property beforehand for your own records
Questions worth asking any contractor during the estimate:
- Who handles permitting, and is it included in the quote?
- What warranty covers materials versus labor?
- What’s the payment schedule, and is a deposit required?
- How is daily cleanup and nail sweep handled?
- What’s the process if hidden decking damage is found once tear-off starts?
Why Ridge, Flashing, and Ventilation Decide How Long a Roof Lasts
If you only have time to check three things, check these in this order: ridge, flashing, then ventilation. Ridge caps take the most direct wind exposure on the entire roof, so they’re often the first component to loosen or crack. Flashing, wherever the roof meets a wall, chimney, or another plane, is the most common single point of leak failure across every material type. Ventilation, meanwhile, works quietly in the background, but a poorly ventilated attic can shorten shingle life by trapping heat and moisture that neither the roof deck nor the insulation was built to handle.
A well-maintained roof isn’t the one with the newest shingles. It’s the one where the ridge, flashing, and ventilation have all been checked on the same schedule, every single year, without exception.
Priority order for any inspection:
- Ridge caps first: look for cracking, lifting, or missing sections
- Flashing second: check seals at every wall, chimney, and skylight intersection
- Valleys third: confirm water has a clear path with no granule buildup
- Penetrations fourth: rubber boots and vent seals degrade faster than shingles around them
- Attic ventilation last, but never skipped: confirm intake and exhaust vents are both clear
Pro Tip: Set a calendar reminder to check ridge caps and flashing seals every spring, the same week you change your smoke detector batteries. Pairing habits like that is the easiest way to actually remember.
A Quick Roofing Glossary for Homeowners
- Flashing: metal or rubber material sealing joints where the roof meets walls, chimneys, or vents
- Underlayment: the water-resistant layer installed beneath shingles or panels
- Ridge: the horizontal peak where two roof slopes meet
- Valley: the internal angle where two slopes meet and water concentrates
- Slope: roof steepness, expressed as rise over run (a 3:12 slope rises 3 inches for every 12 inches horizontal)
- TPO: a single-ply membrane commonly used on flat or low-slope roofs
- Ice-and-water shield: a self-adhering membrane installed at eaves and valleys for extra leak protection
For fuller technical definitions, the glossary of roofing terms covers additional industry vocabulary you’ll hear in a contractor estimate.
A Note From the Field
Years spent walking roofs after storms taught me that the damage homeowners miss is never the obvious kind, it’s the flashing seam or the granule loss nobody thought to photograph. This checklist approach exists because it catches those details before they become a bigger claim.
If You’d Rather Hand This Off to a Pro
Not every homeowner wants to be on a ladder with a flashlight, and that’s a completely reasonable call. A licensed contractor brings a level of inspection detail that’s hard to replicate from the ground: full decking assessment, proper permitting, manufacturer warranty registration, and documented storm-damage reporting that holds up with an insurance adjuster.

Buffalo Roofing and Exteriors is the option for South Texas homeowners who’d rather get a straight answer than climb a ladder. When you request a free estimate, expect a full roof walk, photo documentation of every finding, and a written scope that spells out material choice, timeline, and payment schedule before any work starts. On the day of a reroof, crews protect landscaping, manage debris, and walk the property afterward with a magnetic nail sweep. If your roof was damaged in a recent storm, the storm damage restoration guide covers what documentation your insurer will want, and the exterior renovation planning guide is a solid next stop if a reroof is part of a bigger project. Reach out for a free estimate and get a written scope before you commit to anything.
Sources
- Roof Smarter™ | Roofing 101 Guide
- The Texas 25% Rule for Roof Replacement: What It Means for Your Insurance Claim