

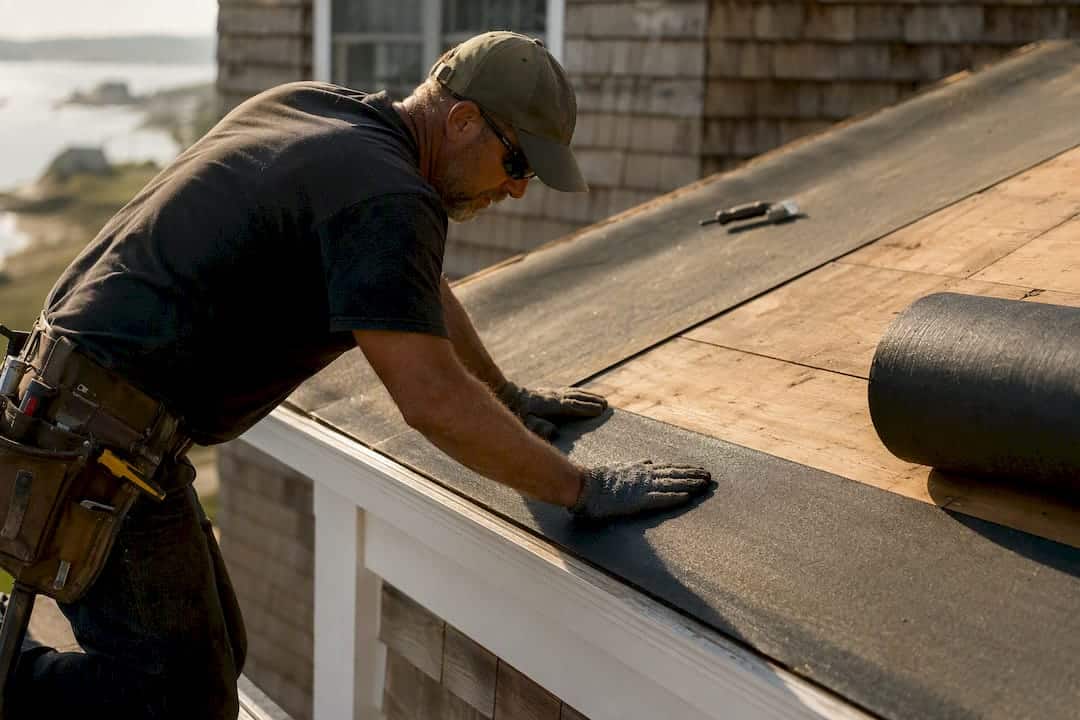
An ice shield roof system uses a self-adhered, rubberized-asphalt membrane at eaves, valleys, and penetrations to stop meltwater from backing up under shingles and leaking into your attic. Most homeowners in cold-climate regions need one, either because code requires it or because the cost of skipping it (rotted decking, ruined drywall, mold remediation) dwarfs the price of the membrane itself.
Here’s the quick decision guide:
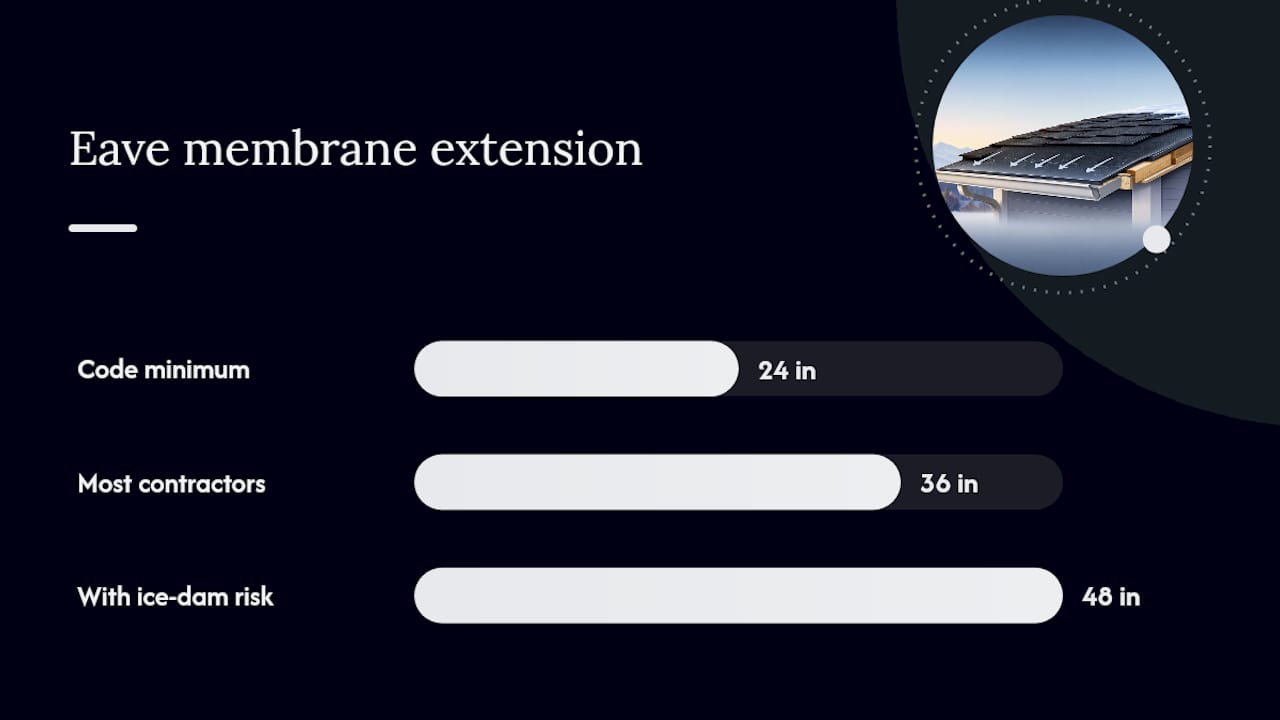
- Required by code: IRC R905.1.2 mandates ice-and-water shield in any region where the average January temperature is 25°F or lower, running at least 24 inches past the interior wall line.
- Strongly recommended even where not mandated: valleys, roof-to-wall intersections, and around skylights, chimneys, and plumbing vents on any home that has seen ice buildup before.
- Optional: warm-climate roofs with no history of ice damming, where a quality synthetic underlayment usually does the job.
Products like Grace Ice & Water Shield have been the industry benchmark for decades, and Buffaloroofingandexteriors specs membrane on nearly every cold-adjacent or storm-exposed roof it installs.
Key Takeaways
An ice shield roof membrane limits leak damage from ice dams and wind-driven rain, but only proper attic insulation and ventilation stop the dams from forming in the first place.
| Point | Details |
|---|---|
| Code minimum vs. best practice | IRC R905.1.2 requires 24 inches of eave coverage in cold climates; most installers extend to 36 to 48 inches. |
| Placement matters most | Eaves, valleys, penetrations, and low-slope sections carry the highest leak risk and need membrane coverage. |
| Installation conditions decide performance | A clean, dry deck and correct application temperature determine whether the adhesive actually bonds. |
| Full-deck coverage has tradeoffs | Whole-roof membrane adds a vapor barrier effect and requires balanced ventilation to avoid trapped moisture. |
| Buffaloroofingandexteriors documents every install | Written coverage scope, product brand, and pre-shingle photos come standard on roof replacement jobs. |
Table of Contents
- What Is an Ice Shield Roof Membrane and How Does It Work?
- Where Does Ice-and-Water Shield Need to Go on a Roof?
- What Separates a Good Install From a Bad One?
- Should You Cover the Whole Roof or Just the Critical Zones?
- How Much Ice Shield Do You Need and What Does It Cost?
- Other Ways to Prevent Ice Dams and Leaks
- What Should a Professional Ice Shield Install Look Like?
- When We Recommend Ice-and-Water Shield
- How Buffaloroofingandexteriors Handles Ice Shield Installation
- Frequently Asked Questions
- Sources
What Is an Ice Shield Roof Membrane and How Does It Work?
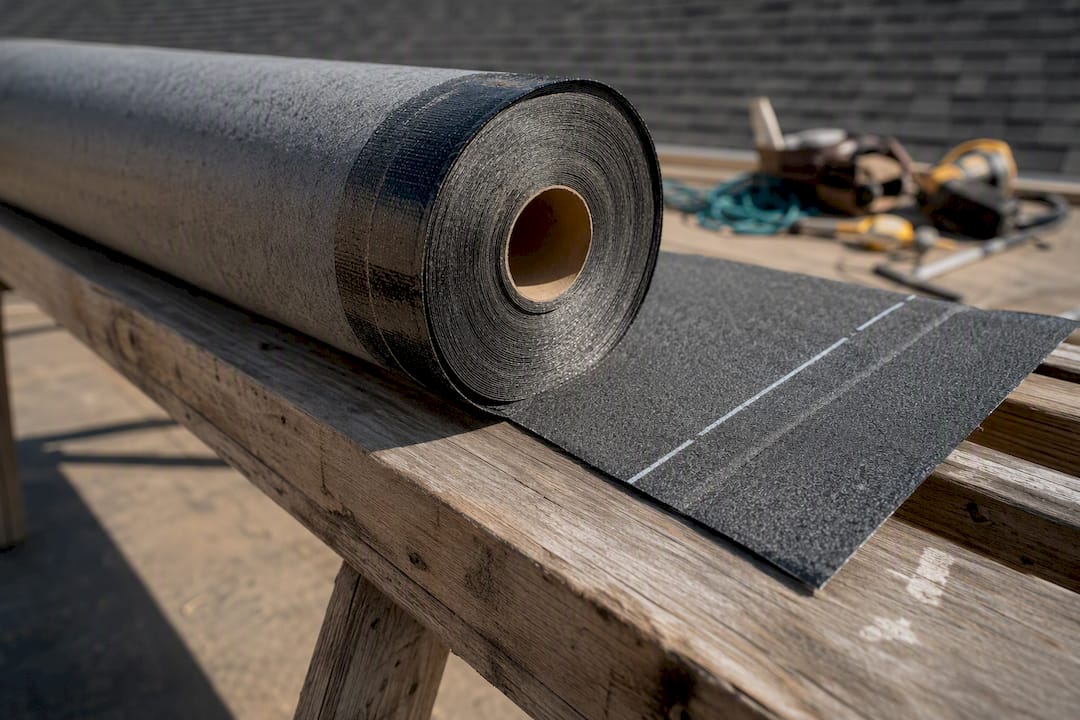
An ice-and-water shield is a self-adhering membrane, not a felt paper or a synthetic sheet stapled to the deck. It’s built from rubberized asphalt adhesive bonded to a top layer, and it sticks directly to clean plywood or OSB without nails holding it in place. That distinction matters because standard underlayment sheds water that’s flowing downhill; it does nothing once water starts moving backward under an ice dam.
Construction varies slightly by manufacturer. Grace Ice & Water Shield pairs rubberized asphalt with a polyethylene film face. Vycor Ice & Water Shield from CertainTeed uses a slip-resistant, cross-laminated polyethylene film over the same adhesive base, with a ripcord release liner for faster application. TopShield’s G300 line goes a different route, using a glass-fiber reinforced, mineral-surfaced face designed for extra durability in valleys and other high-wear zones.
The adhesive doesn’t just lie flat against the deck. It self-seals around roofing nails as shingles get installed through it, closing the puncture instead of leaving an open path for water. That’s the real engineering trick: a membrane that heals itself as fasteners go through it.
Here’s what these products do not do: stop ice dams from forming. They stop the water an ice dam creates from reaching your ceiling. Building science research is blunt about this distinction, noting that ice shield limits damage without preventing the dam itself, since dams form from heat loss through the attic, not from a lack of membrane on the roof deck.
- Rubberized asphalt adhesive bonds cold to the deck and gets tackier as temperatures rise.
- Self-sealing around fasteners is what separates it from felt or synthetic underlayment.
- ICC ESR listings back most major brands’ fire and wind-uplift performance claims.
Where Does Ice-and-Water Shield Need to Go on a Roof?
Placement isn’t a matter of taste. It follows physics: water needs to travel past the point where your attic is warm enough to melt snow above it, then refreeze at the cold overhang.
- Eaves. Membrane runs from the roof edge to at least 24 inches past the interior (warm) wall line, per code minimum. On homes with wide overhangs or a documented ice-dam history, most contractors, including Buffaloroofingandexteriors crews, extend that to 36 to 48 inches.
- Valleys. A full-length center strip covers the entire valley from ridge to eave, since valleys concentrate runoff and are the single most common leak point on complex roofs.
- Penetrations. Plumbing vents, skylights, and chimneys each get membrane wrapped around the curb or boot, sealing the transition where flashing alone tends to fail first.
- Sidewalls and kickouts. Anywhere a roof plane meets a vertical wall, water can wick sideways under siding without a membrane layer diverting it back onto the roof.
- Low-slope sections. Any plane under a 4:12 pitch behaves more like a flat roof for water purposes and generally needs full membrane coverage, not just eave protection.
Roll width matters for coverage math. A standard 36 inch roll set 3 feet up a low-slope section covers less linear footage per roll than the same roll on a steep pitch, because slope stretches material differently across the plane. On a 6:12 roof, a 3 foot vertical rise translates to roughly 3.4 feet of actual roof surface, so always calculate from roof-plane distance, not ground-level height.
Sequencing at the eave is fixed: membrane goes down against the deck first, and drip edge flashing installs over the membrane, not under it. That order keeps water moving off the drip edge rather than behind it.
Pro Tip: Ask your contractor to photograph the membrane before shingles go on, and put exact coverage dimensions (in inches, per roof section) in the written contract. That single request settles most coverage disputes before they start.
What Separates a Good Install From a Bad One?
Membrane performance depends almost entirely on adhesion, and adhesion depends on conditions the crew controls, not the product itself. A perfect roll of Grace or Vycor membrane installed on a wet deck will fail the same way a cheap one does.
- Deck must be clean, dry, and free of debris or old fastener heads before the roll goes down.
- Most manufacturers set a minimum application temperature, commonly around 40°F, below which the adhesive won’t bond properly without priming.
- Laps and overlaps typically run at least 3 to 6 inches depending on the product; skimping here leaves seams that can separate.
- Valleys get installed before field shingles, running the full length in one continuous piece where possible.
- Shingle nails driven through the membrane are supposed to seal, not just puncture. Cap nails are for temporary hold only, before the adhesive fully sets.
Manufacturer data sheets exist for a reason: they document temperature limits and adhesion requirements that installers frequently skip under schedule pressure. A membrane laid on a frosty November morning without a heat gun or primer is a membrane that may never bond correctly.
Watch for these red flags on a quote or during install:
- Coverage described vaguely (“ice shield at the eaves”) instead of exact inches.
- No mention of valleys or penetrations in the scope of work.
- A crew stapling the membrane instead of relying on adhesive contact.
- No photos offered before the deck gets covered by shingles.
- A bid that’s dramatically cheaper than competitors with no explanation of coverage differences.
Should You Cover the Whole Roof or Just the Critical Zones?
For most residential roofs, eaves, valleys, and penetrations cover the actual risk areas, and pairing that with better attic insulation addresses the root cause. Full-deck coverage is the exception, not the default.
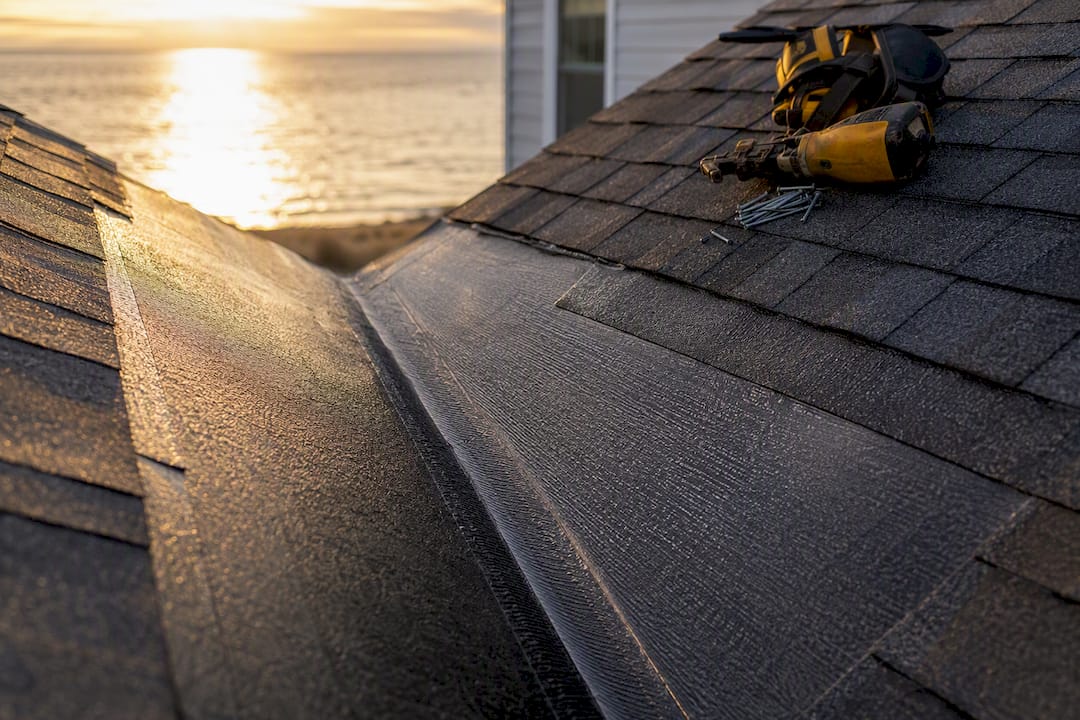
Covering the entire deck in membrane does buy you a genuine secondary water barrier. It also creates a real vapor-barrier effect across the whole roof, which requires balanced soffit and ridge ventilation to avoid trapping moisture against the underside of the deck. Skip that ventilation upgrade and full coverage can trade one moisture problem for another.
Full coverage tends to make sense in specific situations, especially for coastal or hurricane-prone roofs where wind-driven rain risk is high, as explained by Crowley Exteriors:
- Hurricane-prone coastal roofs where wind-driven rain, not just ice, is the primary threat.
- Low-slope roof sections under 4:12 pitch, where water sits longer against the surface.
- Homes with a documented history of chronic leaks despite eave and valley coverage.
- Metal roofing, which requires a high-temperature variant rated for surface temperatures up to roughly 240°F, since standard membranes can soften and slide under a hot metal panel.
Pro Tip: If your roof has a cathedral ceiling with little to no attic space for ventilation improvements, full-deck coverage combined with a properly vented cold-roof assembly is often the more reliable fix than eave-only membrane.
How Much Ice Shield Do You Need and What Does It Cost?
Rolls typically run 36 inches wide and 65 to 75 feet long, covering roughly 200 square feet per roll before accounting for overlap. Convert your eave length, valley length, and penetration count into linear feet, then divide by roll coverage to get a rough material count.
Installed costs vary by region and complexity, but material plus labor for standard eave and valley coverage generally runs a modest premium over standard underlayment for the same square footage, with metal-roof high-temperature variants costing more due to the specialized adhesive formulation. Extending eave coverage from the 24 inch code minimum to 36 or 48 inches adds material cost but rarely adds meaningful labor time, since the crew is already working that section.
Here’s a rough estimate for a 2,400 square foot home with a moderately complex roofline:
- Always round up roll counts. Cutting a roll short mid-valley means an unplanned seam in the worst possible spot.
- Ask your contractor to itemize ice shield separately from general underlayment on the invoice.
Other Ways to Prevent Ice Dams and Leaks
Membrane is one layer in a larger defense, not the whole system. Root-cause fixes target why dams form; surface measures like membrane and heat cables limit what happens once one does.
- Attic insulation upgrades stop warm air from reaching the underside of the roof deck, which is the actual driver of ice-dam formation.
- Balanced ventilation (soffit intake plus ridge exhaust) keeps the roof deck temperature closer to outdoor air temperature, reducing melt-refreeze cycles.
- Heat cables offer a targeted, lower-cost fix for chronic trouble spots but don’t address the underlying heat-loss problem.
- Manual snow removal after major storms reduces the meltwater volume available to form a dam in the first place.
Think of membrane as insurance and insulation as prevention. A homeowner dealing with recurring ice dams despite good membrane coverage almost always has an attic ventilation or insulation gap that no amount of membrane will fix. The two measures work best together, especially on older homes where attic insulation has settled or compressed over the years.
What Should a Professional Ice Shield Install Look Like?
A competent crew follows a predictable sequence: roof inspection, deck prep (including any needed repairs or priming), membrane layout starting at eaves and valleys, drip-edge installation over the membrane, penetration wrapping, field underlayment, shingles, and cleanup. Photo documentation should happen at each stage before it gets covered by the next layer.
Before signing a contract, ask:
- What are the exact coverage dimensions in inches for eaves, and which sections get valley or penetration coverage?
- Which product brand is being used, and does any section (like a metal roof) require a high-temperature variant?
- What’s the minimum application temperature for that product, and how will the crew handle a cold snap?
- Who takes photos, and will they be provided before the roof is closed up?
- What does the warranty cover, and for how long?
Red flags at this stage mirror the installation pitfalls above: vague scope language, no photo commitment, or a bid that undercuts competitors by a wide margin with no explanation. A documented repair or install process with clear photos and product references is the baseline you should expect from any licensed roofing contractor, not a premium add-on.
When We Recommend Ice-and-Water Shield
We spec membrane on nearly every roof with valleys, penetrations, or a cold-climate eave exposure, and we push for extended eave coverage whenever a home has any ice-dam history at all. Membrane alone won’t fix a poorly insulated attic, so we push clients toward the ventilation and insulation conversation at the same time, not as an afterthought. Whichever roofer you choose, insist on photo documentation and a written coverage scope. That’s the difference between a warranty claim you can prove and one you can’t.
How Buffaloroofingandexteriors Handles Ice Shield Installation
Buffaloroofingandexteriors installs ice-and-water shield as standard practice on roof replacements across South Texas, with particular attention to storm-prone coastal zones where wind-driven rain matters as much as winter ice. Every job includes a written scope specifying exact coverage dimensions, the product brand used, and whether a high-temperature variant is needed for metal roofing sections.

Crews document installation with photos before shingles cover the membrane, so you have a paper trail if a warranty question ever comes up. For homes with low-slope sections or flat roof areas, where full-deck coverage is often the right call, Buffaloroofingandexteriors’s flat roof services cover the specific membrane and ventilation needs those roofs require. If you’re not sure whether your roof needs code-minimum eave protection or something more aggressive, request a free roof inspection and get a written estimate that spells out coverage, materials, and warranty terms before any work starts.
Frequently Asked Questions
Is ice-and-water shield the same thing as roofing underlayment?
No. Standard underlayment sheds water flowing downhill; ice-and-water shield is a self-adhered membrane that seals to the deck and around fasteners, which is what allows it to stop backed-up water that ice dams push uphill under shingles.
Do I need ice shield if I live in a warmer climate?
Probably not for the whole roof, but valleys and penetrations still benefit from it regardless of climate, since those areas concentrate water flow even without ice-dam risk.
Can ice shield be installed over an existing roof without tearing off shingles?
Generally no. The membrane needs direct adhesion to a clean, dry deck, so it typically goes down during a full roof replacement or a tear-off of the affected section, not over existing shingles.
How long does ice-and-water shield last?
Most manufacturer data sheets support performance for the life of the roof system, generally matching a 20 to 30 year asphalt shingle warranty, provided the adhesion was correct at install.
What happens if a roofer only staples the membrane instead of using the adhesive?
Stapling without proper adhesive contact defeats the entire purpose of the product, since the self-sealing property around fasteners depends on the rubberized asphalt bonding to the deck, not on mechanical fasteners holding it in place.
Sources
- Ice and Water Shield: 2026 Cost + Code Guide | The Roofing Brief
- BSI-046: Ice Dam | Building Science Corporation
- What is an ice and water protector? | IKO