

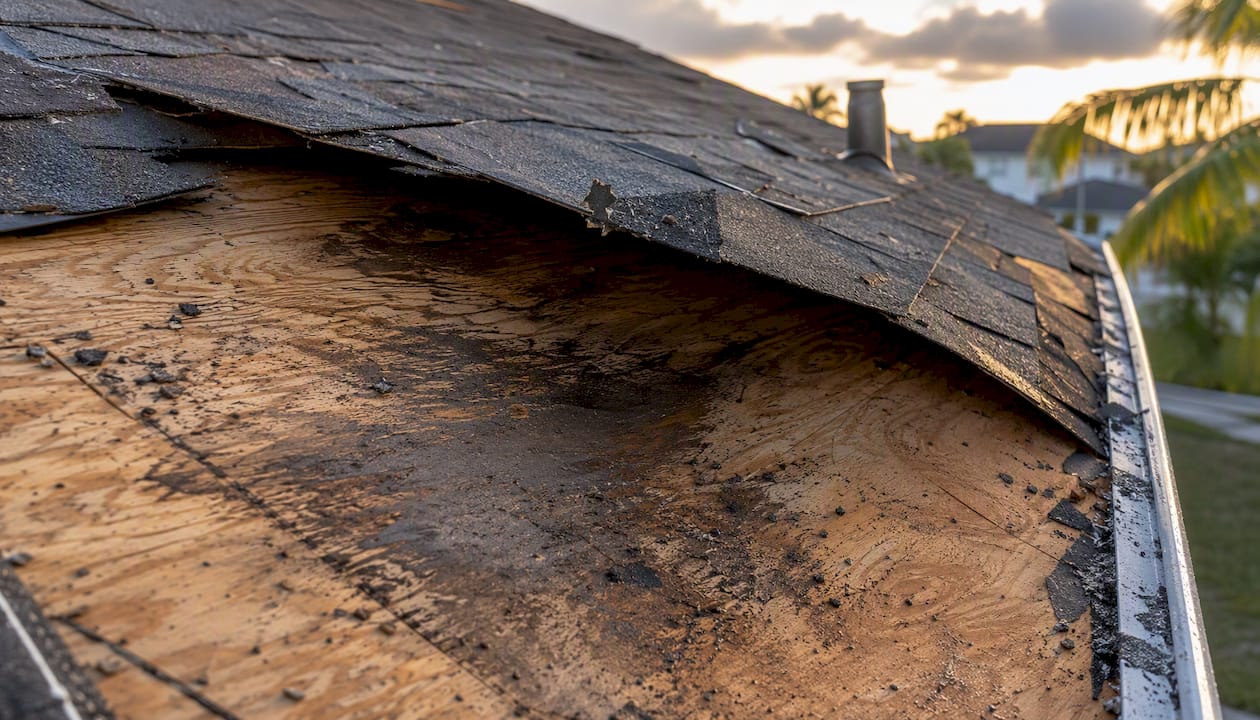
A soft or spongy spot on your roof means the decking underneath has absorbed moisture and lost its structural integrity. This is not a cosmetic issue you can leave for later. It signals wood that’s rotting, delaminating, or losing its grip on the fasteners holding your roof together.
Stay off it. Do not walk on a suspected soft area, and don’t let anyone else up there either, since a weakened deck can give way under body weight. Your next move is to check the attic directly beneath the soft spot from a safe vantage point, looking for staining, sagging sheathing, or a musty smell. If you can’t get a clear look, or the roof is steep, wet, or otherwise unsafe to access, skip the DIY step and call a roofer.
The cause usually falls into one of two buckets: water getting in from above through a failed flashing or damaged shingle, or moisture building up from inside the house through poor ventilation and condensation. Both wreck decking. Only one of them shows up as an obvious leak, which is why some soft spots seem to appear out of nowhere.
Key Takeaways
A soft spot on a roof means the decking has already absorbed enough moisture to weaken structurally, and the fix must address both the wood and whatever let the water in.
| Point | Details |
|---|---|
| Soft spot equals weakened decking | The area is not cosmetic; it means saturated wood that has lost strength and needs prompt evaluation. |
| Stay off the roof | Avoid walking on or near the suspect area and inspect from the attic or ground instead. |
| Cause determines the fix | Leaks need flashing or shingle repair; condensation needs ventilation and moisture source correction. |
| Cost rises fast with delay | Small deck repairs start around $300 but can escalate into thousands once rot spreads to framing. |
| Buffaloroofingandexteriors offers full diagnosis | Forensic inspections combine attic checks, moisture readings, and on-roof evaluation before recommending repair or replacement. |
Table of Contents
- What Causes Soft or Spongy Spots on a Roof
- How Do You Spot Soft Spots on a Roof?
- Why Soft Spots on a Roof Are a Serious Problem
- How to Confirm a Soft Spot Before You Call a Contractor
- What Are the Repair Options and What Do They Cost?
- When Is It Repair Only, and When Do You Need a Full Replacement?
- How to Prevent Soft Spots From Coming Back
- Why Do Soft Spots Sometimes Appear Without a Leak?
- Does Insurance Cover Soft Spot Repairs?
- How to Choose a Roofing Contractor for Soft Spot Repairs
- What Should You Do Right Now?
- An Inspector’s View: What Homeowners Usually Miss
- Get a Local Inspection Before a Small Repair Becomes a Big One
- Sources
What Causes Soft or Spongy Spots on a Roof
Roof decking gets soft for a fairly short list of reasons, and figuring out which one applies to your house usually starts with location. A soft spot in a valley points somewhere different than one near the ridge.
- Active roof leaks: failed flashing around chimneys, skylights, or vent pipes; cracked or missing shingles; nail punctures that let water track sideways under the shingle mat before it soaks into the deck.
- Condensation and vapor drive: warm, moist indoor air migrates into the attic and condenses on the underside of a cold roof deck, saturating the wood from below with no exterior leak at all.
- Inadequate attic ventilation: without enough intake and exhaust airflow, humidity has nowhere to go and lingers against the sheathing.
- Clogged gutters and ice dams: backed-up water has nowhere to drain, so it sits against the roof edge and works its way under the shingles.
- Leaking exhaust vents or plumbing stacks: bathroom fans and dryer vents that terminate too close to the deck, or that leak along the duct run, dump warm moist air directly onto cold framing.
- Poor flashing details: undersized step flashing, missing kick-out flashing, or flashing that was never properly integrated with the shingle courses.
- Age and decking material: older roofs accumulate small failures that compound, and the decking material itself matters. Oriented strand board (OSB) swells and loses its internal bonding once saturated, while plywood tends to hold its shape longer under the same moisture exposure, according to technical guidance on roof softening.
A soft spot tucked into a valley or clustered around a chimney usually traces back to flashing or a leak entry point. A soft spot near the ridge, or spread evenly across a section of roof with no obvious penetration nearby, points more toward condensation from the inside.
How Do You Spot Soft Spots on a Roof?
You can catch most soft-spot problems early if you know where to look, both outside and in the attic, without ever setting foot on the damaged section.
From the ground, scan the roofline for shingles that look wavy, buckled, or slightly sunken compared to the surrounding field. Binoculars help here more than you’d expect. Look for nail heads that have popped through the shingle surface or small gaps where a fastener has backed out, both signs the deck underneath is shifting.
Inside the attic is where the real evidence lives. Bring a flashlight and look at the underside of the roof sheathing for dark staining, discoloration, or a texture that looks swollen rather than flat. Wet or compressed insulation directly below a stain is a strong clue. So is a musty smell that hits you as soon as you climb up, even before your eyes adjust. Rust on nail heads poking through the deck is another tell, since that only happens with sustained moisture exposure.
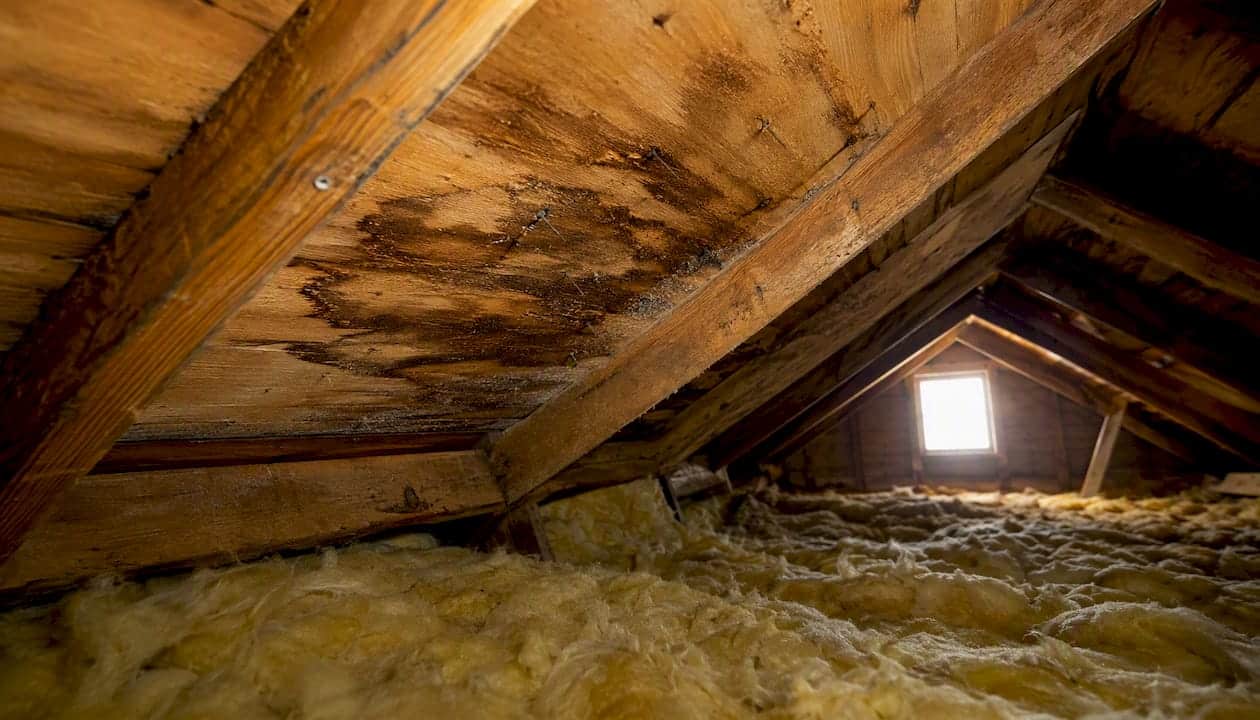
If you want to confirm what your eyes are telling you, gently press upward on the underside of the sheathing with your fingertips, not a tool that could puncture it, and feel for give or a spongy texture. Never step onto the roof deck itself to test a soft spot from above; that’s exactly the scenario that causes injuries. A basic pin-type moisture meter, sold at most hardware stores, gives you a more objective reading than touch alone, and a phone camera lets you document what you find for a contractor later.
Why Soft Spots on a Roof Are a Serious Problem
A soft spot isn’t a one-time repair waiting patiently for your schedule to open up. It’s active decay, and decay spreads.
The immediate risks show up fast. Softened decking holds fasteners poorly, so shingles nailed into rotting wood are more likely to lift or blow off in the next windstorm. That opens a second leak path right where you already have a moisture problem. Mold takes hold in wet insulation and framing within days in warm, humid climates, and that mold doesn’t stay contained to the attic. It affects indoor air quality throughout the house once spores work into the living space through recessed lighting, HVAC returns, or attic hatches.
Left alone, the damage doesn’t stop at the deck. Rot spreads laterally to adjacent sheathing panels and can migrate into the rafters or trusses that the decking is nailed to. Structural framing repairs cost far more than sheathing swaps, and in extreme, long-neglected cases, a severely compromised section can sag or partially collapse under weight, whether that’s accumulated water, snow load, or a person walking across it.
The cost curve on this is steep. A single early-stage deck repair can run in the low hundreds of dollars. Left to spread across multiple panels and into framing, that same problem escalates into a job costing thousands, and a full reroof with structural repair can push into the tens of thousands. The math rewards speed.
How to Confirm a Soft Spot Before You Call a Contractor
Good documentation now saves you time, money, and arguments later, whether you’re negotiating repair scope with a roofer or filing an insurance claim.
Start with a methodical walkthrough:
- Photograph the exterior from the ground, capturing the suspected area along with a wider shot for context, so a contractor can locate it on the roof plan.
- Bring a second person to the attic rather than going alone, both for safety and so someone can hold the light while you inspect.
- Press gently upward on the underside of the deck near the stain or discoloration, never stepping onto the roof itself to test from above.
- Note every stain, smell, or soft texture you find, including approximate size and location relative to a chimney, vent, or ridge.
- Photograph everything, labeling images with the date, time, and a rough location description (“north slope, 3 feet east of bathroom vent stack”).
- Stop and call a professional the moment you find wet or clearly soft decking, or if the roof is steep, icy, or otherwise unsafe to access from inside or out.
A roofing contractor takes this further with tools most homeowners don’t own. A pin-type or pinless moisture meter gives quantitative readings across the deck rather than a single spot check. Infrared thermal scans reveal temperature differences that often correspond to trapped moisture, even under an intact roof surface. Where readings are ambiguous, a contractor will do a small tear-back, pulling shingles and underlayment to physically inspect the decking and fasteners underneath, along with attic humidity readings to distinguish a leak from a ventilation problem. A thorough forensic inspection that combines attic and on-roof checks catches damage that a drone flyover or a look from the driveway simply misses.
Pro Tip: Take your attic photos at the same time of day you’ll be meeting the contractor for the estimate. Consistent lighting makes it much easier for them to match your photos to what they find during their own inspection, which speeds up the scoping conversation.
What Are the Repair Options and What Do They Cost?
Repair scope depends almost entirely on how far the damage has spread by the time you catch it, which is the whole argument for early detection.
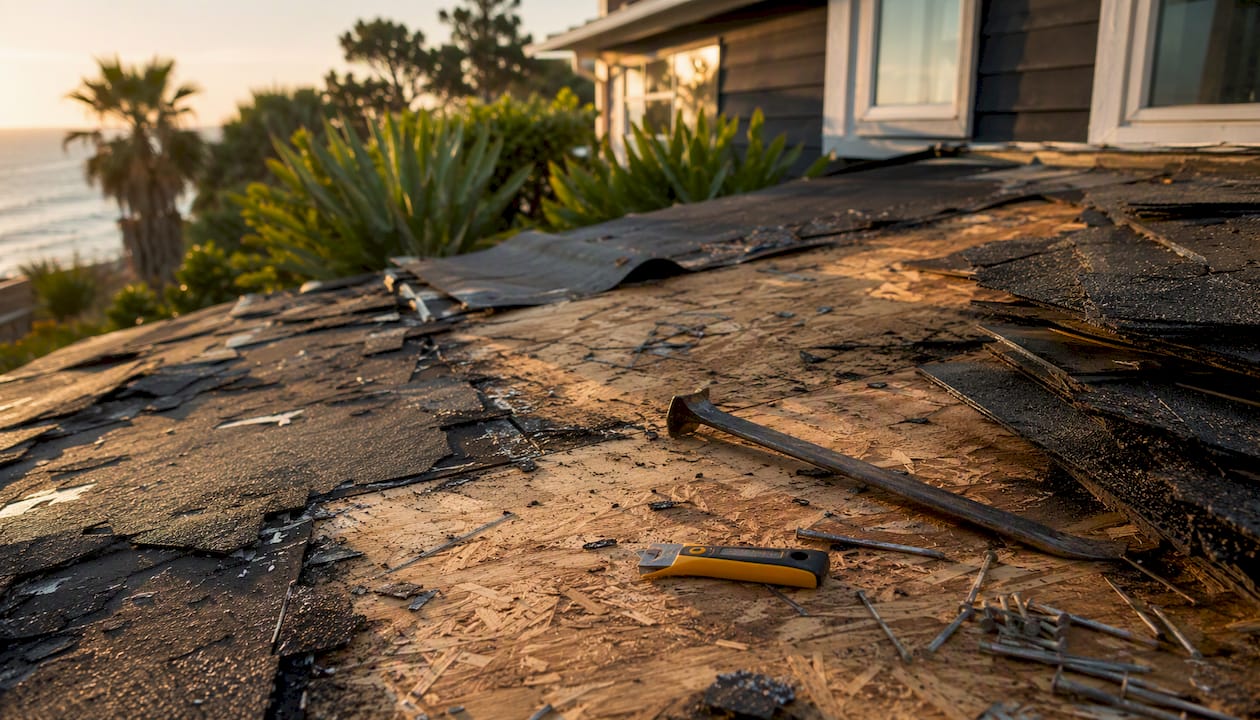
A single soft panel near a flashing detail is usually a localized sheathing swap: cut out the affected OSB or plywood panel, replace it, re-flash the problem area, and reshingle that section. Multiple soft spots scattered across one roof plane often mean a localized reroof of that section, tearing off shingles and underlayment across a wider area to catch hidden damage the moisture meter didn’t flag. If framing members like rafters or trusses show rot, that’s a structural repair layered on top of the decking work. And if the damage is widespread or the roof was already near the end of its service life, a full replacement becomes the more sensible option rather than patching a roof that’s failing in multiple places at once.
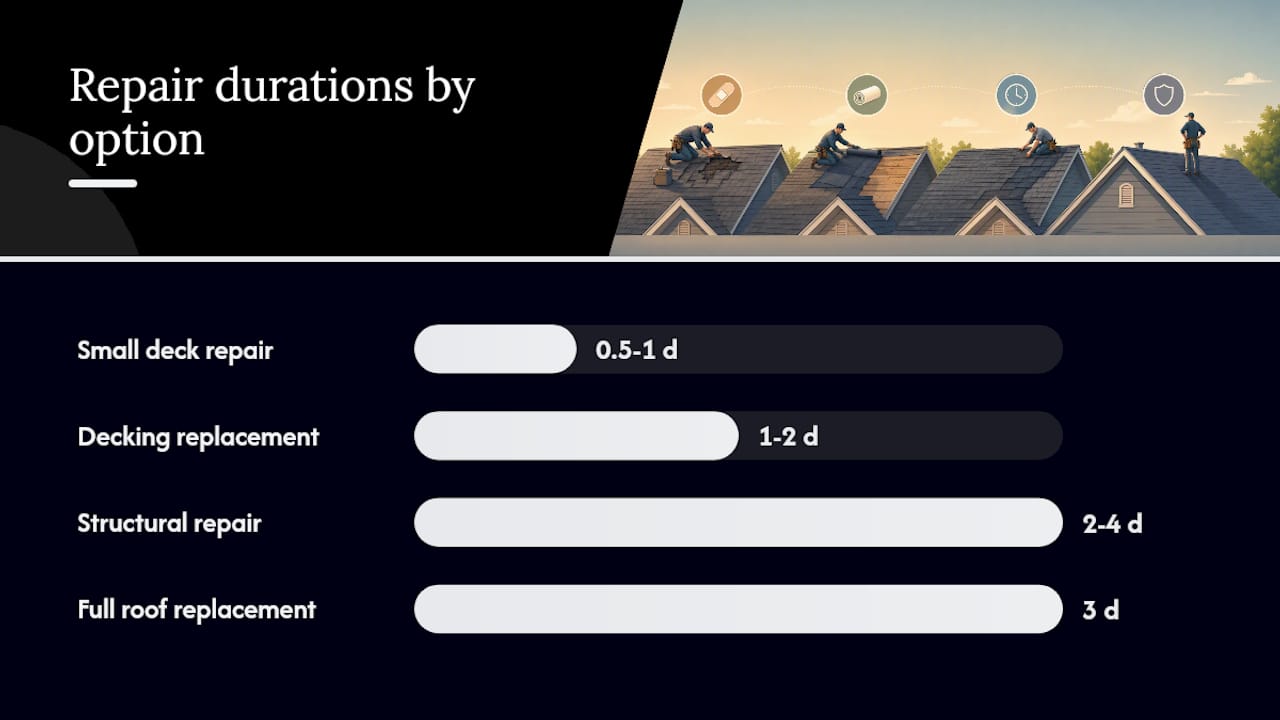
| Repair Category | Typical Damage | Average Cost Range | Typical Repair Time |
|---|---|---|---|
| Small deck repair | One panel, isolated moisture | cost starting in the low hundreds | Half day to 1 day |
| Decking replacement | Several panels, active rot | moderate repair cost range | 1–2 days |
| Structural repair | Rafter or truss damage | substantial repair cost range | 2–4 days |
| Full roof replacement | Widespread deck and framing loss | higher repair cost range | 3 days |
These cost bands shift with roof pitch, how many roofing layers already exist, whether the decking is OSB or plywood, and how much hidden framing damage the crew finds once they open things up. Steep or multi-story roofs cost more to access safely. Permit fees and waste disposal add to the bottom line in most municipalities, and they’re worth asking about upfront rather than finding them buried in a final invoice.
Before you sign anything, weigh the roof’s age against the repair cost. A 20 year old roof with a $2,000 decking repair might be a poor investment compared to moving that money toward a replacement that resolves ventilation issues at the same time. And whatever repair path you choose, fixing the moisture source, whether that’s a leaky vent, missing insulation, or a ventilation gap, matters as much as replacing the wood, or you’ll be back here in a few years.
When Is It Repair Only, and When Do You Need a Full Replacement?
A single small panel near one flashing detail, on a roof under 15 years old, with no other soft spots found during inspection, is a textbook repair-only scenario. Swap the panel, fix the flashing, move on.
The picture changes with scale. Multiple soft areas spread across two or three different roof planes, especially when they show up near several valleys or high points rather than clustering around one obvious leak source, usually points to a systemic problem, either widespread flashing failure or attic-wide condensation, not a single bad spot. That’s a different conversation with your contractor.
Run through this checklist before deciding:
- Is it one panel or several? One is usually a repair; three or more spread across the roof often means replace.
- How old is the roof? A roof past 20 years with active soft spots is a weaker candidate for spot repair.
- Is there a history of recurring leaks in the same general area, even after past repairs?
- Does the framing show rot, not just the decking? Structural damage tips the scale toward larger scope.
- How many valleys or high points are affected? Damage confined to one location is more repairable than damage scattered across the roof’s geometry.
If a contractor’s estimate lists repair as an option but hedges heavily with phrases about “monitoring” the rest of the roof, that’s often a signal they see early signs of a wider problem they can’t fully price yet. Ask directly what they’re watching for.
How to Prevent Soft Spots From Coming Back
Prevention here is mostly about controlling moisture before it ever reaches the deck, and that means treating your roof and your attic as one connected system.
Build a seasonal habit around these checks:
- Clean gutters at least twice a year, more often under trees, so water drains away instead of backing up under the shingle edge.
- Inspect flashing around chimneys, skylights, and vent pipes each spring for gaps or lifted edges.
- Check attic ventilation to confirm intake and exhaust vents are clear of insulation and debris, since blocked vents defeat the whole system.
- Verify exhaust vent terminations for bathroom fans and dryers actually exit through the roof or wall rather than dumping into the attic space.
- Walk the roof surface after major storms, from the ground with binoculars if you’re not comfortable getting closer, checking for new damage.
Beyond the checklist, a few structural fixes make a bigger difference than routine maintenance alone. Confirming your attic has the right balance of intake and exhaust ventilation for its size is one of the highest-leverage prevention moves a homeowner can make, and it pairs directly with sealing air leaks around can lights, attic hatches, and plumbing penetrations that let warm, moist household air escape upward in the first place. If your home has a particularly condensation-prone roof assembly, cathedral ceilings with limited airflow, or minimal insulation between living space and deck, an above-deck rigid insulation retrofit or a conversation with a building enclosure specialist can address the root cause rather than the symptom. That’s a bigger project, but it’s the fix that actually stops the cycle rather than just patching it every few years.
Why Do Soft Spots Sometimes Appear Without a Leak?
Homeowners often assume a soft spot means water got in from outside somewhere. Sometimes it doesn’t, and that’s the part that catches people off guard.
Hygrothermal modeling from Oak Ridge National Laboratory shows that interior moisture can migrate up into the attic, hit a cold roof deck, and condense there directly, saturating the wood from the underside with the roof membrane still fully intact above it. There’s no punctured shingle, no failed flashing, nothing a visual roof inspection from outside would ever catch. The lab’s modeling also found that adding insulation above the deck lowers moisture levels below the threshold where decay sets in, over multi-year simulations, while highly reflective roof membranes can actually raise the risk in assemblies where interior humidity is already high, since a cooler deck surface gives condensation more opportunity to form.
A recurring pattern across industry investigations: improperly terminated or leaky exhaust vents rank among the most common hidden sources of the interior moisture driving this kind of decay, described by researchers as one of the biggest overlooked contributors to condensation damage in roofs.
That framing comes from field investigations covered by IIBEC, and a separate WJE webinar on wood-framed low-slope roofs adds that duct leakage and fully insulated roof cavities without adequate ventilation compound the problem across a range of climate zones, not just humid coastal regions.
The telltale signs that you’re dealing with condensation rather than a leak: soft spots near the ridge or other high points rather than clustered around a single penetration, decay that a tear-back can’t trace to any entry point above it, and bathroom or kitchen exhaust ducts that turn out to be disconnected or terminating inside the attic instead of outdoors. When those signs show up, the fix isn’t just decking replacement. It’s air sealing the attic floor, extending or properly terminating exhaust vents, and in more complex assemblies, bringing in a building enclosure consultant who can model the specific insulation and ventilation setup rather than guessing.
Pro Tip: If your contractor replaces a soft deck panel but never asks about your bathroom fan ducting or attic insulation depth, ask them directly. Replacing wood without addressing the moisture source is a repair that’s likely to fail again within a few years.
Does Insurance Cover Soft Spot Repairs?
Coverage depends heavily on cause, and insurers draw a hard line between sudden damage and gradual deterioration.
Most homeowner policies exclude damage attributed to wear and tear, lack of maintenance, or long-term neglect, which unfortunately describes a large share of condensation-driven and slow-leak soft spots. Where you have a real shot at coverage is sudden, identifiable storm or accidental damage: a tree limb that punctured the roof, hail that cracked shingles and let water in over a short window, or wind that tore back a section of roofing during a named storm.
Build your documentation before you file, not after an adjuster asks for it:
- Photos of the damage taken as soon as possible after the storm event, timestamped where your phone allows it.
- A written inspection report from a licensed contractor identifying probable cause and extent of damage.
- A detailed repair estimate breaking out labor, materials, and any structural components.
- The date and details of the storm itself, since insurers often cross-reference claims against regional weather data.
Timelines vary by the size of the job and how busy local contractors are after a regional storm event, but here’s a general planning range:
| Stage | Typical Duration |
|---|---|
| Initial inspection | Same day to 2 days from first call |
| Minor spot repair | 1–2 days once scheduled |
| Decking replacement | 2–4 days depending on panel count |
| Full reroof | 3 days, weather permitting |
If your claim is storm-related, our storm damage restoration guide walks through documentation in more depth, and a resource like this temporary fix guide covers short-term measures if you’re waiting on a claim decision before permanent repairs begin.
How to Choose a Roofing Contractor for Soft Spot Repairs
The contractor you hire determines whether this gets fixed once or becomes a recurring line item on your home maintenance budget. A few questions separate the professionals from the crews that’ll patch the surface and move on.
Before signing anything, ask about:
- Licensing and insurance, confirmed directly with the state licensing board rather than taking their word for it.
- References from similar jobs, specifically decking or condensation repairs, not just general reroofing.
- Inspection methodology, whether they check the attic and use moisture readings or diagnostic tools, or just eyeball the roof from a ladder.
- Warranty terms, covering both workmanship and materials, and for how long.
- A written scope of work that names exactly which panels, framing, and flashing details are included in the price.
A thorough inspection includes a visual attic walkthrough, moisture meter readings across the suspect area, and a tear-back where visual and moisture evidence don’t line up cleanly. You should walk away with a written report that includes photos, the recommended scope of repair, and an honest assessment of urgency, not just a verbal “yeah, that needs fixing.” A detailed scope upfront is what prevents the surprise change orders that turn a $1,500 estimate into a $4,000 invoice halfway through the job.
What Should You Do Right Now?
If you’ve confirmed a soft spot, or even strongly suspect one, here’s the order of operations that actually protects your home and your budget.
- Stay off the affected area entirely, and keep kids, pets, and anyone else off the roof surface until a professional clears it.
- Check the attic from safe footing, or skip that step and call a roofer directly if access is unsafe.
- Limit time spent in rooms with a musty smell below the affected area until you know whether mold is involved.
- Get temporary protection in place if rain is forecast before a permanent fix can happen. A tarp or temporary flashing from a licensed contractor buys time; it is not a repair, and it shouldn’t sit there for months.
- Compare contractor bids using your own photos and moisture readings as the baseline, so you’re comparing apples to apples on scope rather than just the bottom-line price.
- Prioritize the repair by urgency, addressing active leaks or structural concerns first, and cosmetic or minor issues afterward.
An Inspector’s View: What Homeowners Usually Miss
Most homeowners who call about a soft spot are focused entirely on the wood. They want to know how big the hole is and what it costs to patch. That’s a reasonable instinct, but it skips the more important question: why did that wood get wet in the first place?
The pattern shows up constantly in condensation-prone assemblies, especially in coastal climates where indoor humidity runs high for much of the year. An inspector walks the attic and finds a bathroom exhaust duct that’s been disconnected for years, quietly dumping warm, moist air into the attic every time someone showers. Nobody notices because there’s no dripping, no stain on the ceiling, nothing that screams “leak.” The moisture just does its slow work on the underside of the deck until a soft spot finally shows up, often nowhere near the duct itself, which throws people off the scent entirely.
What separates a useful inspection from a rushed one is whether the contractor treats the roof and the attic as two halves of the same system. A rapid, honest inspection means checking both, documenting everything with photos and moisture readings, and giving you a straight answer about whether you’re looking at a $600 panel swap or a $4,000 job with a ventilation fix attached. Homeowners deserve to know which one they’re actually facing before they agree to anything.
If you’ve found a spongy area and want a second set of eyes on it, a free inspection should include an attic walkthrough, exterior roof assessment, and moisture readings where applicable, with a written summary you can actually use to compare bids.
Get a Local Inspection Before a Small Repair Becomes a Big One
Waiting on a soft spot rarely makes it smaller. Buffalo Roofing and Exteriors handles forensic-level roof inspections across the Corpus Christi, San Antonio, and Victoria area, which means you get an attic check, moisture diagnostics, and an on-roof assessment in one visit instead of piecing together guesses from a driveway glance.

Depending on what we find, the scope might be a straightforward decking swap, a localized reroof, or in more involved cases, addressing a flat roof assembly where condensation risk runs higher. Every estimate comes with a written scope, workmanship and material warranty details, and financing options if the job runs larger than expected. You’ll know the real cause, the real cost, and the real timeline before you commit to anything.
Start with a free estimate through our Corpus Christi and South Texas service page, and if terminology in your inspection report throws you, our roofing terms guide breaks down the jargon so you know exactly what you’re paying for.
Sources
- Oak Ridge National Laboratory (ORNL) hygrothermal study summary
- “Leaky” Exhaust Vents – The 500-lb Gorilla of Condensation Problems | IIBEC
- Condensation problems with wood-framed low-sloped roof assemblies | WJE webinar
- Is it normal if your roof has soft or spongy spots? | Lifetime Xteriors
- Soft Spots on Your Roof? Repair Costs Rise Fast in 2026 | FixUrge
Recommended
- Top Signs Your Roof Needs Repairs Before It’s Too Late | Buffalo Roofing & Exteriors | San Antonio to Corpus Christi, TX
- How to Spot Roof Leaks Before They Cause Real Damage
- How to Repair Roof Leaks for Long-Lasting Protection
- How to Spot and Fix Roof Leaks Before They Lead to Major Damage | Buffalo Roofing & Exteriors | San Antonio to Corpus Christi, TX