
TL;DR:
- Weatherproof caulking is a flexible exterior sealant designed to resist water, UV rays, and temperature changes while accommodating joint movement. Properly choosing, preparing, and applying the right type of sealant ensures long-lasting protection against weather-related damage. Surface cleaning, correct timing, and product selection based on material compatibility are essential for optimal results.
Weatherproof caulking is a flexible exterior sealant engineered to resist water, air infiltration, UV radiation, and temperature fluctuations while handling joint movement greater than 12.5%. The industry standard term is “exterior sealant,” though homeowners widely call it weatherproof caulk. The three most common types are silicone, polyurethane, and siliconized acrylic, each built for different surfaces and conditions. Understanding what is weatherproof caulking and how to use it correctly is the difference between a repair that lasts a decade and one that fails by next spring. This guide covers every choice you need to make, from material selection to application temperature, so your exterior joints stay sealed through whatever the weather delivers.
What is weatherproof caulking and how does it differ from standard caulk?
Weatherproof caulking is defined as a sealant formulated to flex with a structure’s natural movement without cracking or losing adhesion. Standard interior caulk handles minimal movement and is designed for stable indoor environments. Exterior joints expand and contract with heat, cold, and moisture, and a rigid filler simply cannot keep up. Using rigid caulk in high-movement joints causes cracks and joint failure on exterior surfaces, which is why the distinction matters.
The professional distinction is straightforward: caulk is a lower-movement, paintable filler suited for interior trim and baseboards, while a sealant is a flexible, weather-resistant product built for outdoor exposure. Products meeting ASTM C920 standards are tested for expansion and contraction without failure, which is the benchmark you want for any exterior application. Common uses include sealing around windows, doors, siding joints, roof flashing edges, and foundation gaps. These are exactly the spots where air and water sneak in and cause the most damage over time.
What are the main types of weatherproof caulking materials?
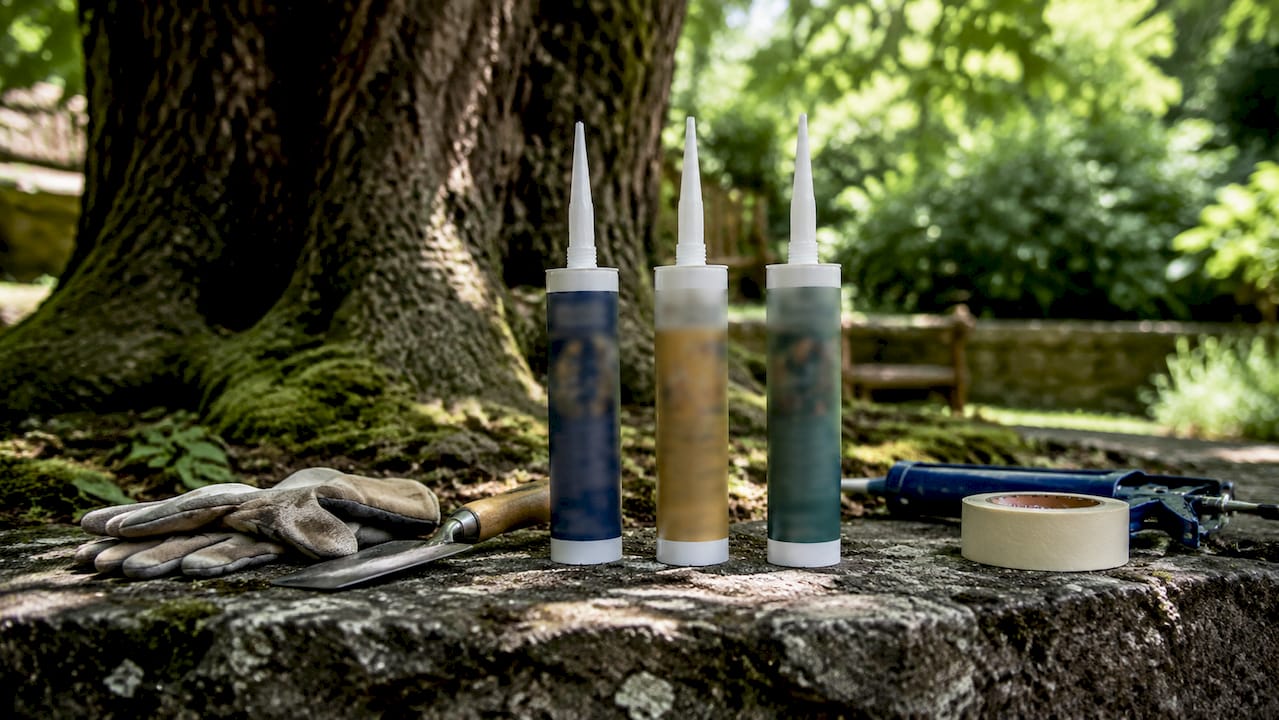
The three primary exterior caulking types are silicone, polyurethane, and siliconized acrylic. Each has a specific strength, and choosing the wrong one for your surface is the most common mistake homeowners make.
Silicone caulk
Silicone caulk delivers the best waterproofing and flexibility of any exterior sealant. It bonds to glass, metal, and ceramic without primer and maintains its flexibility across extreme temperature swings. The trade-off is paintability: 100% silicone is not paintable, so it works best in areas where color match is not a concern, such as around window glass or metal flashing. Silicone products from brands like GE Sealants and Loctite are rated for lifetime performance when applied correctly.
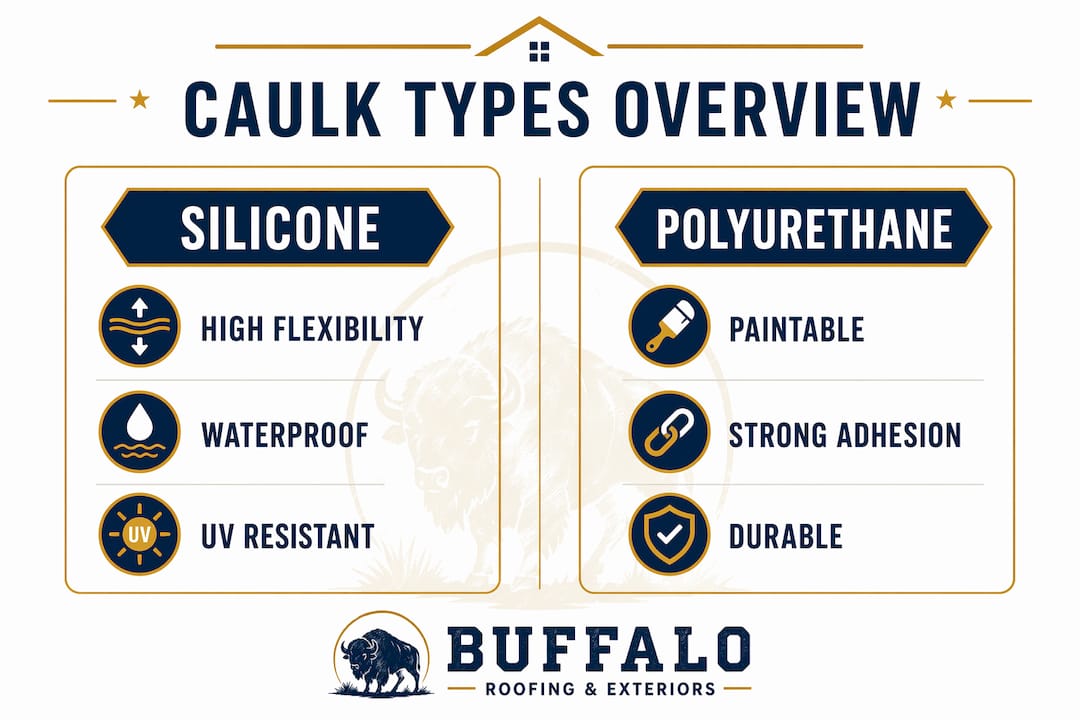
Polyurethane caulk
Polyurethane caulk offers excellent adhesion to concrete, wood, and masonry, and it accepts paint after curing. This makes it the go-to choice for exterior wood trim, concrete expansion joints, and areas where you plan to repaint. It is denser than silicone, which gives it strong gap-filling ability, but it requires more careful surface prep and a longer cure time before painting.
Siliconized acrylic caulk
Siliconized acrylic is a hybrid formula that combines the flexibility of silicone with the paintability of acrylic. It works well on siding, trim, and around window frames where you need a clean, painted finish. This is the most forgiving option for DIYers because it cleans up with water before curing and accepts paint in as little as 60 minutes with advanced formulas like GE Pro Seal Max.
| Property | Silicone | Polyurethane | Siliconized Acrylic |
|---|---|---|---|
| Flexibility | Highest | High | Moderate to High |
| Paintable | No | Yes | Yes |
| Durability | Lifetime | 10–20 years | 10–15 years |
| Best Uses | Glass, metal, flashing | Concrete, wood, masonry | Siding, trim, window frames |
| Cleanup | Solvent | Solvent | Water (before cure) |
Pro Tip: Read the packaging before you buy. If it says “100% silicone,” assume it is not paintable. Look for “siliconized,” “hybrid,” or “paintable” on the label if you plan to paint over the joint.
How to prepare surfaces and apply weatherproof caulking
Proper surface preparation is the single biggest factor in how long your caulk lasts. A clean, dry, well-prepped surface can double the lifespan of even a mid-range product. Skipping this step is the reason most DIY caulk jobs fail within two years. The Department of Energy recommends applying caulk only above 45°F in dry conditions for best adhesion.
Follow these steps for a professional result:
- Remove old caulk completely. Use a caulk removal tool or utility knife to cut out all existing material. Leaving old caulk underneath new caulk prevents proper adhesion.
- Clean the surface. Wipe the joint with isopropyl alcohol or a degreaser to remove dust, oil, and mildew. Let it dry fully before proceeding.
- Check the weather forecast. Applying caulk below 45°F or in high humidity leads to adhesion failure and cracking as it cures. Aim for a dry day with temperatures between 50°F and 80°F.
- Cut the nozzle at a 45-degree angle. Match the cut size to your joint width. A smaller opening gives you more control on narrow gaps.
- Apply in one continuous bead. Move at a steady pace to keep the bead consistent. Gaps or air pockets in the bead create weak spots.
- Tool the joint immediately. Use a wet finger or a caulk tool to press the sealant into the joint and create a smooth, concave surface. This improves adhesion and appearance.
- Allow full cure before painting or exposing to rain. Cure times range from 60 minutes for advanced hybrids to 24 hours for polyurethane and silicone products.
Pro Tip: Do not caulk on a hot afternoon in direct sunlight. The surface heats up faster than the caulk can bond, which causes it to skin over on the outside while staying soft underneath. Early morning application on a shaded surface gives you the best results.
For a full breakdown of exterior prep steps, the exterior prep guide from Buffaloroofingandexteriors covers everything from surface cleaning to priming before you seal.
What advantages does weatherproof caulk offer over standard sealants?
The core advantage of weather-resistant caulking is its ability to move with the structure. Wood expands in summer heat and contracts in winter cold. Concrete cracks under freeze-thaw cycles. A sealant that cannot flex with those forces will fail, and failed seals let in water, air, and pests.
Here is what sets weatherproof exterior sealants apart:
- UV resistance. Standard interior caulks break down under sunlight within one to two seasons. Silicone and polyurethane exterior sealants maintain their bond and flexibility under prolonged UV exposure.
- Temperature range. Quality exterior sealants stay flexible from well below freezing to over 200°F, which covers the full range of conditions in most U.S. climates.
- Waterproofing vs. weatherproofing. Waterproof means the material resists water penetration. Weatherproof means it also resists UV, temperature swings, and air infiltration. Exterior sealants are both. Silicone-based sealants provide the resilience needed against UV, moisture, and temperature changes that cause standard interior caulks to fail.
- Air sealing. Gaps around windows and doors are a major source of energy loss. A properly applied exterior sealant blocks air infiltration, which reduces heating and cooling costs.
- Pest exclusion. Small gaps in exterior joints are entry points for insects and rodents. A flexible sealant that stays bonded through seasonal movement keeps those gaps closed year-round.
Consumer Reports testing found that price is not the best indicator of sealant performance. Matching the product to the surface and movement requirements matters far more than brand name or cost. That finding should shift how you shop: focus on the product spec sheet, not the price tag.
How to choose the right weatherproof caulk for your project
Matching the right sealant to your specific surface and conditions is what separates a repair that holds from one that peels off in six months. Start with the surface material, then consider paintability and movement exposure.
- Wood siding and trim: Use siliconized acrylic or polyurethane. Both bond well to wood and accept paint. Siliconized acrylic is easier to work with for most DIYers.
- Concrete and masonry: Polyurethane is the strongest choice. It fills larger gaps and bonds aggressively to porous surfaces.
- Metal surfaces: Use a neutral-cure silicone. Acetoxy-cure silicone releases acidic byproducts that corrode copper, galvanized steel, and aluminum panels. Neutral-cure formulas avoid that reaction entirely.
- Vinyl siding and window frames: Siliconized acrylic works well here. It bonds to vinyl without damaging it and stays flexible enough to handle the material’s significant thermal movement.
- Glass and glazing: 100% silicone is the standard. Nothing bonds to glass better or lasts longer in wet conditions.
Selecting paintable hybrids balances weatherproofing needs with exterior aesthetics when painting is required. This Old House recommends checking the label for “paintable” or “hybrid” language before purchasing for any visible exterior joint. Homeowners commonly apply non-paintable 100% silicone where paintability is required, then discover paint will not adhere, which forces a full removal and redo.
For coastal Texas homes facing salt air, high humidity, and intense sun, the weatherproofing workflow guide from Buffaloroofingandexteriors details which sealant types hold up best in those specific conditions.
Key takeaways
Weatherproof caulking works because it combines flexibility, UV resistance, and waterproofing into a single product designed specifically for the demands of exterior joints.
| Point | Details |
|---|---|
| Flexibility is the priority | Choose sealants rated for high-movement joints to prevent cracking and failure over time. |
| Match product to surface | Silicone suits glass and metal; polyurethane suits concrete; siliconized acrylic suits wood and vinyl. |
| Prep determines lifespan | Clean, dry surfaces above 45°F are required for proper adhesion and long-term performance. |
| Paintability requires a hybrid | Use siliconized acrylic or labeled paintable polyurethane wherever you plan to paint over the joint. |
| Price does not predict performance | Consumer Reports testing confirms surface compatibility matters more than brand or cost. |
What i’ve learned after watching hundreds of caulk jobs fail
The most expensive mistake I see homeowners make is choosing a caulk based on what is on sale at the hardware store. A tube of 100% silicone costs about the same as a siliconized acrylic hybrid, but if you grab the wrong one for a painted window frame, you are looking at a full removal job before the season ends. The label takes 10 seconds to read. That 10 seconds saves you two hours of frustration.
The second mistake is timing. Fall and spring are the best seasons to caulk exterior joints in most U.S. climates. Temperatures are moderate, humidity is manageable, and the joints are at a middle point in their expansion cycle. Caulking in July heat or January cold sets you up for adhesion problems no matter how good the product is.
My honest recommendation: test any new product on a small, hidden area first. Different siding materials and paint types react differently to sealants. A five-minute test patch can tell you whether the product bonds correctly before you commit to a full perimeter seal. That habit alone will save you from the most common DIY caulking failures I have seen.
— Buffaloroofingandexteriors
Protect your home from the outside in
Weatherproof caulking is one layer of your home’s exterior defense. For Texas homeowners along the Gulf Coast, that defense needs to be comprehensive. Salt air, tropical storms, and intense UV exposure push every exterior material harder than most climates.

Buffaloroofingandexteriors works with homeowners across Corpus Christi, San Antonio, and Victoria to seal, repair, and protect every surface from the roof down. Whether you need weather-resistant roofing built for coastal conditions or a full exterior renovation that includes siding, windows, and sealing, the team at Buffaloroofingandexteriors delivers solutions that hold up. Get a free estimate and see how a complete exterior protection plan compares to patching problems one tube at a time.
FAQ
What is weatherproof caulking used for?
Weatherproof caulking seals exterior joints around windows, doors, siding, roof flashing, and foundation gaps to block water, air, and pests. It is designed for surfaces that expand and contract with temperature changes.
Is caulking waterproof or just water-resistant?
Silicone and polyurethane exterior sealants are fully waterproof, meaning they block water penetration entirely. Siliconized acrylic hybrids are highly water-resistant but not rated as fully waterproof in standing water conditions.
How long does weatherproof caulking last?
Silicone sealants are rated for lifetime performance when applied correctly. Polyurethane typically lasts 10–20 years, and siliconized acrylic lasts 10–15 years depending on UV exposure and joint movement.
What temperature is best for applying exterior caulk?
The Department of Energy recommends applying exterior caulk above 45°F in dry conditions. The ideal range is 50°F to 80°F on a day with low humidity and no rain in the forecast.
Can you paint over weatherproof caulk?
You can paint over siliconized acrylic and polyurethane caulks once they cure. You cannot paint over 100% silicone. Always check the label for a “paintable” designation before purchasing if you plan to paint the joint.