


TL;DR:
- Performing annual inspections, cleanings, repairs, and resealing is essential to keep decks safe and durable. Homeowners should routinely check ledger boards, joists, fasteners, and railings, especially for structural concerns or rot. Timely professional assessments are crucial for aged decks or when serious issues, like soft joists or loose railings, arise.
Every deck needs five things each year: a hands-on inspection, a thorough cleaning, damaged board repairs, fastener and railing checks, and a fresh protective finish. Do all five on a consistent schedule and a well-built deck can last multiple decades. Skip them and small problems compound fast.
Your annual deck maintenance TL;DR:
- Inspect the ledger board, joists, railings, and stairs for rot, rust, and movement
- Clean with an oxygenated cleaner matched to your material (wood, composite, or PVC)
- Repair or replace soft, spongy, or cracked boards before they become structural problems
- Check fasteners and railings for corrosion, popping nails, and wobble; railing heights should meet the 36–42 inch standard per NADRA
- Seal or protect wood surfaces when the water-bead test fails
Quick seasonal reminders:
- Spring (April–early June): Deep clean, full inspection, repair, and reseal as needed. This is your most important maintenance window.
- End of summer: Test the sealant with the water-bead test, clear debris, and store or cover furniture.
- Winter prep (October–November): Remove planters, clear gaps between boards, and know your snow-removal rules before the first freeze.
Table of Contents
- What should you inspect on your deck every year?
- How do you clean a deck without damaging it?
- How do you spot rot and replace a damaged deck board?
- Are your deck fasteners and railings actually safe?
- When and how should you sand, stain, and seal a wood deck?
- What does composite deck care actually require?
- What’s the right seasonal maintenance schedule for your deck?
- When should you call a pro, and what do safety codes actually require?
- What tools and materials do you need, and what will it cost?
- When should you hire a professional for deck work?
- Key Takeaways
- The maintenance mindset most homeowners get wrong
- Buffaloroofingandexteriors handles deck repairs and exterior inspections across South Texas
- Useful sources and further reading
What should you inspect on your deck every year?
Start at the ledger board. That’s the horizontal framing member bolted to your house, and it’s the single most common source of deck failure. Check that the flashing is intact and directing water away from the house wall. If you see gaps, rust stains, or rotted wood at the ledger connection, stop using the deck and call a professional. Vegetation within 18–24 inches of the ledger traps moisture and accelerates joist rot, so trim it back while you’re at it.
Step-by-step inspection sequence:
- Start at the ledger: check flashing, look for rust stains, probe the wood with a screwdriver
- Move to support posts and beams: look for cracks, splits, and soil contact
- Inspect joists from below: look for sagging, soft spots, and signs of insect damage
- Walk every deck board: feel for soft or spongy areas, look for cupping, cracking, and popped nails
- Test every railing section: push laterally with moderate force; zero movement is the goal
- Check stair stringers and risers: probe for rot at the base where they contact the ground or concrete
- Inspect all fasteners: look for rust, corrosion, and any nail heads that have risen above the surface
Immediate safety flags that require stopping use or calling a pro:
- Screwdriver penetrates ¼–½ inch into wood without resistance (active decay per the NADRA checklist)
- Any railing section that moves when pushed
- Visible sagging or bouncing when you walk across the deck
- Ledger board gaps, missing flashing, or visible rot at the house connection
- Deck is 20 years or older and has never had a professional evaluation
Frequency: Do a quick visual pass monthly during the season. Do the full hands-on inspection once a year, ideally in early spring before heavy use begins. Decks over 20 years old should get a professional structural review, not just a homeowner walkthrough.
How do you clean a deck without damaging it?
The right cleaner depends on your material. Using the wrong one, or a pressure washer set too high, causes more damage than a season of neglect. Start by choosing your cleaner, then follow the sequence below.
Material-specific cleaner guide:
- Wood decks: Use an oxygenated (oxygen bleach) cleaner. It breaks down algae and mildew without bleaching wood fibers or raising the grain. Avoid chlorine-based cleaners on both wood and composite surfaces.
- Composite (capped boards): Use a composite-approved, pH-neutral cleaner. Harsh solvents and chlorine can damage the capstock layer and void your warranty.
- PVC decking: Mild dish soap and water handle most stains. PVC is the most forgiving material to clean.
Step-by-step cleaning sequence:
- Clear all furniture, planters, and debris from the deck surface
- Sweep thoroughly, paying attention to gaps between boards where debris compacts
- Pre-wet the deck surface with a garden hose
- Apply your chosen cleaner per the manufacturer’s dilution instructions
- Scrub with a stiff-bristle brush, working with the grain on wood
- Rinse thoroughly from the house outward
- Allow the deck to dry completely before any sanding or sealing (typically 48–72 hours in moderate weather)
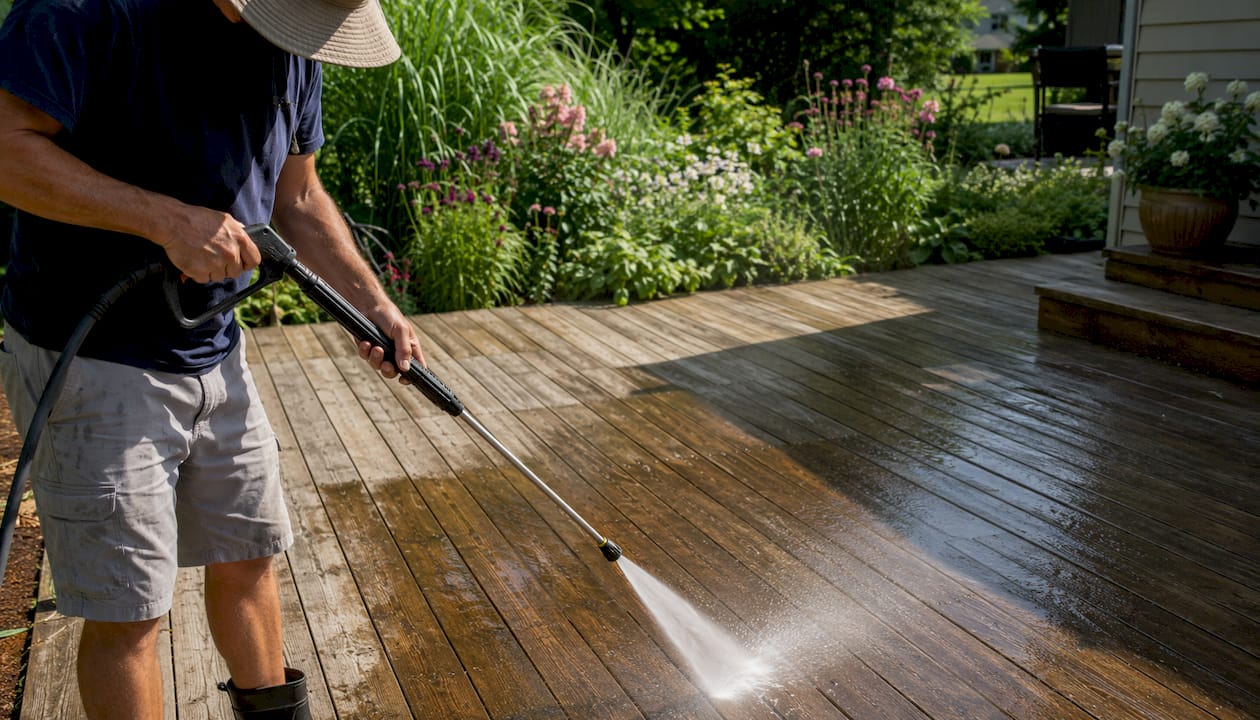
Pro Tip: When pressure washing wood, use a 40-degree fan tip and keep the nozzle at least 12–18 inches from the surface. For softwoods, stay under 1,200 PSI. Going higher or closer permanently raises the grain and creates splinters that no amount of sanding fully fixes.
How do you spot rot and replace a damaged deck board?
The screwdriver test is your fastest diagnostic. Press the tip of a flathead screwdriver firmly into any board that looks discolored, soft, or cupped. If it sinks ¼–½ inch without much resistance, the wood has decayed and the board needs to come out. A board that feels spongy underfoot tells you the same thing without the tool.
Board removal and replacement steps:
- Mark the damaged board with chalk or tape at both ends
- Use a circular saw set to the exact board thickness to cut through any face-screwed fasteners
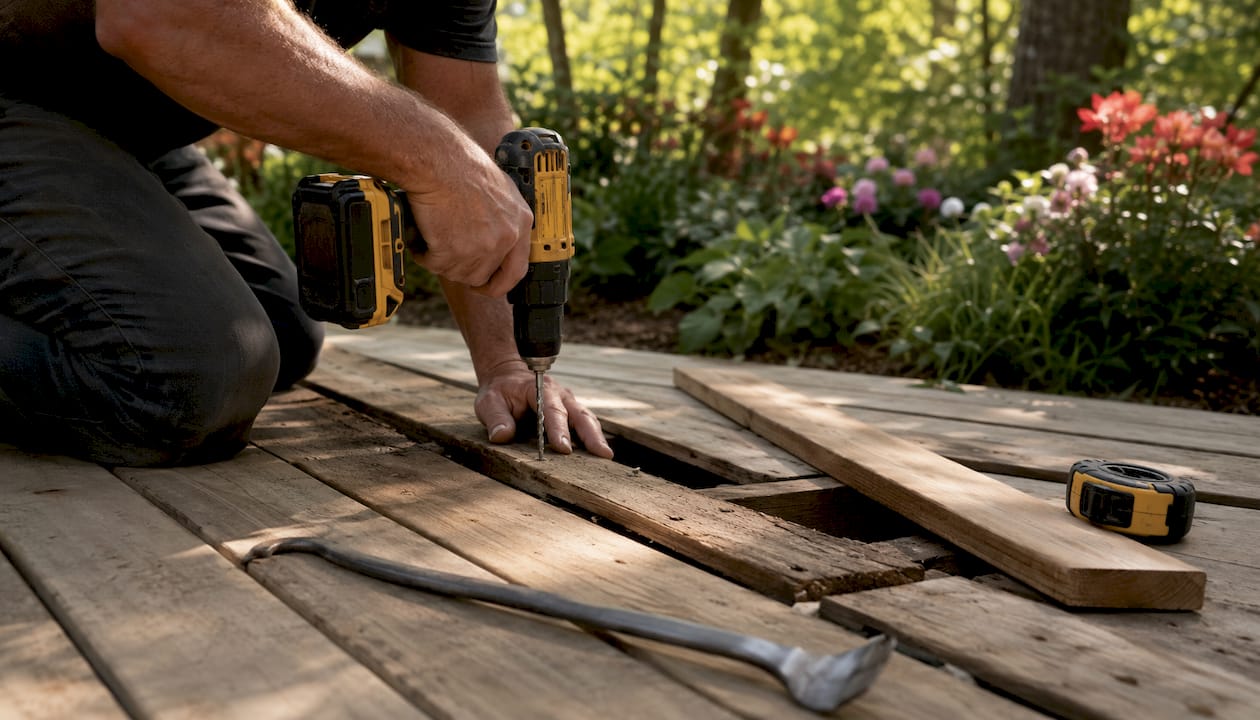
- Pry the board up carefully with a flat bar, working from one end to avoid splitting adjacent boards
- Inspect the joist beneath: probe it with the screwdriver, check for moisture staining, and look for insect tunneling
- If the joist is sound, clean the surface and let it dry before installing the new board
- Cut the replacement board to length, pre-drill pilot holes to prevent splitting, and fasten with corrosion-resistant screws
- Apply a cut-end sealer to the exposed end grain before installation
When to stop and call a professional:
- The joist beneath the board is soft, cracked, or shows active rot
- Multiple adjacent joists are compromised
- The ledger board is involved in any way
- The deck bounces or flexes when you walk over the repaired area
Joist rot is a structural issue, not a cosmetic one. Replacing boards over a compromised frame is like patching a roof over rotted sheathing. If you’re seeing signs it’s time to replace your old deck rather than just a board or two, a contractor assessment is the right next step.
Are your deck fasteners and railings actually safe?
Fasteners fail in two ways: they corrode and weaken the surrounding wood, or they pop up above the surface and become a tripping hazard. Both are fixable, but only if you catch them before they cause a fall.
Fastener and hardware checklist:
- Walk the entire deck and mark any nail heads that have risen above the surface
- Check screws for rust streaking on the wood around them (a sign of active corrosion)
- Replace corroded fasteners with stainless steel or hot-dipped galvanized deck screws
- Inspect post-to-beam bolts and post bases for rust and looseness
- Look at hidden fastener clips on composite boards: clips that have shifted leave boards loose
Stair and railing inspection steps:
- Push each railing post laterally with firm pressure. Any movement means the post-to-beam connection needs tightening or replacement.
- Check that rail spacing is no more than 4 inches apart (measured from the inside of the rails) to prevent children from squeezing through
- Confirm railing height: most codes require 36 inches, with 42 inches commonly encouraged for elevated decks
- Walk each stair tread and probe the stringers at the base where they contact the ground
- Confirm that open stair risers have no gap larger than 4 inches
Pro tip on upgrades: If you’re replacing fasteners anyway, consider switching to hidden fastener clips on wood decks. They eliminate the surface penetrations where water pools and rot starts, and they give the deck a cleaner look. The upfront cost is higher, but you avoid the cycle of popped nails every few years.
When and how should you sand, stain, and seal a wood deck?
Reseal when the water-bead test fails. Pour a small amount of water on the deck surface. If it beads up and rolls off, the sealant is still working. If it soaks in within a few seconds, the wood is unprotected and needs cleaning and resealing soon. Most wood decks need resealing every 1–3 years depending on sun exposure, foot traffic, and the product used.
Choosing the right finish:
- Clear sealers offer minimal UV protection and need reapplication most often. Fine for covered decks.
- Semi-transparent stains are the best choice for most softwood decks. They penetrate the wood, enhance the grain, and provide UV and moisture protection. Oil-based semi-transparent formulas tend to penetrate deeper than water-based on older, more porous wood.
- Solid stains hide the grain completely and work well on weathered or rough-sawn wood that’s past its prime visually. They require more prep and peel if applied over a failing previous coat.
For deck sealing on coastal or high-humidity properties, semi-transparent penetrating stains with mildewcide additives are worth the extra cost.
Application checklist:
- Check the weather: no rain forecast for 48 hours before or after application
- Surface temperature should be moderate. Avoid applying above 90°F because heat causes flash-drying and a finish that won’t penetrate properly
- Confirm wood surface moisture is below 15% with a moisture meter before you start
- Sand with 80-grit along the grain for repairs, then finish with 120-grit for smoothing. Never sand against the grain.
- Apply two thin coats rather than one heavy coat; back-brush each coat to work the finish into the grain
- Run the water-bead test again 72 hours after the final coat to confirm penetration
Pro Tip: Apply stain in the early morning or late afternoon. Midday sun on a hot deck causes the finish to dry on the surface before it penetrates, leaving a tacky film that peels within one season.
What does composite deck care actually require?
Composite is lower-maintenance than wood, but it’s not maintenance-free. The most common mistake composite owners make is assuming the deck takes care of itself. It doesn’t. Organic debris trapped in the gaps between boards creates the moisture conditions that mold needs to grow, and once surface mold is established on a composite, it’s harder to remove than most homeowners expect.
| Care dimension | Wood deck | Composite deck |
|---|---|---|
| Cleaning frequency | Annual deep clean + monthly sweep | Annual deep clean + monthly sweep |
| Safe cleaners | Oxygenated (oxygen bleach) cleaner | Composite-approved, pH-neutral cleaner |
| Pressure-wash max PSI | Under 1,200 PSI (softwood) | Under 1,200 PSI; check manufacturer specs |
| Common problems | Rot, splinters, UV graying, popped nails | Surface mold, staining, fading, scratches |
| Sealing required | Yes, every 1–3 years | No sealing; use composite restorer if faded |
Preventive habits that actually matter:
- Clear debris from board gaps every month during fall and spring when leaves accumulate
- Lift planters and furniture off the surface; use rubber-footed stands or composite-safe pads
- Spot-clean grease from grills immediately. Grease left on composite boards stains permanently.
- Keep organic debris cleared consistently; plant pots left directly on boards trap moisture and cause localized mold
- If the surface has faded significantly, use a composite-approved restorer, not a wood stain
What’s the right seasonal maintenance schedule for your deck?
The pre-summer window from April through early June is the most important maintenance period for most U.S. climates. Miss it and small problems become expensive repairs by August. Here’s how to spread the work across the year.
Spring (April–early June):
- Run the full hands-on inspection (ledger, joists, boards, railings, stairs, fasteners)
- Do the deep clean with the appropriate cleaner for your material
- Complete any board replacements or fastener upgrades
- Run the water-bead test; reseal wood decks that fail
- Apply finish only after the deck has dried for 48–72 hours post-wash and surface moisture is below 15%
Summer (June–August):
- Monthly sweep to clear debris, pollen, and leaves
- Spot-clean grease or food stains immediately
- Check that furniture and planters haven’t shifted and are still elevated off the surface
- Mid-summer: run a quick water-bead test on high-traffic areas to see if the finish is holding
Fall (September–November):
- Clear leaves from the deck surface and gaps daily or weekly during peak leaf-fall
- Inspect and tighten any fasteners that loosened over the summer
- Remove and store or cover outdoor furniture before the first frost
- Lift all planters off the surface; standing water under pots through winter causes staining and mold
Winter (December–March):
- Use a plastic shovel or rubber-edged pusher for snow removal; metal blades gouge wood and scratch composite
- Avoid rock salt and calcium chloride directly on deck boards; use sand for traction instead
- Do a visual check after any major storm for fallen branches or debris
Timing reminders: Wait at least 48 hours after washing before sanding, and 48–72 hours after washing before applying any finish. Apply stain or sealer during cooler parts of the day, preferably when temperatures are stable and not too hot. A routine maintenance cadence of monthly sweeping, quarterly gap clearing, annual deep clean, and resealing every 1–3 years keeps most decks in good shape without major intervention.
When should you call a pro, and what do safety codes actually require?
Call a professional if you find structural soft spots, ledger issues, sagging, or any railing movement. Those four conditions are not DIY territory. A deck that bounces when you walk on it or has a railing that shifts under pressure is a liability, not just a cosmetic problem.
NADRA’s position is clear: with a very large number of decks in North America (https://www.nadra.org/blog/may-is-deck-safety-month-nadra-reminds-homeowners-to-check-your-deck-and-schedule-a-spring-inspection), many now past 20 years old, professional evaluation is the responsible step for any aging structure. Codes have changed, materials have evolved, and a deck built in 2000 may not meet today’s standards.
Safety checklist for homeowners:
- Railings should meet current safety height standards, commonly around 36 inches minimum and higher for elevated decks
- Rail spacing should prevent small children or pets from squeezing through, commonly under 4 inches to prevent children from passing through
- Stair riser openings should be small enough to avoid tripping hazards or safety risks, typically restricted to a few inches
- Ledger board fastened with bolts, not nails alone
- Flashing present and intact at the ledger-to-house connection
- No visible sagging in the deck surface or stair stringers
- All electrical outlets and lighting on the deck are weatherproof and up to code
Timing and weather rules for maintenance work:
- Apply sealant when surface temperature is moderate and below 90°F
- Wood surface moisture must be below 15% before applying any finish
- Pressure wash with a wide fan tip (40 degrees or wider), nozzle 12–18 inches from the surface, and PSI under 1,200 for softwoods
- Schedule professional inspections in spring before the deck sees heavy use
For decks in coastal or storm-prone areas, the inspection frequency and material choices matter even more. Weatherproofing strategies for coastal decks differ from inland maintenance in meaningful ways, particularly around fastener selection and finish durability.
What tools and materials do you need, and what will it cost?
You don’t need a truck full of equipment. Most annual deck maintenance requires tools you likely already own, plus a few consumables.
Essential tools by task:
- Inspection: Flathead screwdriver, flashlight, moisture meter
- Cleaning: Garden hose, stiff-bristle brush, pump sprayer, pressure washer (rental)
- Sanding: Orbital sander or sanding block, 80-grit and 120-grit sandpaper
- Staining/sealing: Paint roller with extension pole, natural-bristle brush for back-brushing, painter’s tape
- Fastener work: Drill/driver, impact driver, pry bar, nail punch
| Task | DIY time | DIY materials cost | Contractor cost (est.) |
|---|---|---|---|
| Annual clean (average deck) | 2–4 hours | $20–$40 | $150–$300 |
| Single board replacement | 1–2 hours | $15–$40 per board | $100–$250 per board |
| Full reseal (wood, 300–400 sq ft) | 4–8 hours | $80–$150 | $300–$500 |
| Full inspection | 1–2 hours | — | $150–$300 |
| Fastener replacement (full deck) | 3–6 hours | $50–$100 | $300–$500 |
Contractor cost estimates reflect typical U.S. ranges and vary by region, deck size, and condition. Structural repairs involving joists, ledgers, or permits will cost more.
Sourcing tips: Rent a pressure washer from Home Depot or Lowe’s for a day rather than buying one. Deck stains and oxygenated cleaners are available at most home improvement stores. For structural lumber, a local lumber yard often has better quality and selection than big-box stores for replacement boards. Any work involving ledger repair, joist sistering, or structural posts may require a building permit; check with your local municipality before starting.
When should you hire a professional for deck work?
The short decision rule: call a pro for ledger issues, bouncy or sagging decks, rotted joists, or any structural stair and railing repair. These are not judgment calls. A compromised ledger can cause a deck to separate from the house entirely, and a rotted joist can fail under load without warning.
Questions to ask any deck contractor:
- Are you licensed and insured for structural deck work in this state?
- Will you pull the necessary permits, and what inspections are required?
- What does your inspection include, and will I receive a written report with photos?
- Which repairs are structural priorities versus cosmetic improvements?
- What is your timeline, and what weather conditions affect the schedule?
- Do you offer a warranty on labor and materials?
- Can you provide references from similar deck repair or restoration projects?
What a professional inspection should deliver:
- Written estimate with repairs prioritized by safety and urgency
- Photographs documenting each problem area
- Clear explanation of which issues require permits
- Honest assessment of whether repair or full deck replacement is the better long-term value
For deck repairs that go beyond cosmetic work, having a contractor who understands local code requirements and can document the work properly protects you at resale. Buyers and their inspectors look at deck condition carefully, and unpermitted structural work can complicate a sale.
Key Takeaways
Consistent annual maintenance, following the inspect-clean-repair-protect cycle, is the single most effective way to extend a deck’s lifespan and keep it structurally safe.
| Point | Details |
|---|---|
| Follow the annual cycle | Inspect, clean, repair damaged boards, check fasteners, and seal wood every year without skipping steps. |
| Use the water-bead test | Pour water on the deck surface; if it soaks in rather than beading, clean and reseal the wood soon. |
| Match cleaner to material | Use oxygenated cleaners for wood and composite-approved, pH-neutral products for capped composite boards. |
| Know when to call a pro | Ledger issues, bouncy decks, rotted joists, or railing movement require a professional, not a DIY fix. |
| Buffaloroofingandexteriors | Offers deck inspections, ledger and board repairs, and full exterior assessments for homeowners in South Texas. |
The maintenance mindset most homeowners get wrong
Most people treat deck maintenance as a cosmetic task, something you do when the deck looks bad. That framing is exactly why so many decks fail structurally before they look like they should. The ledger board that separates from the house, the joist that collapses under a summer party, the railing that gives way when a child leans on it: none of those failures announce themselves with obvious visual cues until it’s too late.
The checklist in this article isn’t about aesthetics. It’s about catching the structural problems that hide under a surface that still looks fine. A deck that passes the screwdriver test, has solid railings, intact flashing, and a fresh coat of sealant isn’t just prettier. It’s a safer, more valuable part of your home. The homeowners who spend a weekend on maintenance every spring are the ones who avoid the $8,000–$15,000 structural repair or full replacement that comes from years of deferred attention. Routine upkeep is the cheaper option every time, by a wide margin.
Buffaloroofingandexteriors handles deck repairs and exterior inspections across South Texas
When the inspection turns up more than you want to tackle yourself, Buffalo Roofing and Exteriors brings professional-grade deck repair and exterior maintenance services to homeowners across Corpus Christi, San Antonio, and Victoria.

The team handles the jobs that go beyond DIY: ledger board repairs, rotted joist replacement, board-by-board restoration, railing and stair structural work, and full deck assessments with written documentation. For coastal properties, where salt air accelerates fastener corrosion and UV exposure degrades finishes faster, having a contractor who understands exterior renovation for coastal Texas homes makes a real difference in how long repairs hold.
What to expect from a consultation:
- Free estimate with a written scope of work
- Photo documentation of all problem areas
- Repairs prioritized by safety and structural urgency
- Financing options and warranty coverage on completed work
Whether you need a single board replaced or a full structural assessment before the summer season, Buffaloroofingandexteriors is ready to help. Contact the team at buffaloroofingandexteriors.com to schedule your free estimate.
Useful sources and further reading
| Source | What it covers |
|---|---|
| NADRA Deck Safety | Safety standards, code guidance, and the Check Your Deck® program for homeowners |
| NADRA Check Your Deck® Checklist | Free printable inspection checklist covering ledger, railings, fasteners, stairs, and more |
| The Wood Carpenter: Wood Deck Maintenance | Step-by-step wood deck care including the water-bead test, sanding sequence, and ledger guidance |
| Burns Carpentry: Deck Maintenance Mistakes | Pressure-washing PSI limits and common errors homeowners make during cleaning |
| The How-To Home: Composite vs Timber Decking | Safe cleaner choices for wood and composite, including why to avoid chlorine-based products |
| Wishfullines: Pre-Summer Deck Checklist | Seasonal timing guidance and the April–June maintenance window |
| Buffaloroofingandexteriors: Deck Repairs | Professional deck repair services in South Texas, including structural and cosmetic work |
| Buffaloroofingandexteriors: Deck Sealing | Sealing services and timing guidance for wood decks in coastal climates |