
TL;DR:
- Storm damage and aging roofs in Converse, TX require prompt inspection and professional repairs to prevent extensive water damage. Using proper tools, safety equipment, and regional expertise ensures effective, durable fixes that withstand local climate challenges. Regular maintenance and expert guidance help homeowners preserve their roofs’ lifespan and protect their investments.
You wake up to the sound of rain hammering your roof and notice a dark stain spreading across your ceiling. It’s a scenario that Converse, TX homeowners face more often than they’d like, especially after the intense hailstorms and high winds that roll through the San Antonio metro area. Storm-damaged and aging roofs are not just an inconvenience — they’re a ticking clock. The longer you wait, the more water finds its way into your walls, insulation, and framing. This guide walks you through every step of identifying, repairing, and verifying a successful roof fix so you can protect your home and your investment before small damage becomes a major headache.
Table of Contents
- Assessing your roof: Signs of damage and when to repair
- What you need: Tools and materials for effective roof repair
- Step-by-step guide: Repairing common roof problems
- Avoiding pitfalls: Common mistakes and expert tips
- Verifying results: How to check your roof repair is successful
- What most guides miss about Texas roof repairs
- Need reliable help? Roof repair and restoration by local experts
- Frequently asked questions
Key Takeaways
| Point | Details |
|---|---|
| Fast action prevents damage | Addressing roof issues promptly in Converse, TX helps you avoid escalated repair costs and home damage. |
| Right tools matter | Equipping yourself with proper tools and safety gear ensures effective and safe roof repair work. |
| Follow expert steps | Clear, step-by-step instructions save time and increase the quality of your roof repairs. |
| Maintenance extends roof life | Regular inspection and upkeep after repairs protect your investment and keep your home secure. |
| Local expertise counts | Hiring local professionals familiar with Converse, TX weather ensures reliable, long-lasting roof solutions. |
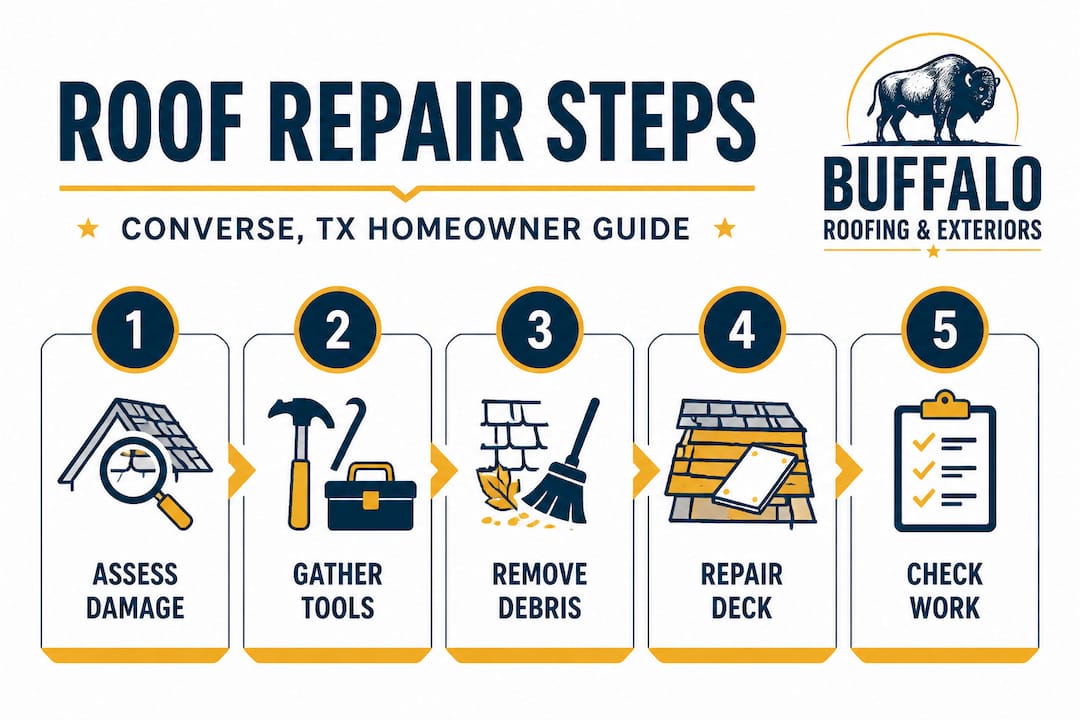
Assessing your roof: Signs of damage and when to repair
Once you understand the urgency of addressing roof issues, the next step is identifying exactly what type of damage you’re dealing with. Not all roof problems look the same, and catching the right warning signs early can save you thousands.
Here are the most common signs your roof needs attention:
- Missing or cracked shingles: After a strong storm, shingles can blow off entirely or crack under hail impact. Even one missing shingle creates an entry point for water.
- Water stains on ceilings or walls: Brown rings or streaks inside your home almost always trace back to a leak above. According to roofing experts, visible signs like missing shingles, leaks, and water stains indicate the need for repair.
- Granules collecting in gutters: Asphalt shingles shed granules as they age. A sudden increase in granule buildup means your shingles are breaking down faster than normal.
- Sagging roof deck: This is a red flag. Sagging means the decking underneath may be rotting or soaked with water. It signals a structural issue, not just a surface fix.
- Damaged or lifted flashing: The metal strips around chimneys, vents, and skylights can pull away from the surface, letting water sneak in along the seams.
Knowing the difference between a spot repair and a full roof replacement matters here. If damage is isolated to a small area and your roof is under 15 years old, repairs usually make sense. If more than 30 percent of the surface is compromised or the decking is compromised, a full replacement is often the smarter investment.
Safety warning: Never climb onto a damaged or wet roof without proper footwear, a safety harness, and someone on the ground to spot you. After a storm, loose shingles and slick surfaces create serious fall hazards. When in doubt, assess from the ground with binoculars and call a professional.
Pro Tip: Walk around your home at ground level immediately after a storm and photograph any visible damage. These photos are essential for insurance claims and help contractors give you an accurate estimate.
What you need: Tools and materials for effective roof repair
With a clear picture of your roof’s needs, preparation with the right tools and materials is crucial for a safe and lasting repair. Showing up unprepared leads to half-finished jobs, callbacks, and the kind of “repairs” that make things worse. Proper tools and safety equipment are essential for safe roof repairs, whether you’re patching a small area yourself or preparing to assist a contractor.
| Item | Purpose | Notes |
|---|---|---|
| Roofing nails (1.75 inch) | Securing replacement shingles | Galvanized to resist rust |
| Roofing hammer or nail gun | Driving nails flush | Nail gun speeds up larger jobs |
| Pry bar / flat bar | Lifting damaged shingles | Use gently to avoid tearing |
| Roofing cement / caulk | Sealing edges and flashing gaps | Butyl-rubber caulk for longevity |
| Replacement shingles | Matching existing surface | Bring a sample to the hardware store |
| Utility knife | Cutting shingles to size | Keep extra blades on hand |
| Chalk line | Keeping rows straight | Prevents crooked shingle placement |
| Underlayment | Water barrier below shingles | Self-adhering ice and water shield is best |
Essential safety gear every homeowner should have on hand:
- Non-slip rubber-soled boots: Standard sneakers are not safe on a pitched roof.
- Safety harness with roof anchor: A fall from even a single-story roof can cause serious injury.
- Safety glasses: Debris, nails, and caulk can easily land in your eyes.
- Work gloves: Shingle edges and roofing nails are sharp.
- Ladder stabilizer: Keeps your ladder from sliding on gutters or siding.
Pro Tip: Before starting any roof repair in Converse, check with your local building department about permit requirements. Some repairs above a certain square footage require a permit, and skipping this step can cause problems when selling your home or filing an insurance claim. Staying ahead of these requirements is part of a solid roof maintenance checklist for any Texas homeowner.
Step-by-step guide: Repairing common roof problems
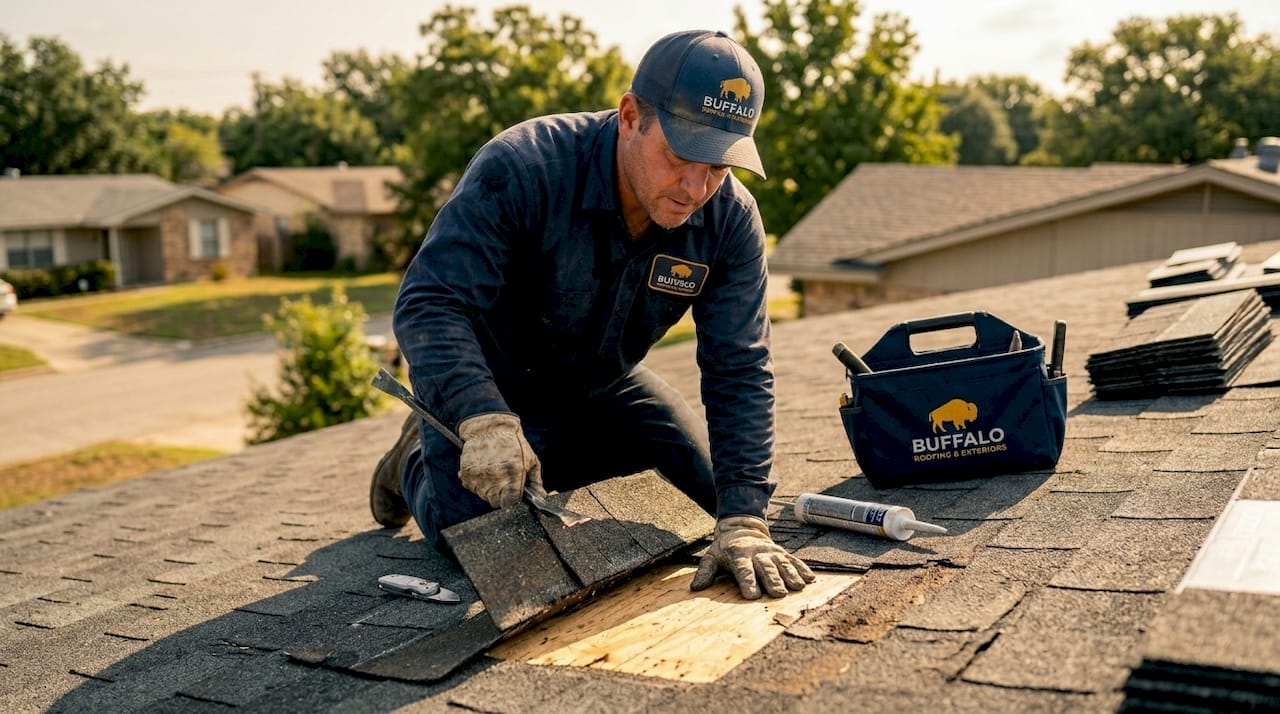
Now that you’re equipped with materials and safety knowledge, let’s walk through the actual repair process step by step. These instructions address the three most common repairs Converse homeowners face: patching leaks, replacing shingles, and fixing flashing. As emergency roof repair experts confirm, storms are a major cause of leaks and shingle damage in Texas, and proper repair steps prevent further issues from compounding.
Patching a leak:
- Locate the leak source from inside the attic using a flashlight. Water travels, so the stain on your ceiling may not be directly under the entry point.
- Mark the spot and go to the roof surface. Look for lifted shingles, cracked caulk, or exposed nail heads in that area.
- Clean the surface with a wire brush to remove debris and loose material.
- Apply a generous layer of roofing cement under any lifted shingles and press them flat.
- Seal all exposed nail heads and seams with fresh caulk or roofing cement.
- For a larger gap, cut a piece of flashing to size and adhere it over the damaged area before sealing the edges.
Replacing missing shingles:
- Slide a pry bar under the damaged shingle and gently lift the tabs of the shingles above it to expose the nails.
- Remove the nails using the pry bar and slide out the old shingle.
- Slide the new shingle into position, aligning it with the row on either side.
- Nail the shingle in place using four nails, one inch from each edge.
- Press down the overlapping tabs from the row above and seal the nail heads with roofing cement.
Fixing flashing around a chimney or vent:
- Remove any dried caulk or old sealant from the flashing seams.
- Check for rust, cracks, or lifted edges along the flashing.
- If the flashing is intact but just unsealed, apply fresh butyl-rubber caulk along all edges.
- If the flashing is damaged, carefully pry it away, cut a replacement piece to size, and re-embed it with roofing cement before re-nailing.
| Repair type | Best approach | Typical lifespan of fix |
|---|---|---|
| Minor leak (nail hole or crack) | Roofing cement and caulk | 3 to 5 years |
| 1 to 3 missing shingles | Full shingle replacement | 15 to 20 years |
| Flashing gap | Re-seal or replace flashing | 10 to 15 years |
| Sagging deck section | Professional repair required | Depends on extent |
| Large multi-zone damage | Full replacement recommended | 20 to 30 years |
Pro Tip: After lifting shingles, press your hand against the decking (the plywood layer below). If it feels soft or spongy, there’s hidden water damage. Replacing just the shingles without addressing damaged decking is a repair that will fail fast. Review home roofing tips to learn how to catch these hidden issues before they escalate.
Avoiding pitfalls: Common mistakes and expert tips
Even with a solid process, there are frequent missteps. Knowing them can be the difference between a quick fix and a costly redo.
The most common mistakes Converse homeowners make when repairing their roofs:
- Using the wrong shingle type: Texas heat and UV exposure demand shingles rated for high temperatures. Cheap 3-tab shingles installed in direct sun can curl and fail within a few seasons.
- Skipping the underlayment: Replacing surface shingles without checking or replacing the felt underlayment below leaves your decking exposed to moisture.
- Over-nailing or under-nailing: Too many nails split shingles; too few let them lift in wind. Four nails per shingle at the correct placement is standard.
- Applying caulk in cold weather: Roofing caulk doesn’t bond well below 40 degrees Fahrenheit. Texas winters are mild, but early mornings in December and January can drop below that threshold.
- Ignoring attic ventilation: Poor ventilation traps heat and moisture, which destroys shingles from the inside out. If you notice premature shingle aging, poor airflow in the attic is often the real culprit.
- Putting off small repairs: Rushing or delaying repairs after a storm can lead to expensive future problems that cost far more than the original fix.
When to stop and call a professional: If your roof pitch is steeper than a 6:12 ratio (meaning it rises 6 inches for every 12 inches of horizontal run), it’s not safe for most homeowners to walk on without professional equipment. The same goes for any repair that requires removing more than two rows of shingles, any work near electrical equipment, or anything involving structural members like rafters or ridge boards.
Pro Tip: Set a calendar reminder to inspect your roof twice a year — once in spring after storm season and once in fall before winter weather arrives. Consistent roof maintenance tips catch minor issues before they turn into major expenses.
Verifying results: How to check your roof repair is successful
With the repairs made, the final step is ensuring your effort pays off and your home stays protected. A repair that looks good from the ground isn’t necessarily a repair that holds up under the next Texas downpour.
Here’s how to know your repair was done right:
- No leaks during rain: Wait for the next rainfall and check the previously affected ceiling area from inside. No new staining or moisture means the repair held.
- Shingles lie flat and are firmly secured: Run your hand across the repaired area. Shingles should not lift, flex, or feel loose under light pressure.
- Smooth transitions between old and new shingles: New shingles should align with the existing rows and not stick up above or sink below the surrounding surface.
- No visible gaps around flashing: After repair, flashing seams should be fully sealed with no exposed edges.
- Gutters stay clear of excessive granules: After the first few rains, check your gutters. A dramatic granule increase from the repaired area points to shingles that weren’t seated properly.
Keeping records is just as important as the repair itself. Document everything with photos before, during, and after, and save all receipts for materials and contractor invoices. Regular inspections after repair help you spot issues early and extend roof life significantly.
Pro Tip: Create a simple home file with repair photos and dates. If you ever need to file a homeowner’s insurance claim after another storm, this documentation can speed up the process and support your case. Follow your post-repair inspection checklist annually to stay ahead of surprises.
What most guides miss about Texas roof repairs
Here’s an opinion you won’t hear from generic roofing guides written somewhere in Ohio: the climate around Converse, TX is not average, and treating it like it is will cost you.
Most online tutorials assume a relatively moderate environment, moderate rainfall, moderate temperatures, and moderate wind. Texas doesn’t operate on moderate. Converse sits in a zone where you can get a hailstorm in April, temperatures above 100 degrees Fahrenheit in August, and flash flooding in October. The thermal expansion and contraction that roofing materials experience in the San Antonio area is intense. Shingles that are technically rated for Texas conditions still have dramatically different lifespans depending on the direction your roof faces, whether nearby trees provide afternoon shade, and whether your attic is properly ventilated against that brutal summer heat.
Out-of-state contractors who sweep into Texas after major storms often don’t understand this. They bring materials from their home regions, apply installation methods suited for milder climates, and leave before the first real summer heat cycle shows whether their work holds up. We’ve seen it happen repeatedly. Homeowners get a repair that looks fine in November and starts failing by July.
That’s why partnering with local roofing experts who have worked specifically in this region matters more than any single product or technique. A contractor who has repaired hundreds of roofs in Converse and the surrounding areas knows which shingle brands hold up against local hail, which underlayments perform best in the heat, and which valleys on a typical Converse home collect water during our specific storm patterns. That local knowledge is not something you can look up in a product manual.
Need reliable help? Roof repair and restoration by local experts
When the stakes are high, having the right team on your side can make all the difference.
At Buffalo Roofing & Exteriors, we specialize in roofing repairs, storm damage restoration, and long-term maintenance for homeowners across Converse, TX and the greater San Antonio area. We understand the specific weather challenges this region throws at your roof, and we bring the local expertise to handle everything from a single missing shingle to full structural damage after a major storm.

Whether you’re dealing with an urgent leak or planning for long-term durability, our team offers free estimates, flexible financing options, and workmanship warranties that protect your investment. Explore our full storm damage restoration services or learn more about weather-resistant roofing solutions built specifically for Texas conditions. We’re local, we’re experienced, and we’re ready to help you protect what matters most.
Frequently asked questions
How quickly should I repair a roof leak in Converse, TX?
You should repair a roof leak as soon as possible because delaying after a storm allows water to penetrate deeper into your home’s structure, leading to mold, wood rot, and significantly higher repair costs.
Can I repair my roof myself, or should I hire a pro?
Small repairs like replacing one or two shingles can be done safely by a confident DIYer, but professional help is recommended for steep roofs, large damaged areas, structural concerns, or anywhere safety equipment is required.
What maintenance helps my roof last longer after repairs?
Scheduling biannual inspections and keeping your gutters clean are the two most impactful habits, as regular maintenance safeguards Texas roofs against the cumulative damage that builds up between storms.
What is the most common cause of roof damage in Converse, TX?
Severe thunderstorms with high winds and hail are the leading culprits, because storms cause the majority of roof issues in Texas by dislodging shingles and exposing the underlayment to direct water intrusion.
How do I check if my roof repair was successful?
Monitor the previously affected area during the next rainfall and confirm there are no new water stains, then physically check that shingles lie flat and gutters are free of excess granules, as post-repair inspections spot issues early before they develop into bigger problems.