

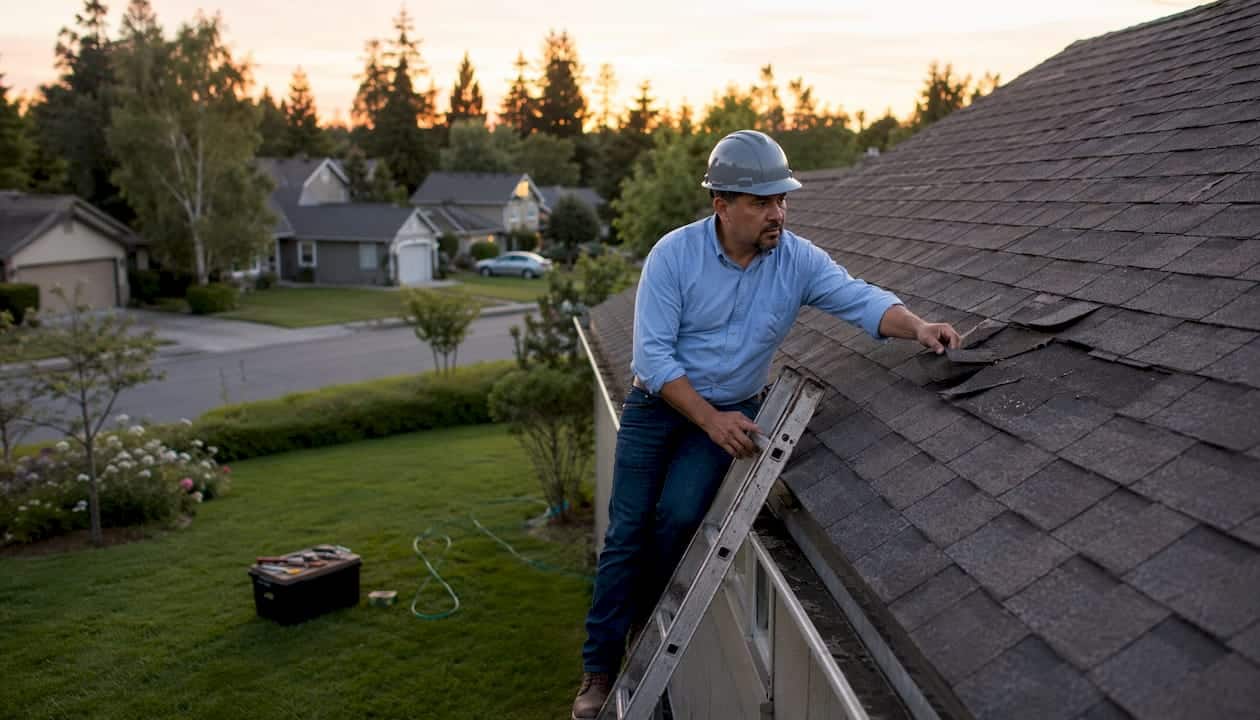
TL;DR:
- Act quickly after wind damage by documenting everything, acting safely, and calling licensed professionals within 24 hours. Wind causes uplift and seal failures that weaken shingles at edges and ridges, often invisible from the ground, which can lead to leaks later. Proper inspection, thorough documentation, and choosing repair or replacement based on damage extent and roof age improve insurance outcomes and long-term durability.
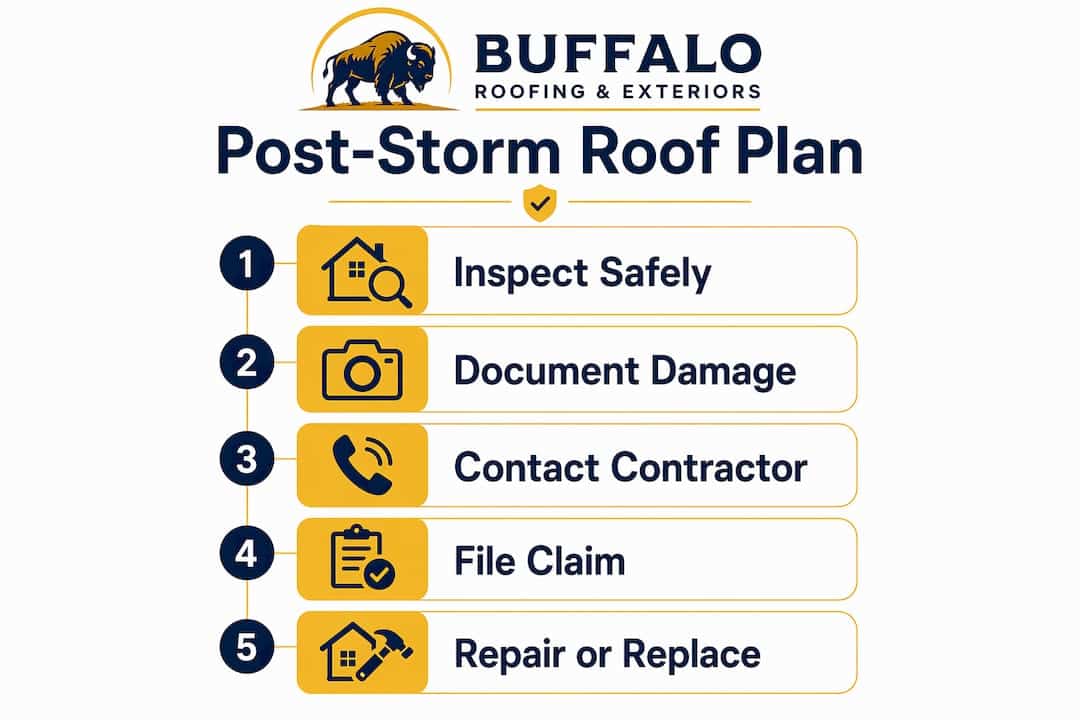
When you suspect wind damage to your roof, act in this order: stay safe, document everything with timestamped photos, apply temporary protection only if you can do so without climbing, then call a licensed roofer and your insurer within 24 hours. That sequence matters because mold can begin within a couple of days of water intrusion, and late documentation weakens insurance claims.
Your first 24–48 hours checklist:
- Stay back from the structure if you see sagging, hear creaking, or spot downed power lines nearby.
- Walk the perimeter from the ground and look for missing shingles, debris on the roof, and granules in the gutters.
- Move vehicles away from the roofline in case loose materials fall.
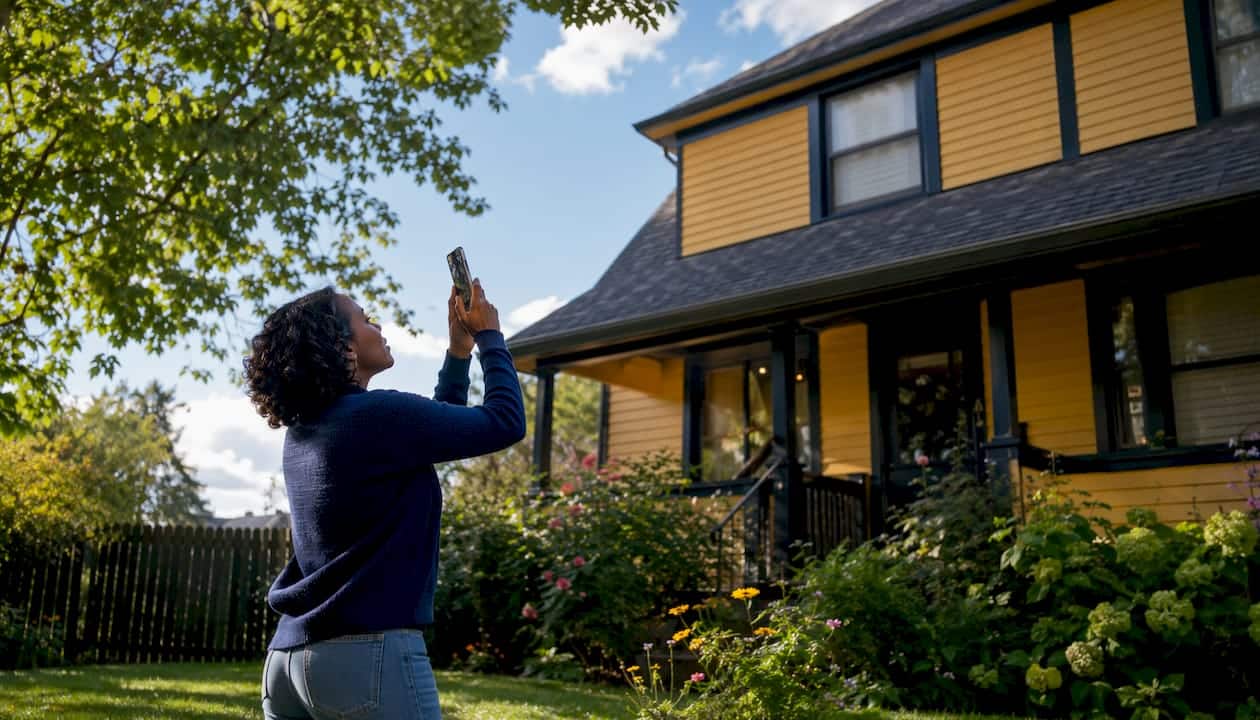
- Take timestamped photos from multiple angles before anything is touched or moved.
- Apply a tarp over any open areas only if you can do it safely from a ladder at the eave, not by walking the slope.
- Call a licensed, insured contractor for a rooftop inspection. Buffaloroofingandexteriors serves Corpus Christi, San Antonio, and the surrounding South Texas coast and offers same-day emergency triage.
- File your claim promptly. The Insurance Information Institute recommends filing quickly and keeping all receipts for emergency mitigation.
Gale-force winds starting at moderate speeds can loosen or curl shingles. Stronger gusts can tear them off entirely, and very high winds can cause substantial structural failure. The National Weather Service classifies winds above a certain speed as “severe,” but real-world roof damage often begins well below that threshold, especially on aging or poorly installed roofs.
Pro Tip: Ask your contractor for a line-item estimate that uses Xactimate terminology. Adjusters work from that same system, and a scope written in matching language is far harder to under-value.
Table of Contents
- How wind actually breaks a roof: mechanics and weak points
- Exterior signs of wind damage you can spot from the ground
- Interior and attic signs that point to wind-related roof problems
- How to safely inspect your roof after a storm
- How to document wind damage for an insurance claim
- Will homeowners insurance pay for a wind-damaged roof?
- Repair vs. replace: how to decide after wind damage
- What professional wind-damage restoration looks like
- Prevention and maintenance to reduce future wind damage
- Download this post-storm roof inspection checklist
- How Buffaloroofingandexteriors handles wind damage in South Texas
- Key Takeaways
- What experienced roofers know that most homeowners don’t
- Buffaloroofingandexteriors: same-day wind damage response in South Texas
- Authoritative sources and further reading
How wind actually breaks a roof: mechanics and weak points
Wind damages roofs by breaking shingle seals and creating uplift that concentrates force at edges, eaves, ridges, and flashing. Understanding the mechanics helps you interpret what you see and explain it to an adjuster.
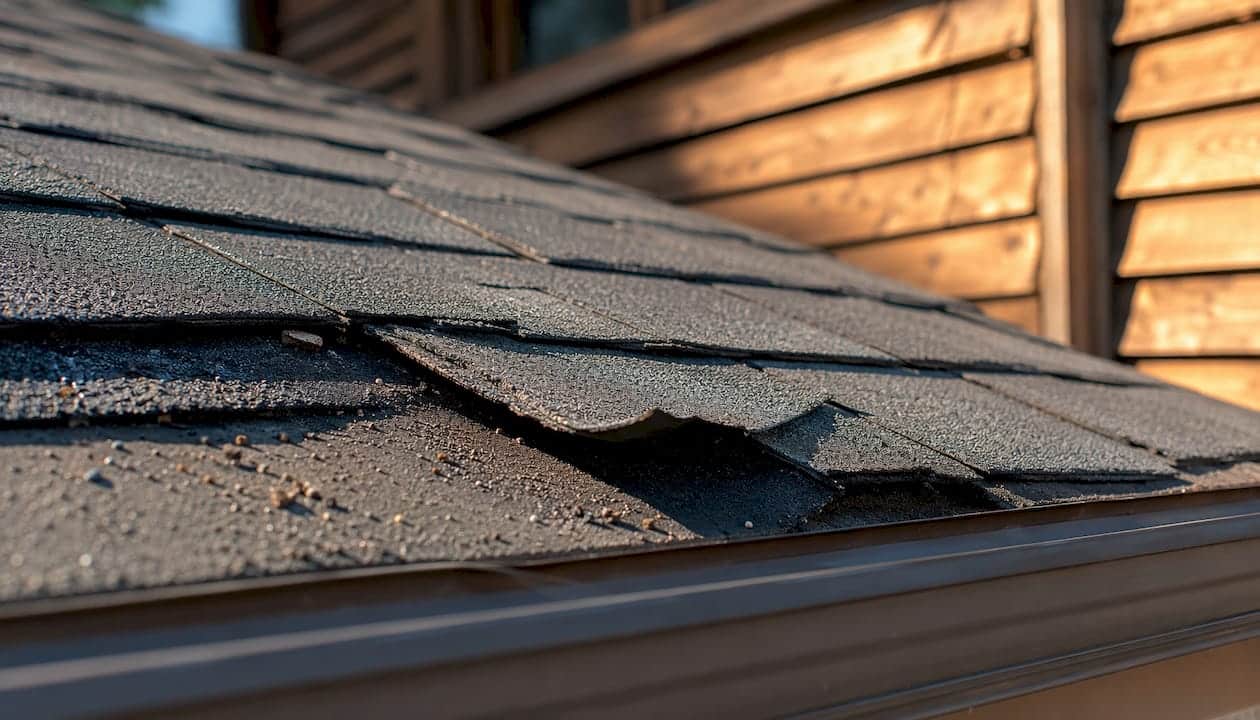
Uplift and seal failure are the primary culprits. As wind accelerates over a roof surface, it creates a low-pressure zone above the shingles. That pressure differential tries to pull the shingles up from the deck. Factory-applied adhesive strips hold shingles down, but once those seals break, the shingle lifts, flexes, and either tears off or re-seats in a compromised position. A re-seated shingle looks fine from the ground. It isn’t.
Creased shingles are the hidden failure most homeowners miss. When a shingle lifts and snaps back, the fiberglass mat inside can fracture along a crease line. That crease is a permanent structural weak point that will eventually leak, even though the shingle is still attached and looks intact. Industry standards treat a creased shingle as damaged and eligible for replacement consideration.
The “zipper effect” is what happens when one failed shingle exposes the edge of its neighbor. Wind catches that exposed edge, lifts the next shingle, and the failure propagates across a slope faster than the storm itself.
Common weak points on any residential roof:
- Eave and rake edges (first to catch wind, last to be inspected)
- Ridge caps (elevated position, exposed on both sides)
- Valleys (water and wind channel together here)
- Step and counter flashing at walls, chimneys, and dormers
- Pipe boots and vent covers
- Skylights and their curb flashing
Pro Tip: A pressure-differential diagram placed between this section and the exterior signs section helps homeowners visualize why edges fail before field shingles. Consider adding one to your printed version.
Exterior signs of wind damage you can spot from the ground
Visible exterior signs of storm damage include missing or lifted shingles, curled edges, granule loss in gutters, dented or bent flashing, and storm debris resting on the slope. You can identify most of these without setting foot on a ladder.
What to look for and photograph:
- Missing shingles or shingle tabs (bare black felt or decking visible)
- Lifted or curled shingle edges, especially at eaves and rakes
- Granules collecting in gutters or downspout splash zones
- Dented, bent, or pulled-away metal flashing at chimneys, walls, or vents
- Debris (branches, neighbor’s shingles, gravel) sitting on the slope
- Exposed nail heads or popped fasteners along ridge caps
- Gutters pulled away from the fascia board
Use binoculars from the far corner of your yard to get a clear view of each slope. Photograph from four directions: front, back, and both sides. For each slope, take one wide shot that shows the full surface, then zoom in on any area that looks irregular.
For insurance adjusters, the most useful photos are: a wide shot of the whole house showing storm context, a close-up of each damaged area with a reference object (a coin or tape measure) for scale, granule-filled gutters photographed from above, and any debris still on the roof before cleanup. Date and time stamps are non-negotiable.
Pro Tip: Photograph your gutters before and after you clean them. A gutter full of granules is direct physical evidence of shingle degradation from the storm, and adjusters respond to it.
For a deeper look at identifying storm damage on non-obvious areas of your roof, Buffaloroofingandexteriors has a practical guide covering the spots most homeowners overlook.
Interior and attic signs that point to wind-related roof problems
New ceiling stains, wet or matted insulation, daylight visible through the deck, or a musty odor in the attic all point to wind-compromised roofing, even when exterior damage looks minor from the ground. Interior symptoms often appear before a homeowner notices anything outside.
What to check in the attic:
- Water stains or dark streaks on the underside of the roof deck
- Wet, compressed, or discolored insulation batts
- Daylight visible through gaps in the decking or at ridge and eave edges
- Active dripping or pooled water on the attic floor
- Musty or mildew smell (mold can establish within 24–48 hours of moisture intrusion, per EPA guidance on mold and moisture)
- Frost or condensation on framing members in cooler months
Interior signs map to exterior failures in predictable ways. A stain near the chimney usually means flashing failure. A stain along an exterior wall line often points to a failed step-flashing joint. Stains in the field of the ceiling, away from penetrations, suggest decking gaps or creased shingles that have begun to let water through.
Safety note: If you see water near electrical fixtures, junction boxes, or wiring, stop the inspection immediately and call an electrician before re-entering that space. Water and live circuits are a serious hazard.
Ceiling stains that appear within a day or two of a storm are almost always storm-related, which matters for your claim timeline. Document them with photos the moment you spot them, noting the date.
How to safely inspect your roof after a storm
Perform a ground-level and attic inspection only. Do not climb a wet, steep, or structurally compromised roof. Leave rooftop work to a licensed professional.
Steps you can safely do yourself:
- Perimeter walk. Circle the entire house at a safe distance. Look up at all four slopes, the ridge, and the eaves. Note anything that looks out of place.
- Binocular survey. From the far edge of your yard, scan each slope methodically from eave to ridge. Focus on edges, ridge caps, and any area where shingles look raised or irregular.
- Gutter check. Look inside gutters for granule accumulation. Check that gutters are still attached to the fascia and that downspouts are intact.
- Attic inspection. With a flashlight, check the underside of the deck for stains, daylight, wet insulation, and any structural framing that looks cracked or displaced.
- Photo documentation. Photograph every finding. Use a consistent naming convention:
YYYYMMDD_location_detail.jpg(for example,20260614_frontSlope_liftedShingle.jpg).
Red flags that require immediate professional intervention:
- Sagging or visibly deflected roof decking
- Daylight visible through the deck boards from inside the attic
- Cracked or displaced structural framing members
- Open seams at eaves or ridge where decking is exposed
- Any sign of active water intrusion near electrical components
Real-world roof damage begins at moderately high wind speeds well below the threshold the National Weather Service uses for “severe” classification. If last night’s storm reached those speeds, a professional inspection is worth scheduling even if you see nothing obvious from the ground.
Pro Tip: When you call a contractor, mention the storm date and the approximate wind speed from your local National Weather Service report. That context helps the inspector know which failure modes to prioritize.
How to document wind damage for an insurance claim
Good documentation materially improves claim outcomes. Timestamped photos from multiple angles, a written storm record, and a contractor’s line-item estimate are the three things that most often determine whether a claim is approved at full scope.
Documentation checklist:
- Timestamped photos of all exterior damage (wide and close-up)
- Photos of granule-filled gutters before cleaning
- Interior ceiling and attic stain photos with date noted
- Written log of storm date, time, and wind speed (pull from the National Weather Service or Weather.gov)
- Contractor’s line-item written estimate
- Receipts for any emergency tarping or temporary repairs
- Copy of your insurance policy declarations page
| Document | Why it matters |
|---|---|
| Timestamped exterior photos | Establishes damage occurred during the storm event |
| Granule gutter photos | Physical evidence of shingle degradation from wind |
| Interior stain photos | Proves water intrusion and its location |
| NWS wind speed record | Ties damage to a specific weather event |
| Line-item contractor estimate | Aligns scope with adjuster’s valuation system |
| Emergency repair receipts | Demonstrates mitigation duty and prevents further damage |
For a step-by-step walkthrough of documenting weather-related damage, Buffaloroofingandexteriors has a dedicated resource that covers photo protocols and claim-ready file organization.
Pro Tip: Request that your contractor’s estimate use Xactimate line-item terminology, specifically calling out “seal failure” and “creased shingle” where applicable. Adjusters sometimes under-scope claims by counting only missing shingles. A scope written in matching language closes that gap.
Will homeowners insurance pay for a wind-damaged roof?
Most standard U.S. homeowners policies cover sudden wind damage to the dwelling, but the actual payout depends on your policy type, roof age, deductible structure, and any applicable exclusions.
ACV vs. RCV: the payout difference that matters most
Actual Cash Value (ACV) pays the depreciated value of your roof at the time of loss. On a 15-year-old roof, that depreciation can be substantial, leaving you with a significant out-of-pocket gap. Replacement Cost Value (RCV) covers the full cost to replace the damaged portion at current material and labor prices. That difference can easily determine whether you’re paying for a repair or a full reroof yourself.
Common coverage gotchas:
- Wind/hail deductibles. Many policies in coastal and storm-prone states carry a separate wind or hail deductible, often expressed as a percentage of the dwelling coverage rather than a flat dollar amount.
- Maintenance exclusions. Damage attributed to wear, neglect, or pre-existing deterioration is typically excluded. Adjusters look for this.
- Discontinued shingle matching. If your shingles are no longer manufactured, many policies include matching provisions that may justify full replacement rather than a patchwork repair.
- Age-based limitations. Some insurers apply percentage-of-slope rules or ACV schedules once a roof passes a certain age.
Practical filing steps:
- Apply emergency mitigation (tarping) and keep all receipts.
- Document damage thoroughly before any cleanup.
- File your claim promptly. Delays can complicate the timeline.
- Get a licensed contractor’s written estimate before the adjuster visits.
- Request an itemized scope from the adjuster and compare it line by line against your contractor’s estimate.
- If the adjuster’s scope misses seal failures or creased shingles, ask your contractor to submit a supplemental estimate.
For help navigating roof insurance claims, Buffaloroofingandexteriors works directly with adjusters and provides Xactimate-aligned estimates as part of its standard process.
Repair vs. replace: how to decide after wind damage
Choose repair for localized damage on a roof that’s in good overall condition and well within its service life. Choose replacement when damage is widespread, the roof is approaching the end of its expected lifespan, or the shingles have been discontinued.
Decision drivers:
- Roof age. Roofs approaching the end of their expected lifespan are often better served by full replacement. Repeated spot repairs on an aging system cost more over time and don’t reset the warranty.
- Extent of damage. Some insurers and contractors apply a 25% slope rule: if a significant portion of a slope is damaged, replacement of the full slope may be required or recommended.
- Creased shingles. A roof with widespread hidden fiberglass mat fractures is a replacement candidate even if most shingles are still attached.
- Matching availability. If your current shingles are discontinued, a patch will look mismatched and may trigger a matching provision in your policy.
- Warranty reset. A full replacement with a new Owens Corning or GAF system resets the manufacturer warranty and gives you a fresh service life.
| Factor | Lean toward repair | Lean toward replacement |
|---|---|---|
| Roof age | Under 10 years | 20+ years |
| Damage extent | One or two slopes, localized | Multiple slopes or widespread |
| Shingle availability | Current product still made | Discontinued, no match available |
| Prior repairs | First incident | Repeated repairs in past 5 years |
| Warranty status | Active manufacturer warranty | Expired or voided |
Pro Tip: Ask your contractor to check whether your shingle line is still in production before agreeing to a repair. A discontinued product means any patch will be visible and may open the door to a full replacement claim under your policy’s matching provision.
What professional wind-damage restoration looks like
A professional restoration follows a predictable sequence: thorough inspection, emergency mitigation, line-item scope, adjuster coordination, and finish work with documented quality controls. Knowing the steps helps you hold a contractor accountable at each stage.
- Initial inspection. The contractor walks the roof and attic, photographs all damage, and produces a written report that identifies missing shingles, seal failures, creased shingles, flashing damage, and any structural concerns.
- Emergency mitigation. If the roof is open to weather, tarps or temporary repairs go on the same day. This protects your home and satisfies your policy’s mitigation duty.
- Line-item scope. The contractor produces a detailed estimate using Xactimate or equivalent line-item format, covering materials, labor, tear-off, disposal, permits, and any code-required upgrades.
- Adjuster coordination. A good contractor meets the adjuster on-site, walks the damage together, and submits a supplemental estimate if the adjuster’s scope is incomplete.
- Material procurement and scheduling. Lead times for Owens Corning and GAF shingles in South Texas typically run a few days to two weeks depending on color and product line.
- Installation. Tear-off, deck inspection and repair, underlayment, shingles, flashing, and ridge caps installed to manufacturer specs and local building code.
- Final inspection and punch list. The contractor walks the completed job with the homeowner, confirms all penetrations are sealed, and provides warranty paperwork.
| Phase | Typical timeline |
|---|---|
| Initial inspection | Same day to 48 hours post-storm |
| Emergency tarping | Same day as inspection |
| Insurance scope and adjuster meeting | 3–10 days |
| Material lead time | 3 days |
| Installation (residential reroof) | 1–3 days |
| Final documentation | Same day as completion |
Pro Tip: Ask for a final photo set from the contractor showing completed flashing, ridge caps, and pipe boots. That documentation protects you if a warranty question arises later.
Prevention and maintenance to reduce future wind damage
Regular maintenance plus a few targeted upgrades, such as edge securement, improved nailing patterns, and higher wind-rated shingles, can significantly lower wind-damage risk more than any single product purchase.
Practical maintenance items:
- Trim trees so no branches hang within 10 feet of the roofline.
- Inspect and re-seal loose or lifted flashing at chimneys, walls, and vents every year.
- Check ridge caps and eave edges after every significant storm.
- Clean gutters twice a year so water doesn’t back up under eave shingles.
- Inspect attic ventilation to maintain balanced pressure and reduce uplift forces on the deck.
- Replace any cracked or brittle caulk around pipe boots and skylights.
Annual and post-storm maintenance schedule:
- Spring (pre-storm season): Full ground inspection, binocular survey, gutter cleaning, attic ventilation check.
- After any storm with winds above 45 mph: Ground inspection, gutter granule check, attic moisture check.
- Fall: Flashing inspection, tree trimming, re-seal any open joints before winter.
- At replacement: Specify wind-rated shingles (Owens Corning or GAF products rated for very high wind speeds are available for South Texas coastal applications), six-nail fastening patterns at eaves, and sealed roof deck underlayment per FLASH (Federal Alliance for Safe Homes) sealed roof deck guidelines.
Homes with attached awnings or exterior fixtures should consider how those elements affect wind loads on the roof structure. Properly rated and maintained exterior fixtures reduce the risk of debris impact and pressure concentration at roof edges. Resources on wind resistance for exterior fixtures can help homeowners evaluate those attachments alongside their roofing upgrades.
Download this post-storm roof inspection checklist
This one-page checklist covers every step from the moment you step outside after a storm to the point where you hand documentation to your insurer. Print it or save it to your phone before storm season.
Checklist contents:
- Safety steps (downed lines, structural hazards, when to stay out)
- Ground perimeter walk items
- Binocular survey targets (eaves, ridge, flashing, vents)
- Gutter and downspout check
- Attic inspection items (stains, daylight, wet insulation, odors)
- Photo checklist with recommended file naming
- Emergency tarping decision guide
- Claim documentation list (photos, NWS record, contractor estimate, receipts)
- Contractor questions to ask before signing
Download the printable PDF checklist from Buffaloroofingandexteriors, or save the page to your phone’s home screen for quick access after a storm.
Pro Tip: Store a printed copy in your emergency kit alongside your insurance policy declarations page. After a major storm, cell service and internet access can be unreliable, and having a physical checklist means you won’t miss a step.
How Buffaloroofingandexteriors handles wind damage in South Texas
Buffaloroofingandexteriors follows a documented local workflow built specifically for South Texas coastal conditions, shortening emergency response time and producing estimates that align with insurance adjuster expectations from the first meeting.
What the local workflow includes:
- Same-day emergency triage and tarping for open or actively leaking roofs
- Full rooftop and attic inspection with written photo documentation
- Xactimate-aligned line-item estimates that itemize seal failures, creased shingles, flashing damage, and code-required upgrades
- On-site adjuster coordination to prevent under-scoping
- Permit handling for Corpus Christi, San Antonio, Victoria, and surrounding South Texas jurisdictions
- Material sourcing for Owens Corning and GAF wind-rated shingle systems suited to coastal wind exposure
- Financing options for homeowners whose ACV payout leaves a gap
- Manufacturer-backed warranties on completed installations
South Texas coastal roofs face wind loads that inland roofs don’t. Gulf storms, tropical systems, and fast-moving fronts can push sustained winds well above the 45–50 mph threshold where real-world damage begins. Buffaloroofingandexteriors’ crews are trained on coastal installation standards and familiar with the local permit offices, which shortens the timeline from inspection to finished job.
Credentials to confirm before signing with any contractor:
- Licensed by the Texas Department of Licensing and Regulation
- Carries general liability and workers’ compensation insurance
- Provides a written, itemized estimate before work begins
- Offers a manufacturer warranty on materials and a workmanship warranty on labor
Pro Tip: Ask any contractor you’re considering for their license number and verify it at the Texas Department of Licensing and Regulation’s online lookup before signing anything. A licensed, insured contractor protects you if something goes wrong mid-job.
Key Takeaways
Acting within the first 24–48 hours after a wind event, with thorough documentation and a licensed contractor’s line-item assessment, is the single most effective way to protect both your home and your insurance claim.
| Point | Details |
|---|---|
| Document before anything else | Timestamped photos taken before cleanup are the foundation of a successful insurance claim. |
| Hidden damage is common | Creased shingles and broken seals leave shingles attached but structurally failed; only a rooftop inspection finds them. |
| ACV vs. RCV changes your costs | Replacement Cost Value policies cover full reroof cost; ACV policies pay depreciated value, leaving a gap you pay out of pocket. |
| Age drives the repair-vs-replace decision | Roofs near 20 years old are usually better served by full replacement than repeated spot repairs. |
| Buffaloroofingandexteriors offers same-day response | Emergency tarping, Xactimate-aligned estimates, and adjuster coordination are available across South Texas. |
What experienced roofers know that most homeowners don’t
The biggest mistake homeowners make after a wind event isn’t skipping the inspection. It’s assuming that because shingles are still on the roof, the roof is fine. Seal failures and creased fiberglass mats are invisible from the ground and from a casual rooftop walk. They show up six months later as a ceiling stain during a rainstorm that had nothing to do with wind.
The second mistake is accepting an adjuster’s initial scope without a contractor’s line-item review. Adjusters work quickly and often count only what’s visibly missing. A contractor who knows to document seal failures and creased shingles by name, using the same Xactimate terminology the adjuster uses, can materially change the scope and the payout. That’s not gaming the system. That’s accurate documentation of real damage.
If your roof is over 20 years old and you’ve had two or more repair visits in the past five years, a storm is often the event that tips the economics toward replacement. A new roof with a full manufacturer warranty from Owens Corning or GAF costs more upfront, but it resets your protection and eliminates the cycle of recurring repairs on a system that’s past its service life.
Buffaloroofingandexteriors: same-day wind damage response in South Texas
When a storm rolls through Corpus Christi, San Antonio, or anywhere along the South Texas coast, the window between wind damage and water damage is short. Buffaloroofingandexteriors offers same-day emergency tarping and triage for wind-damaged roofs, so you’re not waiting days for protection while your insulation soaks.

The difference from calling a general contractor is specificity. Buffalo Roofing and Exteriors produces Xactimate-aligned, line-item estimates that speak the same language as your adjuster, covers permit handling across South Texas jurisdictions, and offers financing for homeowners whose ACV payout doesn’t cover the full replacement cost. From emergency tarping to a finished, warranted reroof, the process is managed in one place.
Ready to get your roof assessed? Request a free inspection and estimate through storm damage restoration services or call Buffaloroofingandexteriors directly. Have your storm date, any photos you’ve taken, and your insurance policy number ready when you reach out. That information lets the team start your estimate and adjuster coordination the same day.
Authoritative sources and further reading
These are the primary references used to build this guide. Each one is worth bookmarking for your own research.
- Insurance Information Institute: How to File a Homeowners Claim — Step-by-step filing guidance from one of the most cited insurance industry sources in the U.S.
- Ready.gov: Thunderstorms and Lightning — Federal emergency preparedness guidance on storm safety, including when to shelter and when to assess damage.
- EPA: A Brief Guide to Mold, Moisture, and Your Home — The source for the 24–48 hour mold establishment window cited in the attic inspection section.
- IBHS: Roof 101 — Insurance Institute for Business and Home Safety’s technical overview of residential roof systems and wind performance.
- FLASH: Seal the Roof Deck and Install a Wind-Resistant Roof Cover — Federal Alliance for Safe Homes guidance on sealed deck installation and wind-resistant roofing products.
- Allstate: Does Homeowners Insurance Cover Storm Damage? — Practical insurer-side explanation of what standard policies cover and common exclusions.
- Travelers Insurance: Homeowners Insurance for Wind Damage — Clear explanation of ACV vs. RCV and how each affects your out-of-pocket costs after a claim.
- Buffaloroofingandexteriors: Storm Damage Restoration Guide — The local South Texas resource for homeowners navigating the full restoration process from emergency tarping to final inspection.