
TL;DR:
- Proper installation and choice of fiber cement siding are essential for coastal Texas durability.
- Salt air, humidity, wind, and hail heavily threaten siding performance along the Gulf Coast.
- Regular inspections and maintenance extend siding lifespan and protect against storm damage.
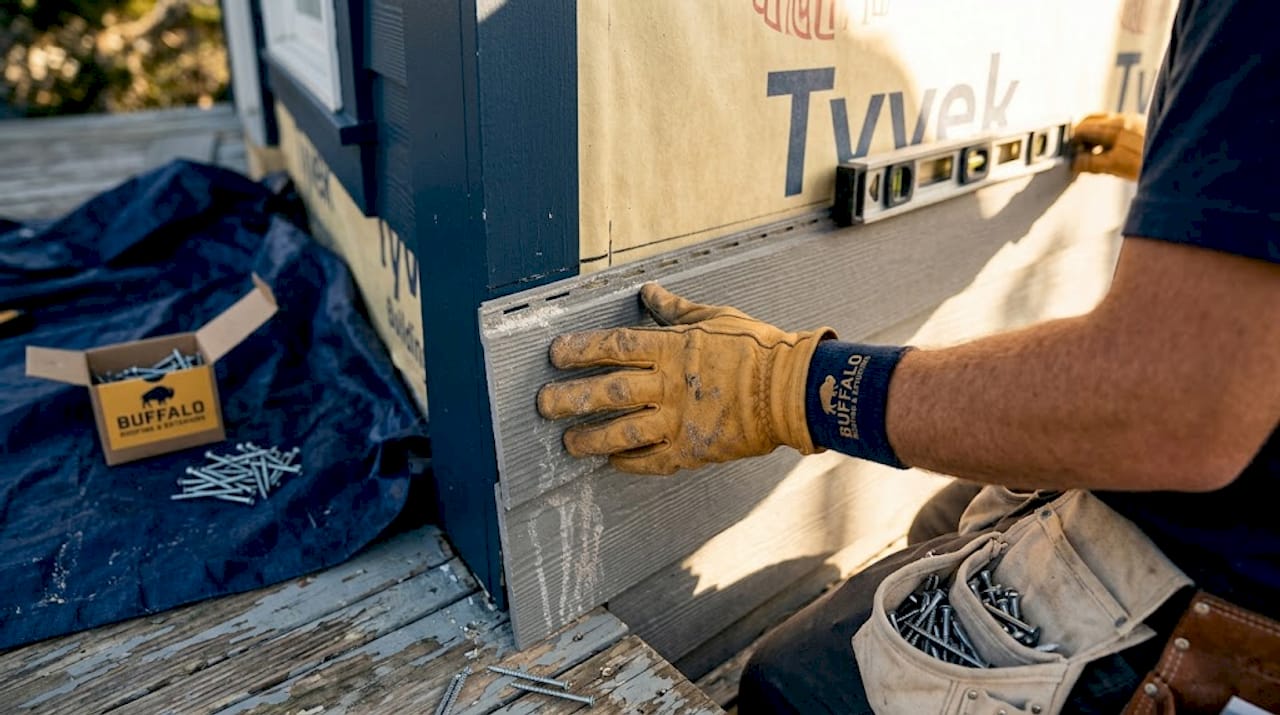
Your neighbor’s vinyl siding starts peeling after the first major Gulf storm. Three houses down, rotting wood panels are already letting moisture into the walls. Meanwhile, the one home on the block with properly installed fiber cement siding looks exactly the same as it did before the storm hit. That difference is not luck. It is the result of choosing the right material, preparing correctly, and installing it the way coastal Texas actually demands. This guide walks you through every step, from understanding local threats to keeping your siding in peak condition for years.
Table of Contents
- Understand your challenges: Texas coastal weather and siding threats
- Choose the right material: Siding options compared for weatherproofing
- Preparation checklist: What you need for a weatherproof install
- Step-by-step: How to install weatherproof siding for Texas coastal homes
- Verification and upkeep: How to ensure your siding lasts
- Our expert take: Why most weatherproof siding fails on the coast (and what really works)
- Ready to upgrade your siding? Coastal Texas experts can help
- Frequently asked questions
Key Takeaways
| Point | Details |
|---|---|
| Fiber cement is best | James Hardie HZ10 or similar fiber cement offers superior protection for Texas coastal homes. |
| Proper installation matters | Even the best siding fails without proper weather barriers, flashing, and corrosion-resistant fasteners. |
| Avoid vinyl and wood | Vinyl and wood siding often degrade and fail quickly in Texas coastal conditions. |
| Annual checks needed | Regular inspections and maintenance maximize siding performance after installation. |
Understand your challenges: Texas coastal weather and siding threats
Living along the Texas Gulf Coast means your home faces a relentless combination of threats that inland homes simply do not deal with. Salt air is one of the most damaging forces your siding encounters. Salt particles carried by coastal winds land on your exterior surfaces and accelerate corrosion, paint failure, and material breakdown faster than almost any other environmental factor.
High humidity compounds the problem. When moisture levels stay elevated for months at a time, siding materials that were not designed for coastal conditions absorb water, swell, warp, and eventually rot or crack. Add hurricane-force winds and hail to that equation, and you have a serious challenge.
Common siding failure points in coastal Texas include:
- Paint peeling or bubbling from salt and UV exposure
- Warping and buckling caused by moisture absorption in wood or vinyl
- Fastener corrosion when non-stainless hardware reacts with salt air
- Mold and mildew growth behind panels where moisture has infiltrated
- Wind-driven panel separation from improper installation or inadequate fastening
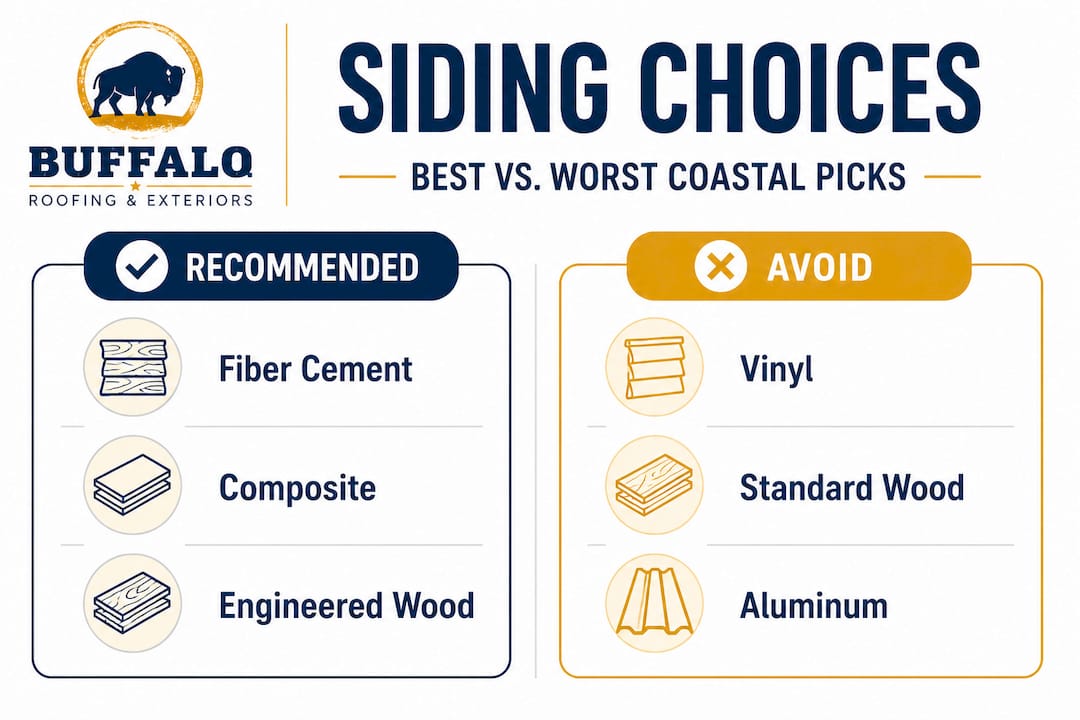
Fiber cement siding, such as James Hardie, is the top recommendation for Texas coastal regions due to superior resistance to salt air, humidity, hurricanes, wind, hail, fire, and pests. Experts consistently point to this material as the benchmark for weather-resistant exteriors along the Gulf Coast.
“The wrong siding material combined with poor installation is not just a cosmetic problem. It is a structural risk that can lead to mold, rot, and interior water damage within just a few storm seasons.”
Understanding how siding protection from storm damage works at a material level gives you the foundation to make a smart purchase decision.
With the challenges clear, let’s look at which siding materials actually hold up to the Texas coastal climate.
Choose the right material: Siding options compared for weatherproofing
Not all siding is created equal, and the coastal Texas environment exposes every weakness quickly. Here is how the most common options stack up:
| Material | Wind resistance | Salt/humidity resistance | Cost range | Lifespan (coastal) |
|---|---|---|---|---|
| Fiber cement (HZ10) | Excellent | Excellent | $$$ | 30 to 50 years |
| Engineered wood | Good | Moderate | $$ | 15 to 25 years |
| Steel/composite | Excellent | Excellent | $$$$ | 40 to 60 years |
| Vinyl | Poor | Poor | $ | 5 to 15 years |
| Traditional wood | Poor | Very poor | $$ | 5 to 10 years |
HZ10-rated fiber cement is specifically engineered for high-humidity coastal zones. It uses stainless fasteners to resist salt corrosion, and it requires elevated foundations and hurricane clips for a complete install. Experts strongly advise homeowners to avoid vinyl and wood in high-humidity, high-salt environments. The fiber cement siding benefits include dimensional stability, meaning it does not expand and contract dramatically with temperature swings the way vinyl does.
Steel and composite options offer maximum impact resistance, which matters a great deal in hail-prone areas. Their higher upfront cost is often offset by dramatically lower repair and replacement expenses over a decade. Explore your full range of siding material types before committing to a product.
Key factors to prioritize when selecting your material:
- HZ10 climate zone rating for fiber cement products
- Salt-spray test certification from the manufacturer
- Impact resistance rating (Class 4 is the highest for hail)
- Fire resistance rating for insurance discounts
- Manufacturer warranty specific to coastal or humid climates
Pro Tip: Ask your supplier for the actual salt-spray test results for any product you are considering. A product spec sheet is not the same as a certified test result. Real coastal performance data tells you how the material actually holds up, not just how it is marketed.
Review expert siding choices for coastal Texas to see how local professionals approach material selection for different budgets and exposure levels.
Now that you know what to look for in materials, let’s get practical with a checklist and table to help you prepare for installation.
Preparation checklist: What you need for a weatherproof install
Preparation is where most DIY and even some contractor installs go wrong. Skipping steps here causes failures that no premium material can prevent.
| Item | Purpose | Coastal requirement |
|---|---|---|
| Weather-resistive barrier (WRB) | Blocks moisture behind siding | Code-compliant housewrap or building paper |
| Kick-out flashing | Diverts water at roof-wall intersections | Required at all roof-wall joints |
| Window and door flashing | Seals openings against wind-driven rain | Tape and metal flashing combined |
| Stainless steel fasteners | Resists salt corrosion | Mandatory within 1,000 feet of saltwater |
| HZ10-rated siding panels | Designed for humid coastal zones | Required for warranty validity |
| 6-inch grade clearance | Prevents ground moisture wicking | Must be maintained above soil/mulch |
Proper installation requires a code-compliant WRB, correct flashing at all openings and roof-wall intersections, corrosion-resistant fasteners, 6-inch grade clearance, and nail spacing of 16 inches on center penetrating at least 1.25 inches into framing. These are not suggestions. They are the baseline for a weatherproof result.
Follow these numbered prep steps before a single panel goes up:
- Pull all required permits from your local municipality
- Order HZ10-rated siding with at least 10 percent overage for cuts and waste
- Confirm stainless steel fasteners are on-site before the crew arrives
- Inspect the existing wall sheathing for rot, soft spots, or previous water damage
- Repair any sheathing issues before installing the WRB
- Install WRB from the bottom up, overlapping seams by at least 6 inches
- Flash all windows, doors, and roof-wall intersections before siding begins
Review the full siding maintenance checklist to understand what your siding will need after installation, and plan your installation workflow before materials arrive.
Pro Tip: Never let siding panels sit directly on the ground or in standing water on the job site. Even moisture-resistant materials can absorb water during storage, which affects their performance and can void the manufacturer’s warranty.
Consider composite siding as an alternative if your budget allows for higher upfront investment in exchange for lower long-term maintenance costs.
With everything ready, follow these steps for best results during installation in a demanding coastal environment.
Step-by-step: How to install weatherproof siding for Texas coastal homes
Installation quality determines whether your siding performs as advertised or fails within a few storm seasons. Follow each step without shortcuts.
- Prepare the wall surface. Remove all old siding, inspect sheathing, and repair any damage before proceeding.
- Install the WRB. Start at the bottom and work upward. Overlap horizontal seams by 6 inches and vertical seams by 12 inches. Tape all seams with compatible flashing tape.
- Flash all openings. Install self-adhering flashing tape at window sills first, then sides, then head. Add metal kick-out flashing at every roof-wall intersection.
- Install the starter strip. Level it carefully. This strip sets the angle for every course above it.
- Fasten siding panels correctly. Use stainless steel nails, maintain 16-inch on-center spacing, and drive fasteners into framing, not just sheathing.
- Maintain clearances. Keep siding panels at least 6 inches above grade and at least 1 inch above roof surfaces.
- Caulk and seal. Use manufacturer-approved caulk at all butt joints, corners, and trim intersections. Do not caulk the bottom edge of each course.
- Clean the site. Remove all metal shavings and debris immediately. Metal particles left on fiber cement surfaces can rust and stain.
Warning: Improper flashing is the single most common cause of siding failure on the Texas coast. Even premium fiber cement panels cannot stop water that enters through a poorly flashed window or roof-wall joint. Never skip or rush the flashing step.
Poor installation negates material advantages entirely. Coastal installs specifically require stainless fasteners and salt-spray tested materials confirmed before the job begins.
Pro Tip: Request salt-spray tested samples from your siding supplier and compare them visually to standard samples after 48 hours of exposure. This simple test reveals real-world coastal performance before you commit to thousands of dollars in materials.
Explore hurricane-ready siding strategies for additional techniques used in high-wind coastal environments. For a detailed local guide, see our proper installation guide specific to Texas coastal conditions.
Once your siding is installed, it is all about making sure your investment stands the test of time.
Verification and upkeep: How to ensure your siding lasts
Installation day is not the finish line. Ongoing inspection and maintenance are what separate a 10-year siding job from a 40-year one.
After installation, do a thorough visual inspection covering:
- All caulked joints for gaps, cracking, or separation
- Fastener heads for any signs of rust or corrosion
- Panel edges for chips or damage from installation
- Flashing at windows, doors, and roof-wall intersections
- Grade clearance to confirm no soil or mulch has built up against the siding
After any major storm, walk the full perimeter of your home and look for impact damage, lifted panels, or areas where wind-driven rain may have pushed behind the siding. Corrosion-resistant fasteners are critical in coastal installs, and you should check them annually for early signs of salt-related breakdown.
Your annual maintenance schedule should include:
- Spring cleaning with a low-pressure wash to remove salt deposits and mildew
- Sealant inspection to catch and re-caulk any cracked joints before storm season
- Fastener check to tighten or replace any hardware showing corrosion
- Paint touch-up on fiber cement to maintain the moisture-resistant coating
Understanding why siding matters for your home’s structural health makes it easier to prioritize this maintenance. Homes with properly maintained siding consistently see reduced storm damage compared to those with neglected exteriors.
Pro Tip: Set a calendar reminder every September, before peak hurricane season ends, to do a full siding inspection. Catching a loose panel or cracked caulk joint before a major storm costs almost nothing. Fixing the water damage after is a different story.
Our expert take: Why most weatherproof siding fails on the coast (and what really works)
After working on hundreds of coastal Texas homes, we have seen a consistent pattern. The siding itself is rarely the problem. The installation is. Homeowners invest in premium fiber cement, pay for quality materials, and then watch the project fail because a contractor skipped the kick-out flashing or used standard galvanized nails instead of stainless steel.
Here is the uncomfortable reality: the installation quality matters more than the material brand. A perfectly installed mid-range fiber cement product will outlast a poorly installed premium product every single time. The salt air does not care what the product spec sheet says. It finds every gap, every wrong fastener, and every missed flashing point.
We also see homeowners get misled by product marketing. A manufacturer claiming “coastal ready” on the label is not the same as a product that has passed independent salt-spray testing. Always ask for the test data, not just the marketing language. Our team’s approach to weather-resistant exterior expertise is built on this principle: verify everything before it goes on the wall.
The other lesson we share with every client is this: do not treat siding as a set-it-and-forget-it upgrade. The Gulf Coast environment is aggressive. Annual inspections and quick repairs after storms are what protect your investment. The homeowners who get 40 years out of their siding are the ones who treat it like a living part of their home, not a one-time purchase. Review our siding installation reality guide to see how a properly managed project actually unfolds from start to finish.
Ready to upgrade your siding? Coastal Texas experts can help
Choosing and installing weatherproof siding in a coastal environment is not a standard home improvement project. It requires local knowledge, the right materials, and installation methods that match what the Gulf Coast actually throws at your home.

At Buffalo Roofing & Exteriors, our teams in Corpus Christi, San Antonio, and Victoria specialize in exactly this kind of work. We know which products perform in salt air, which installation details make or break a coastal install, and how to protect your home before the next storm season arrives. Explore your expert siding options or connect with our siding installation specialists to get a free estimate and start protecting your home the right way.
Frequently asked questions
What is the most durable siding for Texas coastal homes?
Fiber cement siding, such as James Hardie HZ10, is the most durable option due to superior resistance to salt, humidity, wind, and fire. It is the top recommendation from experts for Gulf Coast homes.
Are there siding materials homeowners should avoid in coastal Texas?
Avoid vinyl and wood siding in areas with high humidity and salt air, as they are prone to warping, rot, and wind damage. These materials simply do not hold up to the Gulf Coast environment over time.
What’s the essential prep before installing weatherproof siding?
Use a code-compliant WRB, proper flashing at all openings and roof-wall intersections, and corrosion-resistant stainless steel fasteners. Skipping any of these steps creates entry points for moisture and wind damage.
How often should weatherproof siding be inspected after installation?
Inspect your siding annually and after every major storm for damage, loose fasteners, or moisture infiltration. Catching small issues early prevents expensive structural repairs down the road.