

TL;DR:
- DIY window replacement offers benefits like lower costs, improved energy efficiency, and enhanced curb appeal. Proper measurement, careful removal, and correct sealing are essential for a successful installation, while mistakes can lead to damage or warranty issues. In complex cases such as rot or large windows, hiring professionals ensures safety and proper performance.
Window replacement is a DIY project that delivers real returns: lower energy bills, better curb appeal, and a more comfortable home. This step by step window replacement guide walks you through every phase, from gathering tools to sealing the finished frame. DIY window replacement typically takes 4–8 hours per window, so plan your weekend accordingly. Material costs generally run $1,000–$3,000 per window when you handle the labor yourself, well below professional installation quotes. Follow each step carefully and you will end up with a window that performs as well as a professionally installed one.
What tools and materials do you need for window replacement?
The right tools make the window installation tutorial go smoothly. Missing even one item mid-project forces a frustrating stop. Stock everything before you start.
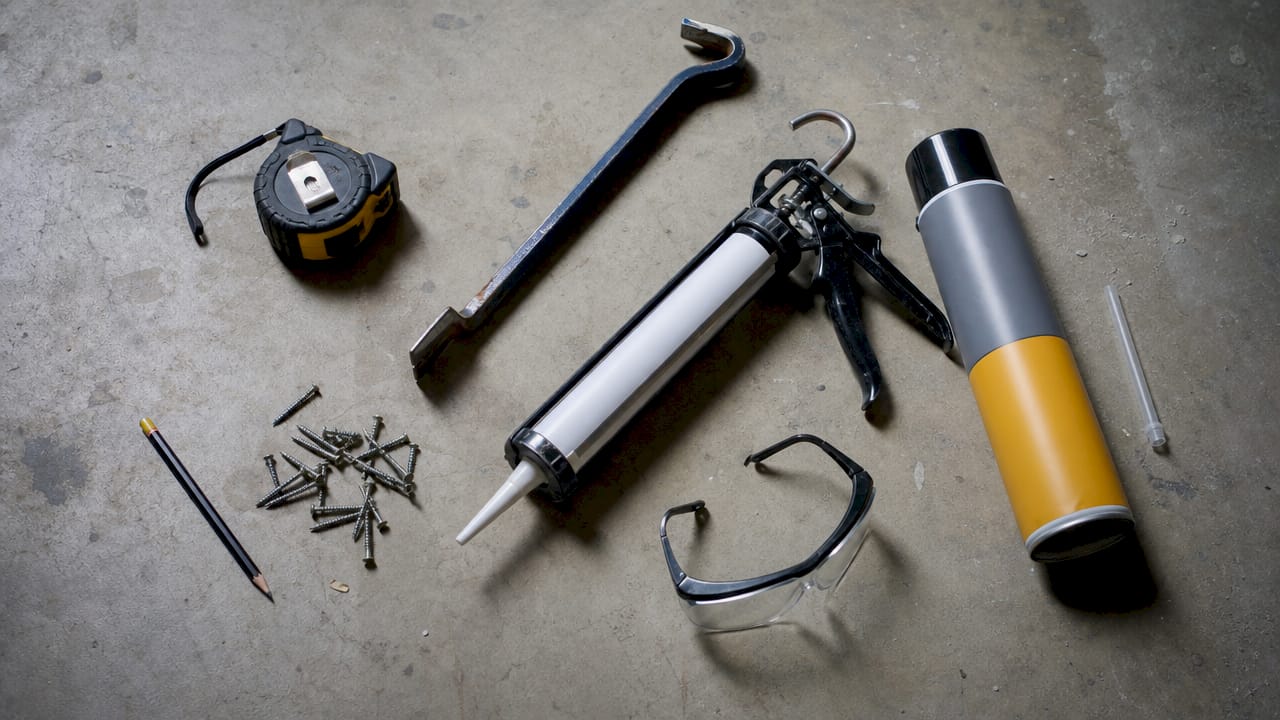
| Tool or Material | Purpose |
|---|---|
| Tape measure | Measure width and height at three points each |
| Pry bar and utility knife | Remove old trim and cut old caulk |
| Level and speed square | Verify plumb, level, and square during install |
| Shims (wood or composite) | Fine-tune window position in the opening |
| Low-expansion window foam | Insulate gaps without bowing the frame |
| Exterior-grade caulk | Seal the perimeter against air and water |
| Drill and screws | Fasten the window to the rough opening |
| Safety glasses and gloves | Protect against glass shards and debris |
| Lead paint test kit | Required for homes built before 1978 |
Quality caulk matters more than most homeowners expect. Use a paintable, waterproof silicone or siliconized latex caulk rated for exterior use. Cheap caulk cracks within a season and lets moisture into the wall cavity.
Pro Tip: Buy foam specifically labeled “window and door” or “minimal expanding.” Standard high-expansion foam can bow a vinyl frame enough to prevent the sash from opening on the day you install it.
How do you accurately measure existing window openings?
Precise measurement is the single most important step in the entire window replacement process. A window that is even a quarter inch too wide will not fit, and a custom order takes 6–12 weeks to arrive. That lead time makes a remeasure extremely costly.
Follow these measurement steps without shortcuts:
- Measure width at the top, middle, and bottom of the rough opening, inside the frame.
- Measure height on the left side, center, and right side of the opening.
- Use the smallest number from each set. Windows must fit the tightest point.
- Check diagonals by measuring corner to corner in both directions. Diagonal measurements must match within 1/4 inch to confirm the opening is square.
- Record everything on paper before ordering. Do not rely on memory.
An out-of-square opening does not mean you cannot proceed. It means you will need more shimming during installation to bring the new window into plumb. Knowing this before the window arrives lets you plan rather than improvise.
Pro Tip: Measure twice, order once. Have a second person confirm your numbers before you submit a custom window order. A fresh set of eyes catches transposed digits.
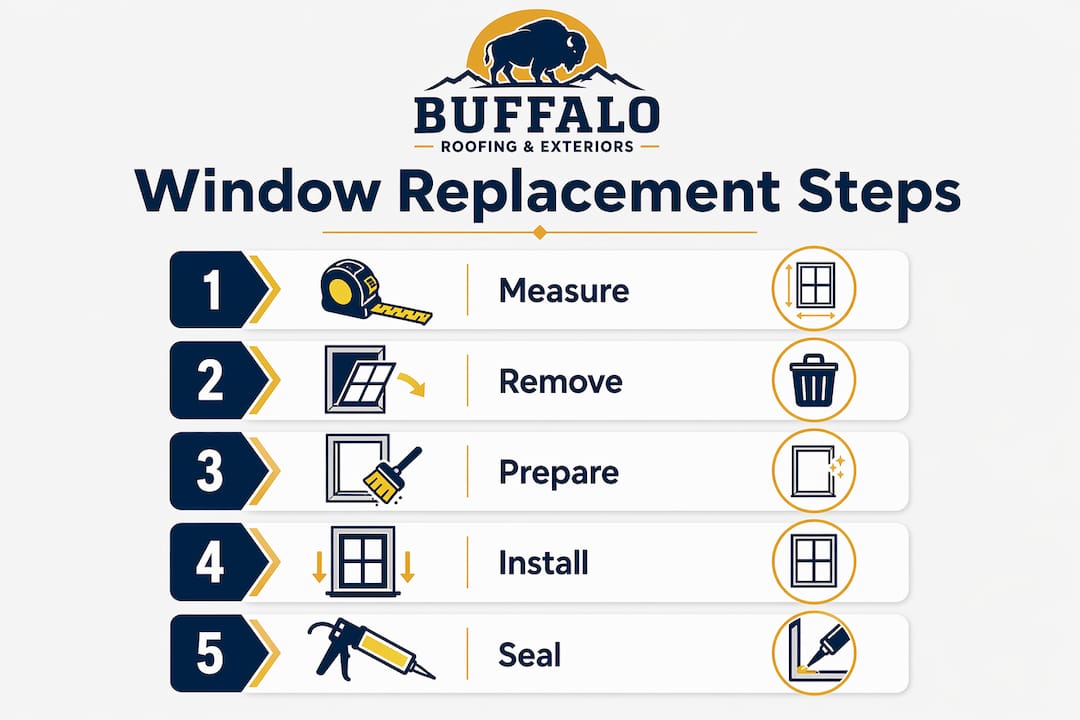
Understanding window frame options before you order also helps you choose a frame material that fits your climate and budget.
How do you remove old windows and prepare the opening?
Careful removal protects the surrounding wall and saves you repair work later. Rushing this phase causes more damage than the original window ever did.
- Score the interior caulk along all four sides of the trim using a utility knife. This prevents paint and drywall from tearing when you pull the trim.
- Remove interior stops by prying gently with a flat bar. Label each piece if you plan to reuse them.
- Extract the sashes on double-hung windows by tilting them inward and lifting out. On casement or fixed windows, cut any remaining caulk from the exterior before pulling the frame.
- Pull the old frame out of the rough opening. Work slowly and have a helper support the weight.
- Inspect the rough opening thoroughly. Check for rot, moisture staining, and soft wood before proceeding. Soft or discolored wood must be replaced before the new window goes in.
- Scrape away old caulk and debris from all four sides of the opening. A clean surface is required for the new flashing and caulk to bond properly.
- Apply self-adhesive flashing tape to the sill and up the sides of the rough opening. This is your first line of defense against water intrusion.
Safety first: Homes built before 1978 require lead paint testing and containment before you disturb any painted surfaces. Sanding or prying old frames releases lead dust, which is a serious health hazard. Use an EPA-approved lead test kit and follow containment protocols before you pick up a pry bar.
If you find significant rot in the rough framing, stop and repair it before installing the new window. A new window set into a rotted frame will fail within a few years regardless of how well you seal it.
How do you install and seal the new window correctly?
Correct installation locks in the performance you paid for. Incorrect installation voids manufacturer warranties even when the window itself is high quality. Take your time through each step below.
- Apply a bead of caulk along the sill and up both sides of the rough opening, leaving the bottom sill uncaulked for now.
- Set the window into the opening from the exterior. Center it left to right and let it rest on the sill.
- Check level and plumb immediately. Place your level on the sill and on each side jamb. Insert shims at the corners and midpoints to correct any deviation.
- Drive one screw through the frame at the top corner to hold position, then recheck level before fastening the remaining screws.
- Verify the sash operates correctly before fully fastening. Open and close it several times. A binding sash means the frame is racked; adjust shims before adding more screws.
- Insulate the gap between the window frame and the rough opening using low-expansion window foam. Fill the gap in one pass and let it cure fully before trimming.
- Caulk the exterior perimeter on the top and sides only. Never caulk the bottom of the window frame. Leaving the bottom open allows any water that gets behind the casing to drain out rather than pool inside the wall.
- Reinstall interior trim and touch up paint as needed.
Modern window installation is designed to let water escape, not trap it. That principle drives every sealing decision above. Sealing the bottom feels intuitive but creates a moisture trap that leads to rot and mold.
Pro Tip: After the foam cures, run your hand along the interior perimeter on a cold day. Any cold spots indicate gaps the foam missed. Fill them with a second pass before reinstalling the trim.
Homeowners in coastal Texas face additional moisture pressure from humidity and wind-driven rain. Choosing weather-resistant windows designed for coastal conditions adds a meaningful layer of protection beyond correct installation technique.
If you want to understand how your new window’s insulation rating affects energy costs, the window U-value guide from Buffaloroofingandexteriors breaks it down clearly.
What mistakes should you avoid during window replacement?
Most installation failures trace back to a small set of repeatable errors. Knowing them in advance keeps your project on track.
- Wrong measurements. Ordering a window based on the exterior frame size rather than the rough opening is the most common and costly mistake. Always measure the rough opening.
- Skipping the squareness check. A window installed in an out-of-square opening will bind, leak, or both. Always verify diagonals before ordering and before fastening.
- Using high-expansion foam. Standard spray foam exerts enough pressure to bow a vinyl frame and prevent the sash from operating. Use only foam labeled for windows and doors.
- Sealing the bottom of the frame. Caulking all four sides traps water and causes rot within a few years. Leave the bottom open.
- Fastening before checking operation. Drive all screws only after confirming the sash opens, closes, and locks correctly. Backing out screws to readjust a racked frame is tedious but far easier than replacing a bowed unit.
- Ignoring rot in the rough opening. Installing over damaged framing transfers the problem to your new window. Repair the structure first.
When problems persist after careful installation, the issue is usually a racked rough opening or a window that was ordered to the wrong size. Both require starting the relevant step over rather than forcing a fix. If the frame is severely out of square or the wall shows signs of structural movement, professional assessment is the right call.
Key Takeaways
Successful DIY window replacement depends on precise measurement, correct foam selection, and moisture management at every stage of the process.
| Point | Details |
|---|---|
| Measure at three points | Take width and height measurements at three locations each; use the smallest number to order. |
| Verify squareness | Diagonal measurements must match within 1/4 inch before ordering and before fastening. |
| Use the right foam | Low-expansion window-and-door foam prevents frame bowing; high-expansion foam causes binding. |
| Leave the bottom open | Never caulk the bottom of the window frame; moisture must be able to drain out. |
| Check operation before fastening | Open and close the sash before driving all screws to catch a racked frame early. |
What I have learned from watching homeowners tackle this project
The homeowners who struggle most with window replacement are not the ones who lack skill. They are the ones who underestimate preparation. Measuring once, ordering, and then discovering the opening is out of square by half an inch is a lesson that sticks. The measurement and squareness check steps exist precisely because that scenario plays out constantly.
The DIY versus professional debate is real but often framed wrong. The question is not whether you are capable. The question is whether the specific window in your specific wall presents complications: a rotted rough opening, a brick surround that needs mortar removed before flashing, or a window large enough that safe handling requires two experienced people. Those situations tip the math toward professional installation, not because the steps are different but because the margin for error shrinks.
Warranty protection is also worth taking seriously. Incorrect installation voids manufacturer warranties regardless of window quality. If you are spending $1,500 on a high-performance unit, the warranty is part of what you paid for. A professional installation preserves it.
My honest advice: do the prep work at a pace that feels slow. The installation itself goes fast. The prep is where the project is won or lost.
— Results
Window replacement help from Buffalo Roofing and Exteriors
Window replacement rewards careful preparation, but some projects call for professional hands. Rotted framing, storm-damaged openings, or multi-window replacements across an entire home are situations where professional expertise pays for itself quickly.

Buffalo Roofing and Exteriors serves homeowners across Corpus Christi, San Antonio, and Victoria, Texas, with window installation, exterior renovations, and storm damage restoration built for coastal conditions. The team handles everything from single-window replacements to full exterior renovation projects with free estimates and financing options available. Contact Buffaloroofingandexteriors for a consultation and get a clear picture of what your project requires before you commit to either path.
FAQ
How long does DIY window replacement take?
Most DIY window replacements take 4–8 hours per window depending on your experience level and the condition of the existing frame. Budget a full day for your first replacement.
What size window should I order?
Order based on the rough opening size, not the old window’s exterior dimensions. Measure width and height at three points each and use the smallest measurement from each set.
Can I use regular spray foam to insulate the gap?
No. Standard spray foam expands too aggressively and can bow the window frame. Use only foam labeled “window and door” or “minimal expanding” to avoid operational problems.
Do I need to caulk all four sides of the window?
Caulk the top and both sides of the exterior frame only. Leaving the bottom uncaulked allows moisture to drain out and prevents rot and mold inside the wall cavity.
When should I hire a professional instead of doing it myself?
Hire a professional when the rough opening shows rot or structural damage, when the window is in a brick or masonry wall, or when the unit is large enough to require multiple people for safe handling. Improper installation voids warranties and can cause performance failures even with a high-quality window.