
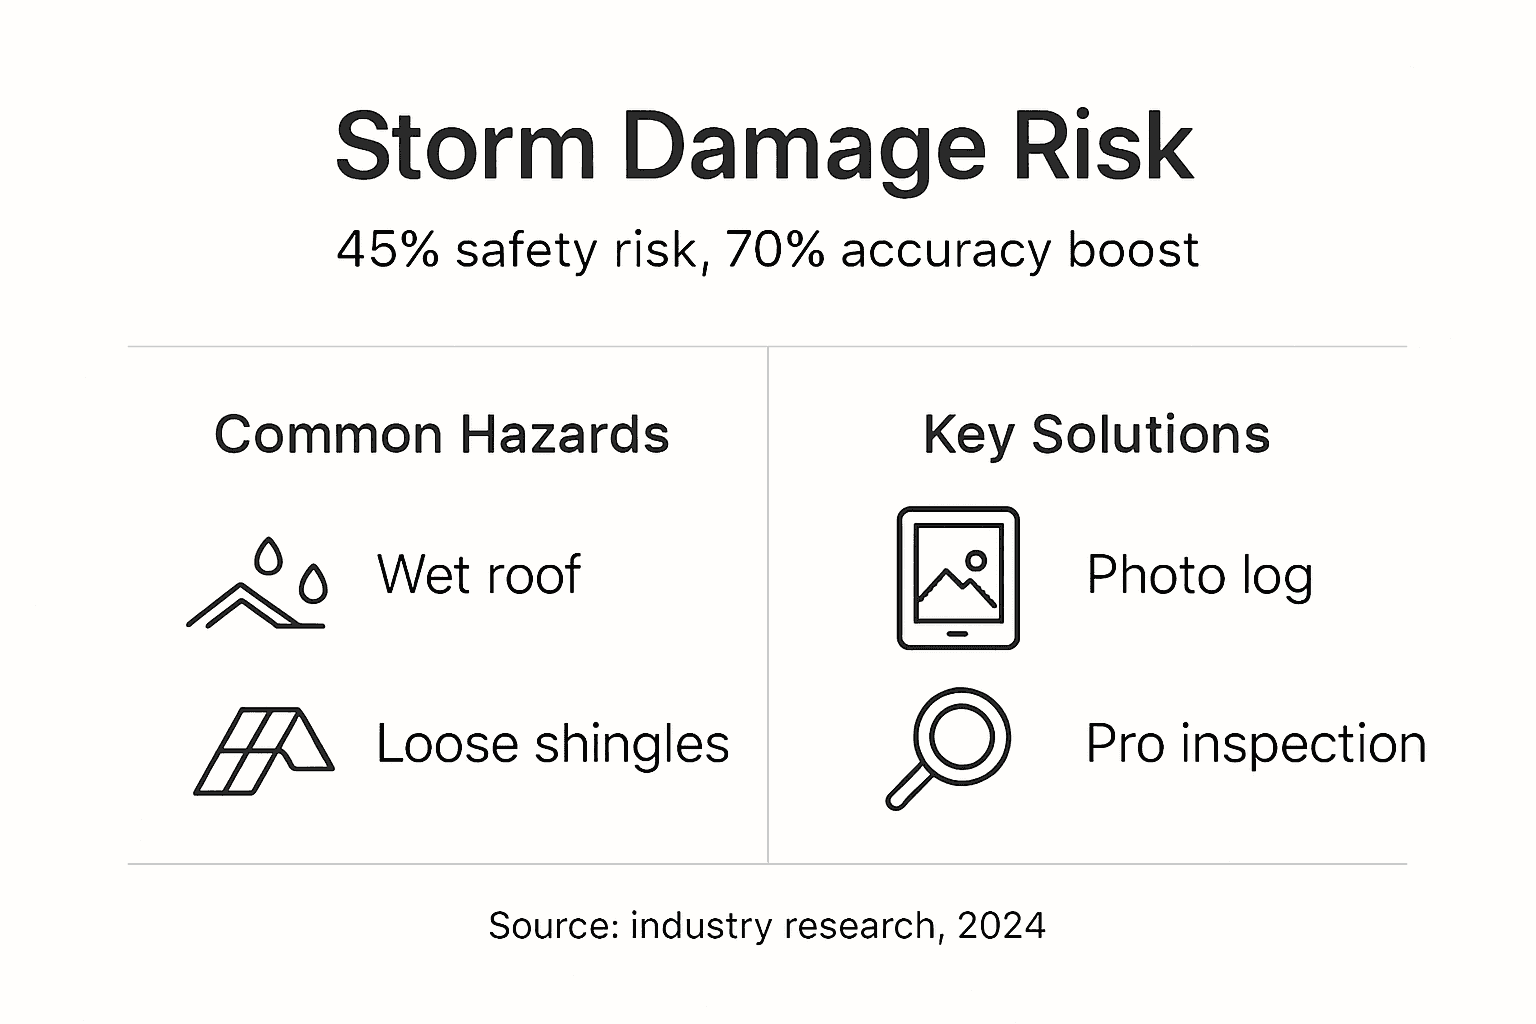
After a major storm passes through coastal Texas, many homeowners rush to inspect their roofs without proper safety gear or knowledge, creating serious injury risks. Research shows 45% climb roofs unsafely during post-storm assessments. This guide walks you through a systematic, safety-first approach to evaluate storm damage accurately, helping you document issues properly for insurance claims while avoiding common mistakes that lead to missed damage or injuries.
Table of Contents
- Prerequisites: Safety And Preparation
- Step 1: Initial Visual Inspection From Ground Level
- Step 2: Detailed Damage Identification On The Roof Surface
- Step 3: Professional Inspection Considerations
- Step 4: Documentation And Reporting For Insurance And Repairs
- Common Mistakes And Warnings
- Expected Results, Costs, And Timelines
- Explore Expert Roofing Solutions For Coastal Texas Homes
Key Takeaways
| Point | Details |
|---|---|
| Safety First | Wait 24 to 48 hours post-storm before inspecting to avoid wet, slippery surfaces and ongoing hazards. |
| Ground Level Start | Use binoculars for initial assessment to spot obvious damage without climbing risks. |
| Professional Edge | Professional inspections detect 70% more damage than DIY ground-level methods alone. |
| Documentation Matters | Thorough photo documentation speeds insurance claims by 30% and strengthens approval rates. |
| Know Your Limits | Avoid climbing without proper safety gear; use spotters and harnesses when physical inspection is necessary. |
Prerequisites: Safety and Preparation
Before you start any roof inspection, proper preparation protects you from injury and ensures you catch all damage. Waiting 24 to 48 hours after a storm allows surfaces to dry and reduces hazards like loose debris or unstable structures. Rushing in too quickly puts you at unnecessary risk.
Gather these essential tools before beginning your assessment:
- Binoculars for distance viewing
- Camera or smartphone for documentation
- Stable ladder rated for your weight
- Hard hat and slip-resistant shoes
- Safety harness if climbing becomes necessary
- Notepad for recording observations
Check weather conditions carefully before starting. Clear skies and dry conditions are mandatory for safe inspection. If winds remain high or rain threatens, postpone your assessment. Understand your physical limits honestly. If you feel uncomfortable with heights or lack experience on ladders, skip the climbing portion entirely.
Pro Tip: Always have a spotter hold your ladder steady when climbing. This simple precaution prevents the majority of ladder-related accidents during home inspections.
Step 1: Initial Visual Inspection from Ground Level
Your first assessment should happen entirely from the ground using binoculars to scan your roof systematically. This approach eliminates climbing risks while revealing obvious damage that guides your next steps. Start from one corner of your property and work methodically across the entire roof surface.
Look for these specific damage indicators:
- Missing, cracked, or curled shingles
- Dents or dimples in roofing materials
- Displaced or damaged flashing around vents and chimneys
- Granule loss creating bare spots on shingles
- Fallen debris in gutters or around your property
Take high-resolution photos from multiple angles, capturing the entire roof and any visible damage. These images become crucial evidence for insurance claims and contractor estimates. While ground inspection provides valuable information, professional inspections detect 70% more damage than this method alone because trained eyes spot subtle issues homeowners miss.
Common storm damages on roofs vary by storm type. Hail creates distinct denting patterns, while wind damage shows as lifted or missing shingles along edges and ridges. Understanding these patterns helps you identify storm damage on your roof more effectively during your ground-level survey.
Pro Tip: Photograph your entire roof even if damage seems isolated to one area. Storm impacts often cause hidden damage across multiple sections that become apparent later.
Step 2: Detailed Damage Identification on the Roof Surface
After completing your ground assessment, a physical roof inspection reveals damage invisible from below. This step requires strict safety protocols because most inspection injuries occur during roof access. Only proceed if you have proper equipment and feel completely confident in your abilities.
Focus your detailed inspection on these vulnerable areas:
- Ridge caps where wind uplift concentrates
- Valleys where water flow increases impact
- Flashing around chimneys, vents, and skylights
- Shingle edges along eaves and rakes
- Areas near trees where branches caused abrasion
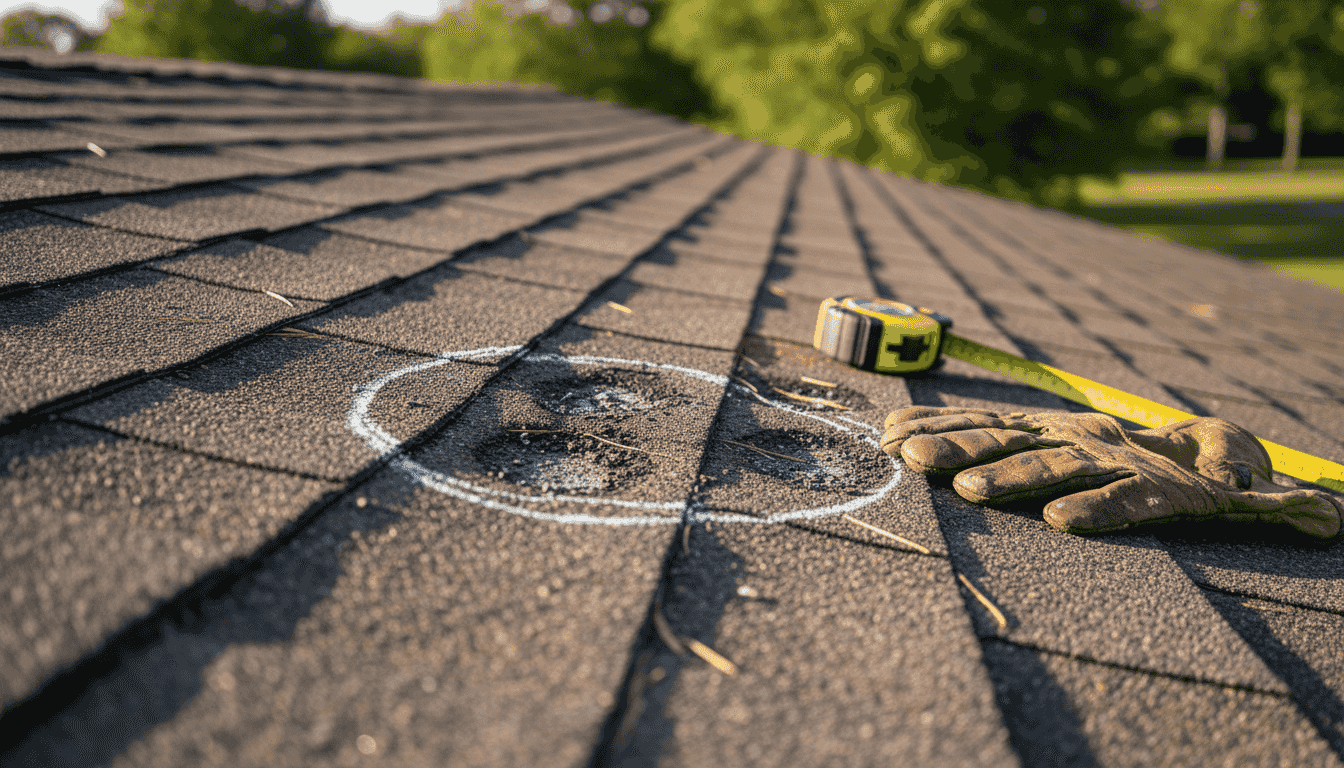
Hail damage appears as dents or bruises on shingles, sometimes with granule loss in circular patterns. Wind damage shows as lifted, creased, or missing shingles, particularly along roof edges. According to Houzz, these damage types often occur together during severe storms, requiring careful distinction for accurate repair planning.
| Damage Type | Visual Signs | Severity Level |
|---|---|---|
| Hail Impact | Circular dents, granule loss, soft spots when pressed | Moderate to Severe |
| Wind Uplift | Lifted corners, missing shingles, exposed underlayment | Severe |
| Debris Strike | Punctures, tears, displaced materials | Severe |
| Water Intrusion | Staining, sagging, soft decking | Severe |
Document everything with photos showing both wide shots for context and close-ups of specific damage. When you inspect roof damage in Texas climates, remember that heat and humidity accelerate deterioration of storm-compromised materials, making prompt assessment critical.
Pro Tip: Press gently on suspected hail-damaged areas. Soft or spongy spots indicate underlying damage even when surface appearance seems minor.
Step 3: Professional Inspection Considerations
Certain situations demand professional expertise rather than DIY assessment. Roofing professionals bring specialized equipment, safety training, and diagnostic experience that protects both you and your property. Professional inspections detect 70% more damage than homeowner efforts while eliminating personal injury risks.
Hire professionals when these conditions apply:
- Roof pitch exceeds comfortable climbing angle
- Storm damage appears extensive or severe
- You lack proper safety equipment
- Roof height creates dangerous fall risk
- Previous health conditions limit physical activity
Professional roofing contractors use drones, infrared cameras, and moisture meters to detect problems invisible to the naked eye. These technologies identify water intrusion, insulation gaps, and structural weakening before they cause catastrophic failures. While professional inspections cost more upfront, they prevent missed damage that leads to expensive repairs later.
| Inspection Method | Damage Detection Rate | Safety Level | Typical Cost |
|---|---|---|---|
| DIY Ground Only | 30% | High Safety | Free |
| DIY with Climbing | 50% | Moderate Risk | Free |
| Professional Full | 100% | Maximum Safety | $200 to $500 |
Understanding roof inspection importance helps you make informed decisions about when to call experts. Many insurance policies actually require professional documentation for major claims, making this investment necessary rather than optional.
“Professional roof inspectors identify structural damage, hidden water intrusion, and compromised flashing that homeowners routinely overlook during visual assessments. This expertise directly impacts claim approval rates and repair adequacy.” – National Fire Protection Association
Pro Tip: Schedule professional inspections within one week of major storms. This timing prevents damage progression while memories and documentation remain fresh for insurance purposes.
Step 4: Documentation and Reporting for Insurance and Repairs
Proper documentation transforms your inspection findings into actionable insurance claims and repair plans. Inadequate records lead to claim denials or underpayments that leave you covering costs out of pocket. Clear photo documentation improves claim processing speed by 30%, making this step crucial for financial recovery.
Follow this documentation sequence:
- Photograph entire property from street level showing storm context
- Capture all four sides of your roof from ground angles
- Take close-ups of every damaged area from multiple perspectives
- Document surrounding property damage like downed branches or debris
- Record interior ceiling stains or water damage if present
- Note date, time, and storm details for each photo set
Write detailed notes describing damage location, size, and severity. Include measurements when possible, such as number of missing shingles or size of punctures. These specifics help contractors provide accurate estimates and insurance adjusters verify claims.
Submit documentation to your insurance provider immediately after completing your assessment. Delays complicate claims and may result in denial if damage worsens before reporting. Include professional inspection reports if you hired contractors, as these carry significant weight with adjusters.
When filing roofing claims, keep copies of all correspondence, estimates, and photos in both digital and physical formats. This redundancy protects you if documents get lost during the insurance restoration process.
Pro Tip: Create a simple spreadsheet logging each damaged area with corresponding photo numbers. This organization helps adjusters and contractors reference specific issues quickly during reviews.
Common Mistakes and Warnings
Homeowners make predictable errors during storm damage assessment that compromise safety and financial recovery. Learning these pitfalls helps you avoid costly mistakes that extend repair timelines or reduce insurance payouts.
The most dangerous mistake involves climbing roofs without proper equipment. Studies show 45% of homeowners attempt this after storms, leading to preventable injuries. Never climb without slip-resistant shoes, a safety harness, and a stable ladder secured by a spotter.
Avoid these common assessment errors:
- Delaying inspection beyond one week, allowing damage to worsen
- Confusing cosmetic damage with structural problems
- Taking insufficient photos that fail to show damage scale
- Skipping professional assessment for ambiguous damage
- Not documenting interior water stains or leaks
- Accepting first contractor estimate without comparing options
Poor documentation causes 25% more insurance claim denials according to industry data. Blurry photos, missing angles, or incomplete damage lists give adjusters reasons to question your claim validity. Spend extra time ensuring your evidence clearly shows all damage.
Distinguishing surface wear from storm damage requires experience. Normal aging shows as uniform deterioration, while storm impacts create sudden, localized damage patterns. When uncertain, consulting professionals prevents misidentification that leads to claim rejection.
Proper roof maintenance to prevent damage reduces storm vulnerability, but even well-maintained roofs suffer in severe weather. Avoid common remodeling mistakes by understanding that quick fixes without addressing underlying damage create bigger problems later.
Pro Tip: Never sign contracts with storm chasers who appear immediately after severe weather. These unlicensed contractors often perform substandard work and disappear before warranties matter.
Expected Results, Costs, and Timelines
Understanding realistic expectations for repairs, costs, and timelines helps you plan recovery after assessing storm damage. Coastal Texas roof repairs typically range from $3,000 to $8,000 for moderate damage, while complete replacements cost $15,000 to $30,000 depending on home size and material choices.
Repair timelines vary by damage severity and contractor availability. Minor repairs often complete within one to two weeks. Major restoration projects take three to six weeks from assessment through final inspection. Emergency tarping protects your home within 24 hours of contacting contractors, preventing additional water damage while permanent repairs await scheduling.
| Service Type | Typical Timeline | Cost Range | Insurance Coverage |
|---|---|---|---|
| Emergency Tarp | 24 hours | $500 to $1,500 | Usually Covered |
| Minor Repairs | 1 to 2 weeks | $3,000 to $8,000 | Partial to Full |
| Major Restoration | 3 to 6 weeks | $8,000 to $15,000 | Usually Covered |
| Full Replacement | 4 to 8 weeks | $15,000 to $30,000 | Depends on Damage |
Proper initial assessment reduces long-term costs significantly by catching hidden damage early. Undetected leaks cause mold growth, insulation damage, and structural rot that multiply repair expenses. Addressing all damage during initial restoration prevents these cascading failures.
Prompt repairs protect your home value and may reduce insurance premium increases after claims. Insurers view quick action favorably, interpreting it as responsible homeownership that minimizes loss exposure. Delayed repairs signal negligence that can complicate future claims.
Choosing between repair and replacement depends on damage extent, roof age, and cost analysis. Roofs older than 15 years with significant damage often benefit from full replacement rather than patching deteriorating materials. Your step-by-step roof repair guide provides detailed comparison factors, while siding repair tutorials address related exterior damage common after major storms.
Pro Tip: Request itemized estimates from multiple contractors. This transparency helps you compare value accurately and identifies any inflated pricing before committing to repairs.
Explore Expert Roofing Solutions for Coastal Texas Homes
After assessing your storm damage thoroughly, partnering with experienced professionals ensures repairs meet coastal Texas weather demands. Buffalo Roofing & Exteriors specializes in storm damage restoration using materials engineered for hurricane-force winds and intense heat common along the Gulf Coast.

Our weather-resistant roofing options include impact-rated shingles, reinforced underlayment, and advanced flashing systems that withstand future storms better than standard materials. We provide comprehensive storm damage restoration services from emergency tarping through final inspection, managing insurance coordination to streamline your recovery.
Explore our full range of roof materials available to find solutions matching your budget, aesthetic preferences, and performance requirements. From traditional asphalt to metal and tile systems, each option offers distinct advantages for Texas coastal environments.
FAQ
How long after a storm should I inspect my roof?
Wait at least 24 to 48 hours after a storm ends before inspecting your roof. This delay allows surfaces to dry, reducing slip hazards and giving time for debris to settle. Ensure weather conditions remain calm with no wind or rain threatening during your inspection.
What are the most common signs of storm damage on roofs?
Look for missing or cracked shingles, circular hail dents, lifted shingle edges from wind, debris accumulation in gutters, and damaged flashing around vents or chimneys. According to roofing experts, these indicators confirm storm impact requiring professional assessment.
When should I hire a professional instead of inspecting myself?
Hire professionals when your roof pitch feels unsafe, damage appears extensive, you lack proper safety equipment, or previous health conditions limit physical activity. Professional assessments eliminate injury risks while detecting subtle damage homeowners typically miss during DIY inspections.
How can I best document roof damage for insurance claims?
Take clear, high-resolution photos from multiple angles showing both wide context shots and close-ups of specific damage. Note detailed descriptions of location, size, and severity in writing. Documentation quality speeds claim processing by 30%, so submit everything promptly with professional reports when available.
Recommended
- How to Identify Storm Damage on Your Roof Easily
- Roof Maintenance Workflow to Prevent Storm Damage
- What to Do After a Storm Damages Your Roof | Buffalo Roofing & Exteriors | San Antonio to Corpus Christi, TX
- Roof Inspection and Storm Damage – Why It Matters
- Security Risk Assessment: Protecting Commercial Assets – A To Z Locksmith Inc
- Roofing Company Corpus Christi TX